Wyze - Wired Outdoor Wi-Fi Floodlight Home Security Camera - White
- Key Specs
- Color Temperature: Adjustable white, Bright white, Daylight
- Works With: Amazon Alexa, Google Home (Compatible with or able to be connected to other smart devices or applications.)
- General
- Brand: Wyze
- Model Number: WYZEC3FL
- Product Name: Wired Outdoor Wi-Fi Floodlight Home Security Camera
- Color: White
- Installation Required: true
- Lighting
- Bulb Type Required: LED
- Bulb Enclosure: Full
- Bulb(s) Included: true
- Light Output: 2600 lumens
- Number Of Lights In Fixture: 2
- Color Temperature: Adjustable white, Bright white, Daylight
- Compatibility
- Works With: Amazon Alexa, Google Home (Compatible with or able to be connected to other smart devices or applications.)
- Voice Assistant Built-in: Amazon Alexa, Google Assistant (A digital assistant built into the device that uses voice commands to answer questions and control smart devices.)
- App Compatible: true (The product can be connected to a program or software application on a mobile device, which then receives collected data from the product.)
- Features
- Mount Type: Flush mount
- Motion Sensing: true
- Motion Detection Range: 30 feet
- Rotating Head: true
- Vertical Pivot: true
- Remote Control: true
- Performance
- Weather Resistant: true (Can be exposed to a range of conditions like sunlight, heat, or humidity.)
- Certifications Listings & Approvals
- ENERGY STAR Certified: false (Devices carrying the ENERGY STAR service mark, such as computer products and peripherals, kitchen appliances, and other products, generally use 20% to 30% less energy than required by federal standards.)
- Power
- Power Source: Hard wired
- Auto On/Off: true
- Automatic Power Outage Reset: true
- Design
- Finish: Matte
- Included
- Number Of Light Fixtures Included: 2
- Installation Hardware Included: true
- Material
- Fixture Material: Plastic
- Dimensions
- Product Height: 7.2 inches (The out of box height of the item. Height is measured as the vertical distance from the bottom of the item to the top as it would be primarily used or placed.)
- Product Width: 9 inches (The out of box width of the item. Width is measured as the horizontal distance from one side of the item to the other as it would be primarily used or placed.)
- Product Length: 7.2 inches (The out of box length of the item. Length is measured as the longest dimension of the item.)
- Product Depth: 6.8 inches (The out of box depth of the item. Depth is measured as the distance from the front of the item to the back as it would be primarily used or placed.)
- Product Weight: 1 pounds (The out of box weight of the item.)
- Warranty
- Warranty - Parts: 1 year limited
- Warranty - Labor: 1 year limited
- Other
- UPC: 850025015691
Wyze Floodlight cam is the ultimate Home Security device with PIR Sensor, color night vision camera, and extra-bright Lumens to stop any person, or critter in their tracks. Wyze continues to offer smart home security at an affordable option and our floodlight delivers just that. Get additional safety features with an optional cam plus subscription.
- Your (yard's) future's so bright, you gotta wear shades!: Two super bright, adjustable LED lights with a combined 2600 lumens of baddie-deterring power for you, and a handy dimming option for your long-suffering neighbor.
- Not just a motion detector: Three individually controlled PIR sensors provide 270 degrees of customizable motion detection. Turn them on or off. Adjust range and sensitivity up to 30 ft. Add sound detection and advanced AI identification and not even an invisibility cloak is sneaking past this thing.
- From detection to inspection: Wyze Cam Floodlight, doesn't just detect and deter motion, its built in Wyze Cam v3 identifies and records it in 1080p Full HD with our can't-believe-it's-not-daytime Starlight Sensor color night vision.
- Dusk to Dawn: Wyze Cam Floodlight knows when the sun is down and when it's up. Just hook it up and never think about your light switch again.
- 105dB Siren and speaker: A 105dB siren and speaker mean you can deter bad guys with more than just bright lights.
- Rules and automations: All the usual smart settings from vacation mode to event triggering and the ability to sync with other Wyze devices.
- Extra USB port for twice the coverage: What's better than one Wyze Cam v3? Two. The answer is two. Double your camera coverage and look both ways with an extra port for another Wyze Cam v3.
- IP65 Weather resistance: Built for a beatdown, from dust clouds to torrential rain to ice and snow.
- Two-way audio: Don't just imply intruders are unwelcome with your bright floodlights. Make it explicit with two-way audio! Or strike up a conversation! There are stranger ways to make new friends.
Whats Included
- Wyze Cam V3
- Wyze Floodlight
- Wiring Components
- Mounting Hardware
A: Hi there, the Wyze Cam Floodlight comes with a Wyze v3 camera in which it will be the one that records event videos and you can also view livestream using the camera through the Wyze app. Event recordings are saved through the cloud and/or through a micro SD card. With detecting people, pets, packages and more, this will need a Cam Plus subscription. You may also check with this link on how the service subscription works: (https://support.wyze.com/hc/en-us/articles/360032441731). Also, you may adjust the detection settings through the Wyze app. To learn more on how the device works, please check with this link: (https://support.wyze.com/hc/en-us/sections/4409918578331). You may also reach out to us at (https://wyzelabs.zendesk.com/hc/en-us) so we may further assist you. Thank you and have a great day!
Q: Do you need to purchase a Wyze home base to use this camera?
A: No, you can view on phone app or Alexa
Q: Can it be mounted to a cieling receptacle
A: Hello there! Yes, you can mount the floodlight on a ceiling / overhang or wall mount, as long as you have a junction box and a neutral wire. If you have additional questions, concerns, or would like to speak more about your concern, please reach out to our Wizards team (https://support.wyze.com/) so we may help. Thank you and have a great day!
Q: Other than hard wire is there an optional plug for a receptacle.
A: The Wyze Cam Floodlight is designed to be hardwired into your existing electrical system and does not come with an optional plug for a standard electrical receptacle. This is because it requires a stable power source to function properly, typically provided by a hardwired connection. You may also check this link to learn more about how the device works: (https://support.wyze.com/hc/en-us/sections/4409918578331-Wyze-Cam-Floodlight). You may also reach out to us at: (https://wyzelabs.zendesk.com/hc/en-us) so we may further assist you if you have other queries or concerns. Thank you and have a great day!
Q: WILL IT WORK WITH A ANDROID PHONE
A: Yes it does
Q: Are there home security sensors with an audio warning
A: undefined
Q: Can you manually turn the lights on with a switch?
A: you can do it from the app. I dont think it would work with a switch though. the way it wires up leads me to believe its all or nothing switch wise. it even comes with little stickers to put on your switch plate that say not to turn it off.
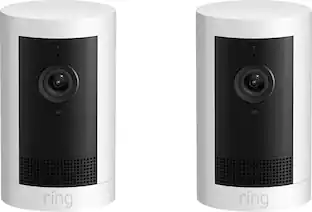
Today's top picks
 $44.99The price was $59.99
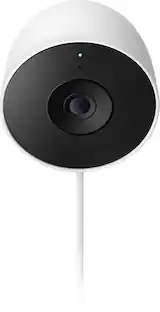
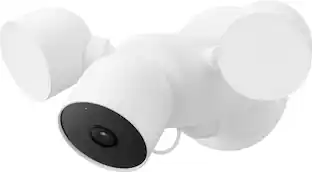 $258.00The price was $279.99
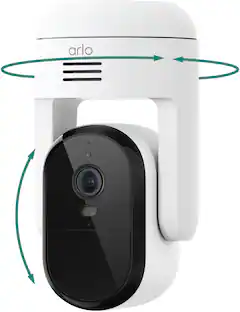
 $99.99The price was $149.99
 $64.99The price was $69.99
 $159.99The price was $219.99