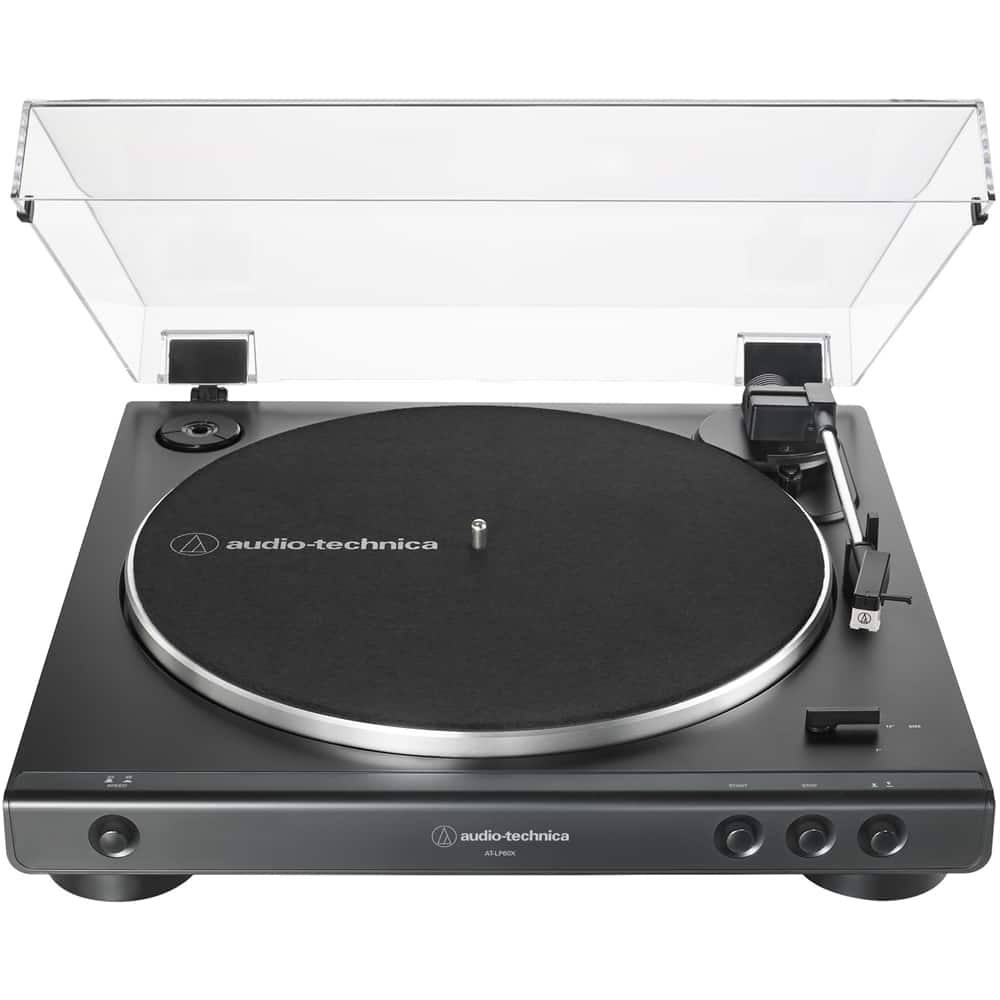
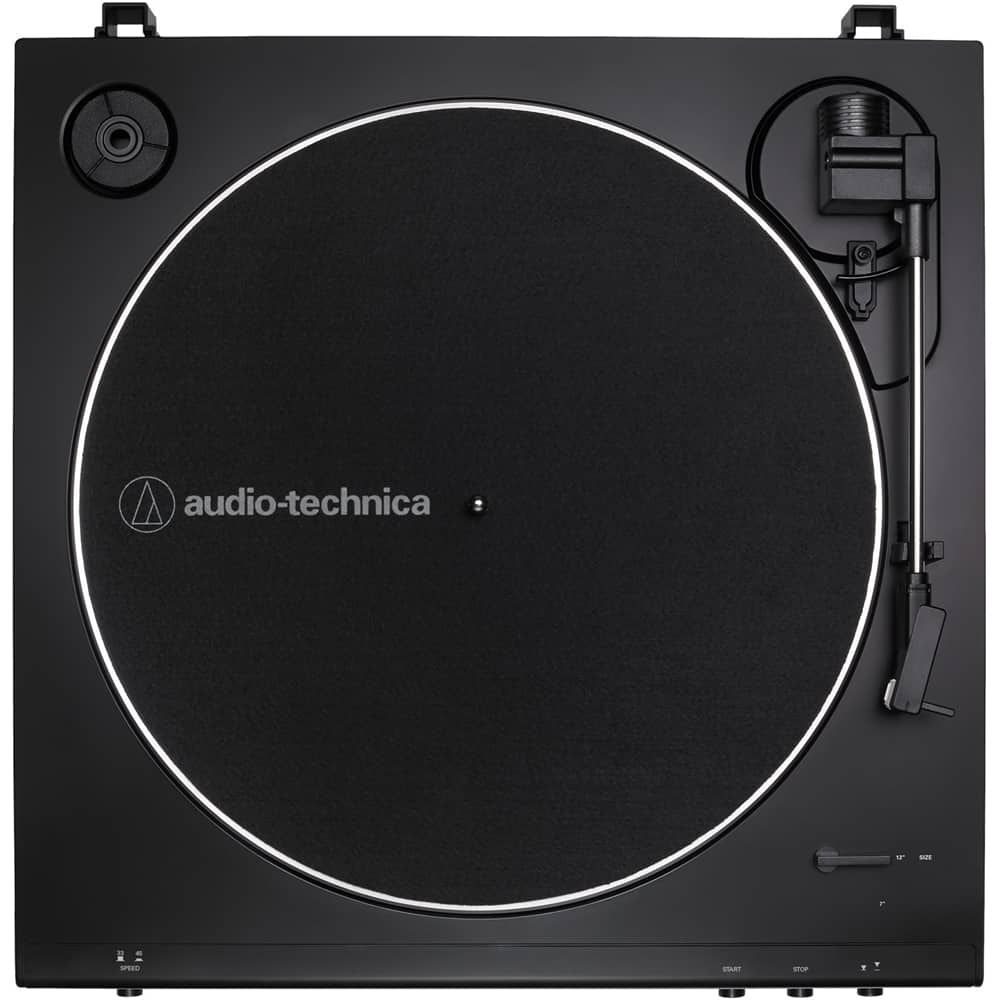
A:AnswerThe AT-LP60X Turntable is fully automatic, press the Start button and the arm will lift, go over to the record, lower to the record and begin playing. At the end of the record the arm will lift, go back to the tonearm rest, lower to the rest and the platter will stop spinning.
A:AnswerIt should. It has a phono input. This turntable comes with a stereo audio cable with RCA connectors. There is a switch on the back of the turntable to select for either phono or auxiliary input on the stereo receiver it is connected to. There is no ground wire because the provided external power supply has eliminated the hum problem. The set up instructions included are illustrated and easy to follow.
A:AnswerYou need to have separate speakers since the turntable does not have its own. However you don’t need a receiver as there is a speaker connection on the back.
A:AnswerIn the top left corner of the turntable there is a round indentation. There should be a round plastic piece in it with a hole in the center. This plastic piece is the size of the hole in a 45 RPM record. Place the plastic piece over the turntable spindle. Also set the record speed button on the front left to 45 and the record size lever on the bottom right corner of the turntable to 7”. Then your turntable will be set to play 45 RPM records.
If your turntable is missing this round plastic piece, check if it is still in the packing box. If it is missing, contact the manufacturer.
A:AnswerYes, the Z323 speaker system should work fine. You may want to get a 3.5 mm stereo (TRS) to 3.5 mm stereo (TRS) audio cable in the length required for your particular setting to simplify the connection of the turntable to the right satellite speaker however. This speaker has a single 3.5 mm stereo input jack on it. The audio cable included with the turntable has dual RCA male plugs at the output end. If you use this cable, you will need a dual RCA female to single 3.5 mm stereo (TRS) mini-plug adapter cable to connect the turntable to the satellite speaker. The Analog Out jack on the rear of the turntable that this cable connects to is a single 3.5 mm stereo jack. The use of a 3.5 mm stereo (TRS) to 3.5 mm stereo (TRS) audio cable would allow you to connect the turntable directly to the speaker, no adapter cable would be needed. Be aware that there are RCA type jacks on the subwoofer that the included cable could be connected to, but the subwoofer would be so close to the turntable in this case that you can expect to have feedback problems, especially at higher volume levels and with sources that have strong bass content.
A:AnswerYes it does.
The platter starts spinning when the tone arm moves over the platter, then will lift and return at the end of the record.
Mine was great for the first 6 weeks. Now its junk. No anti-skate at all. The skating force causes mine to skip inward and is unusable
The tone arm is factory set around 3.5 grams (mine is 3.78 g), so unless its skating your records are safe from excess wear. But if the needle can’t play more that 20 records before wearing too far….
A:AnswerYes, using a 3.5mm male to 3.5mm male stereo cable (not included), you can connect the record player to the AUX IN connector on the back of a Bose SoundTouch 30 speaker. Make certain that the preamp selector switch on the back of the turntable is set to the LINE position for this application.
A:AnswerNo, it does not have adjustable arm height. Consider the AT-LP140XP Turntable instead. Please note that the AT-LP140XP is a fully MANUAL turntable however, there are NO automatic functions. Also, it DOES NOT have a built in phono preamplifier. The felt mat provided with the AT-LP60X Turntable is 1/8" (3.175 mm) thick.
A:AnswerThis turntable does not feature Bluetooth, but it can be wired to the Polk DSB 1 Sound Bar using the 6 ft 3.5mm male to 3.5mm male analog cable that was provided with the sound bar.
There is a Bluetooth version of this turntable, the AT-LP60XBT-USB, but we cannot guarantee the compatibility of it with the sound bar.
A:AnswerThe AT-LP60X comes fitted with the AT3600L Cartridge. The cartridge itself is an integral part of the tonearm and cannot be changed, only the stylus can. Use the ATN3600L Replacement Stylus when the stylus needs changing.
A:AnswerNot directly, no. These Klipsch Heresy (H= Heresy, B=Birch, R=Raw) speakers are passive type speakers. They are intended to be connected to a stereo amplifier or receiver as they have no power on their own. The turntable would connect to a set of inputs on the amplifier or receiver, and the speakers would connect to the speaker outputs on the receiver.
A:AnswerExchange this unit for another one through the reseller from whom it was purchased, pending their exchange policy, or ship it to our Service Center for repair/replacement. The factory warranty period for the turntable is 1 year from the date of purchase. Following is a link to our Repair Return Instructions should you need to ship the turntable to our Service Center. Along with the completed ATUS Service Form, also enclose a copy of your dated sales receipt so we can honor any warranted repair/replacement that may apply. The ship to address is the Stow, OH address shown at the bottom of the form. Please note the special instructions for shipping turntables in for service, we do not require all of the components.
Do NOT ship the platter or dust cover and secure the tonearm to the tonearm rest using a wire tie to avoid damage to the stylus or tonearm assemblies during transit.
Service – USA - Repair Return Instructions
https://www.audio-technica.com/en-us/support/repair-service/
A:AnswerPerfect length, only tw0 things I I don't like .
1. the power cord , a square plug that converts AC power to DC power. I never leave those plugs plugged into an outlet they get hot ..
2 . No ground wire to hook up to the receiver..other then those two no other problems
A:AnswerAn alternative to the receiver with passive type speakers connected method, is to connect the turntable directly to a set of powered (aka active) type speakers. This method eliminates the need for a separate receiver or amplifier between the turntable and speakers. Powered type speakers will have the amplifier built into them. At least one of the speakers will need to plug into an AC power outlet and we recommend models that have a volume control on them as there is no volume control on the turntable. Make certain that you place the preamp selector switch in the correct position based on the type of input (phono or line) that is on the speaker.
A:AnswerRemove the record mat from the turntable. Remove the platter from the center spindle as shown in Figure 11c. Once removed, flip the platter over and note the raised rim located about an inch and a half in from the outer edge of the platter. The belt goes around this rim. See Figure 11d. Make certain that the belt lies flat (no twists) all the way around the rim. Once the belt is installed around the rim, flip the right side side up and place it back on the center spindle. Rotate the platter by hand until one of the large rectangular shaped openings is located at the upper left corner of the turntable (at about the 10 o’clock position). Look into the opening and locate the brass colored motor pulley. Grab the belt with your fingers and stretch it over the pulley. The belt will be located at the inside edge of the rectangular shaped opening. Place the record mat back on the turntable, place a record on the mat and test for normal operation.