How Do You Mount a TV to the Wall?
Best Selling Products carousel(6 Items)
How to mount a TV
Mounting a TV to the wall is a great way to save space and give your room a sleek, modern look. However, the process of television mounting requires careful planning and the right tools to ensure your TV is secure and perfectly positioned.
From choosing the best TV mount for your setup to installing it safely and efficiently, keep reading as we guide you through the steps of mounting a TV.
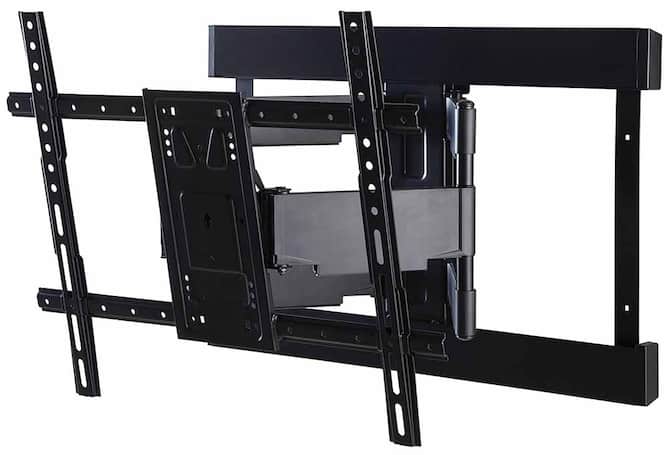
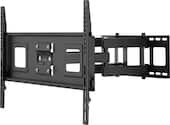
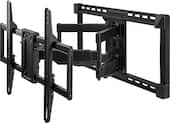
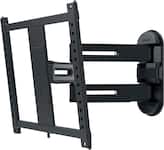
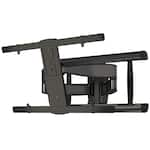
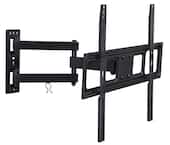
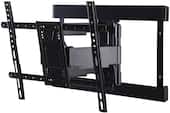
1. Choose the right TV wall mount
The first step in mounting your TV to the wall is selecting the right TV wall mount. The four main types of mounts used during TV wall mount installation are: fixed, tilting, swiveling and full-motion mounts. Fixed TV mounts are keep your TV flush against the wall and are perfect for a sleek, low-profile look.
Tilting TV mounts allow slight up-and-down adjustments, which is useful for reducing glare or achieving the perfect angle when mounting the TV higher on the wall. Meanwhile, swiveling TV mounts are designed to pivot left or right, which is great for corner installations or rooms with multiple viewing areas.
If you have a room with an open layout, full-motion TV mounts will provide the best flexibility, allowing you to move the TV in multiple directions.
2. Select the mounting location
Choosing the right spot for your TV helps make sure you get the best view while also minimizing eye and neck strain. Here are some factors to consider:
- Viewing height. Position your TV so the center of the screen is at eye level when you’re seated.
- Room lighting. Avoid placing your TV where glare from windows or lights could interfere with picture quality.
- Wall material. Mounting to a drywall requires securing the mount to studs, while brick or concrete walls may need special anchors.
- Accessibility. Make sure your TV’s ports are easily accessible for connecting things like streaming devices or gaming consoles, and, avoid positioning the TV too far from an outlet.
3. Gather the necessary tools and equipment
Before you begin your television wall mount installation, you’re going to need to have the right tools and equipment ready. TV wall mounts typically include the mounting bracket, screws and anchors required for installation. In addition to these, you’re going to need:
- Stud finder
- Drill and drill bits
- Screwdriver
- Level
- Measuring tape
- Socket wrench or adjustable wrench (depending on the bolts used for the mount)
4. Attach the mount to your wall
Attaching a mount to your wall is somewhat similar to hanging a frame or shelving unit, but it requires extra precision and support due to the weight of the TV. To ensure a safe and successful TV mount installation process, follow these steps:
- Locate the wall studs. Use a stud finder and mark the edges of the stud to locate the center. If you’re mounting on concrete of brick, you’ll need masonry anchors instead of screws.
- Position the mounting template. Many wall mounts come with a paper template or the wall plate itself can be used as a guide to mark the locations of the pilot holes on the wall.
- Drill the pilot holes. To make it easier to insert screws, use a drill and the appropriate-sized drill bit to make pilot holes at the marked locations.
- Attach the wall plate or bracket. Align the wall plate or mounting bracket with the pilot holes, insert the screws or bolts and use a socket wrench or screwdriver to securely tighten them.
- Test how stable the mount is. Give the mount a gentle pull to ensure it is firmly secured to the wall and use a level to double-check that it’s properly aligned.
5. Attach the mounting plate to your TV
With the wall mount securely attached, the next step is to prepare your TV by attaching the mounting plate. This plate connects the TV to the wall bracket. For a safe and stable setup, you should:
- Locate the mounting holes and align the plate. Find the four threaded holes arranged in a square or a rectangle on the back of your TV and position the mounting plate over them.
- Attach the screws. Insert the screws through the holes in the mounting plate and into the back of your TV and tighten them with a screwdriver.
- Add spacers if needed. If your TV has a curved back or an obstruction near the mounting holes, use the spacers included in your wall mount kit to create an even surface for the mounting plate.
6. Place the TV on your wall
TV mounting FAQs
How do you hide cords when you mount a TV?
To make your entertainment setup more organized, you can hide cords by using cable management and concealment solutions like cable covers, in-wall kits or adhesive clips. You can also always get creative with household plants and other decorative items to strategically hide cords without making permanent changes.
How do you remove a TV from a wall mount?
- If you ever need to remove a TV from a wall mount, you should:
- Unplug all cables and any connected devices
- Check for locking mechanisms, such as screws, latches or pull strings, and unlock them
- Carefully lift the TV upward or outward, depending on the mount type
- If needed, remove the brackets attached to the TV
Can you mount a TV without studs?
If you’re wondering how to mount a TV without studs, you’ll need to use alternative methods to secure the mount safely. Options include using heavy-duty wall anchors, toggle bolts or a mounting plate designed for hollow walls. It might also be a good idea to research what TV size is best for your room so you can ensure the wall mount and anchors are strong enough to support the weight of your TV.
How do you mount a TV on a brick fireplace?
Mounting a TV to brick requires a masonry drill bit and anchors designed for brick surfaces. With the drill, create pilot holes in the brick and then secure them with the anchors. Then, just like if you were mounting a TV to drywall, ensure the mount is level and properly positioned for comfortable viewing.
Hopefully you now have a much better idea how to mount a TV to the wall. The process isn’t as daunting as it may first initially seem, and, you’ll be surprised how easy mounting a second TV will be after your first try. However, if you do ever need any professional TV mounting assistance, TV and home theater services
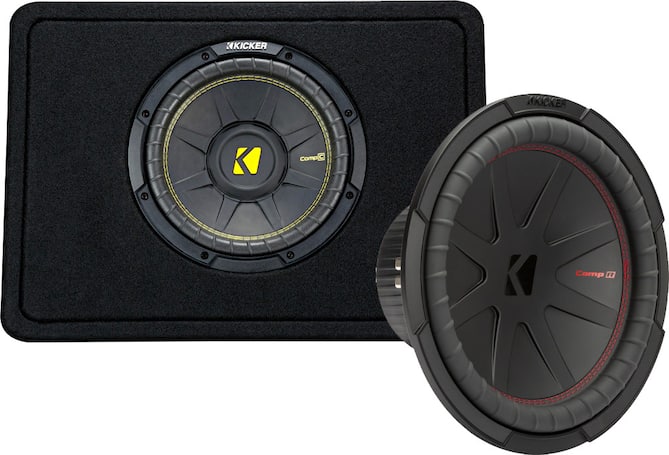
Installing a subwoofer
If you’ve found the best car subwoofer for you and are looking to upgrade your vehicle’s audio system, you’ve come to the right place. Installing a subwoofer in your car adds rich, deep bass to your music while transforming the overall sound quality, giving you a more immersive and powerful listening experience.
Whether you’re an audio expert or a beginner looking to enhance your sound system with a top-rated car subwoofer, we will walk you through the installation process and provide helpful tips to ensure optimal performance. Keep reading to boost your car’s sound today and enjoy the powerful bass from your car subwoofer with every drive.
Pre-installation prep
Before diving into installing your new car subwoofer, it’s important to do a little preparation first. This not only helps the installation process go smoothly as possible, but also helps promote safety.
- Measure the available space. Measure the area where you plan to install the unit, such as the trunk or under the seat. Mini subwoofers and shallow subwoofers typically require less space than massive subwoofers.
- Check the power requirements. Subwoofers use up a lot of energy, so you might need to upgrade your battery or alternator if your car’s electrical system can’t handle the extra power.
- Choose the right enclosure. Sealed enclosures offer tight bass, while ported enclosures provide more booming bass, so make sure the enclosure that encases your subwoofer will fit in your car.
- Gather the necessary tools. Ensure that you have a wiring kit that includes power, ground and RCA cables, as well as a remote turn-on wire.
Once you’ve covered these initial steps, you should be ready to begin installing your car subwoofer.
How to install a subwoofer
1. Disconnect the battery
2. Run the power wire
3. Mount the subwoofer and amplifier
To properly mount your subwoofer and amplifier (or your subwoofer with built-in amp), start by selecting a suitable location in your vehicle where the subwoofer can fit without obstructing other components. Your trunk or underneath a seat are typically the best spots. Then, use brackets or a custom enclosure to firmly anchor the subwoofer.
For a separate amplifier, pick a well-ventilated area to help prevent overheating and secure it with screws or mounting kits. Doublecheck that all connections are tight and cables are neatly organized.