How to Choose a Crypto Wallet

Best Selling Products carousel(6 Items)
Find the best crypto wallet for you
What is a crypto wallet?
A crypto wallet is a physical or digital storage device for the proof of the crypto currency you own. Unlike a regular wallet, a cryptocurrency wallet doesn’t store physical coins and bills. Rather, it holds the public and private keys required to authenticate and transfer your cryptocurrencies.
While some crypto exchanges offer crypto wallets, their users can also choose their own wallets by storing cryptocurrencies with computer storage devices like external hard drives. To find out which crypto wallet is best for your needs, you’ll need to explore the different types of crypto wallets and weigh several factors, like security and convenience.
Types of crypto wallets
When differentiated by ownership, a crypto coin wallet can either be custodial or noncustodial. Also called a hosted wallet, a custodial wallet is ideal for those who don’t want to worry about how to set up a crypto wallet on their own. A third party hosts the custodial wallet you sign up for and keeps cryptocurrencies in it on your behalf. The main appeal of a hosted wallet is eliminating the risk of losing your crypto holding if you lose your wallet or its private key.
If you prefer exclusive access to your cryptocurrency assets, choose a noncustodial wallet. With this type of digital wallet, only you have the private key to the wallet and losing this key means losing your crypto holding. In addition to being in full control of the security of your crypto, a noncustodial wallet also allows you to do more with your crypto assets. Besides buying, selling, sending and receiving cryptos, you can also lend, borrow and stake your crypto.
It's also important to understand the differentiation between hot and cold storage. A hot storage wallet is online, while a cold wallet keeps your crypto offline. Examples of hot wallets are desktop, mobile and web wallets. Cold wallets include paper printouts of your cryptocurrency ownership hardware and offline software wallets. By storing cryptocurrencies in an offline software wallet, you reduce the chances of unauthorized access and help eliminate the risk of cyberattacks.
Which crypto wallet is best for you?
Before considering how to get a crypto wallet, determine what type is best for you. Choose a hot storage wallet if you only need to keep a small amount of cryptocurrency or want a wallet you can share with someone else. Online, desktop and app-based wallets are also ideal for those not overly concerned with security.
While hot storage wallets are usually free, you’ll have to pay for a cold crypto wallet. This can be the cost of the paper for printing the wallet’s alphanumeric public and private keys and QR codes as well as the price of the hard drive or USB flash drive used for a hardware wallet. The best cold crypto wallet will help with with large amounts of cryptos for those placing a high value on the privacy and security of their holdings.
Features to look for in a crypto wallet
Choosing a crypto wallet depends on your specific needs and the types of cryptocurrencies you hold. Key features to consider when choosing a crypto wallet include:
- Security. Pick a provider with an excellent track record and a large user base. For secured storage, the safest crypto wallets support two-factor authentication, PIN login or URL address with “HTTPS” at the beginning (for online wallets).
- Portability. Portability refers to the ability to access a wallet from anywhere, a necessary feature if you’re wondering how to choose a crypto wallet for high-volume trading that requires quick access to your cryptocurrencies.
- User-friendly interface. Having stable software with a user-friendly interface lets you easily see the cryptos in your wallet. QR code support is a notable user-friendly feature to look for because it’s more convenient to scan keys encoded in QR codes than to type out the long alphanumeric strings generated for these keys.
- Multi-currency support. This functionality allows a single wallet to manage various digital assets, eliminating the need for multiple wallets for different coins.
How to set up a crypto wallet
For a custodial wallet or a noncustodial online wallet, make sure to pick a trusted host. Simply create an account with the third-party service provider and secure it with a password to finish your crypto wallet setup. For a mobile or desktop wallet, download and install a preferred crypto wallet app or program on your phone, tablet or computer. With a crypto app, you’ll need to create an account and make a note of the random private key generated for the account before transferring crypto into the wallet.
If you’re setting up a crypto wallet that requires a thumb drive, the process starts with downloading software from the crypto hardware wallet vendor you chose. Install this software on the USB drive and follow the instructions provided to create and secure your crypto wallet. A paper wallet is the easiest one to set up because it involves generating a public and private key pair, usually through a secure website, and printing or writing down these keys for offline storage.
A good crypto wallet secures your assets
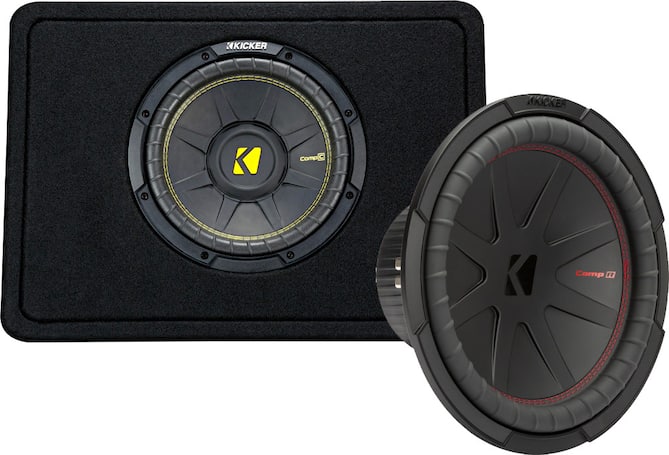
Installing a subwoofer
If you’ve found the best car subwoofer for you and are looking to upgrade your vehicle’s audio system, you’ve come to the right place. Installing a subwoofer in your car adds rich, deep bass to your music while transforming the overall sound quality, giving you a more immersive and powerful listening experience.
Whether you’re an audio expert or a beginner looking to enhance your sound system with a top-rated car subwoofer, we will walk you through the installation process and provide helpful tips to ensure optimal performance. Keep reading to boost your car’s sound today and enjoy the powerful bass from your car subwoofer with every drive.
Pre-installation prep
Before diving into installing your new car subwoofer, it’s important to do a little preparation first. This not only helps the installation process go smoothly as possible, but also helps promote safety.
- Measure the available space. Measure the area where you plan to install the unit, such as the trunk or under the seat. Mini subwoofers and shallow subwoofers typically require less space than massive subwoofers.
- Check the power requirements. Subwoofers use up a lot of energy, so you might need to upgrade your battery or alternator if your car’s electrical system can’t handle the extra power.
- Choose the right enclosure. Sealed enclosures offer tight bass, while ported enclosures provide more booming bass, so make sure the enclosure that encases your subwoofer will fit in your car.
- Gather the necessary tools. Ensure that you have a wiring kit that includes power, ground and RCA cables, as well as a remote turn-on wire.
Once you’ve covered these initial steps, you should be ready to begin installing your car subwoofer.
How to install a subwoofer
1. Disconnect the battery
2. Run the power wire
3. Mount the subwoofer and amplifier
To properly mount your subwoofer and amplifier (or your subwoofer with built-in amp), start by selecting a suitable location in your vehicle where the subwoofer can fit without obstructing other components. Your trunk or underneath a seat are typically the best spots. Then, use brackets or a custom enclosure to firmly anchor the subwoofer.
For a separate amplifier, pick a well-ventilated area to help prevent overheating and secure it with screws or mounting kits. Doublecheck that all connections are tight and cables are neatly organized.