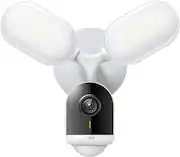
Rating 4.3 out of 5 stars with 55 reviews
4.3- Camera Quality (23)
- Floodlights (17)
- Motion Detection (15)
- Brightness (12)
- Night Vision (9)
- Reliability (3)
Customer Images
The vast majority of our reviews come from verified purchases. Reviews from customers may include My Best Buy members, employees, and Tech Insider Network members (as tagged). Select reviewers may receive discounted products, promotional considerations or entries into drawings for honest, helpful reviews.
- Rated 5 out of 5 stars
Great Floodlight Camera for Home Assistant!
I have been anticipating the release of these floodlight cameras for quite a while. I had 2 Feit Floodlight Cameras that just did not function in the ways that I wanted them to. I replaced those Feit cameras with these and I am very pleased. I bought these during the 2024 Prime Day time frame (obviously bought them on Best Buy) and they were about $100 each, which I thought was a great deal for them. First off: These cameras have great picture quality for both daytime and nighttime viewing. The 2K quality is great and the field of view is massive. LED's are super bright and light up the areas I have these at very well. Second: This was the biggest thing for me - These cameras allow you to get their camera streams so that you can place them into your NVR and handle events that way. My specific use case was I just wanted to be able to pull their camera streams into my Home Assistant instance just so I could view them. I don't care so much about handling motion events or anything through Frigate or MotionEye or anything like that, I just wanted to be able to view them in Home Assistant. There is a small bit of advance setup for this use case, but chances are if you're aware of NVR's and setting them up, you would be able to set it up just fine. Third: And related to the second point - These have local storage via SD card or you can opt to use their Tapo Care service which allows for cloud storage and rich notifications to your phone (getting a picture preview on motion detection for example) for some price. I'm staying with just local storage. Fourth: Setup is easy if you're familiar with basic wiring. If you replace an existing floodlight with this it's simple. Turn off breaker to floodlight, take off old floodlight, attach new mounts, attach wires by following their instructions, plug in main camera body, turn on breaker, open the Tapo app, add device by following the app instructions, and you're off! The whole process took me probably around 1 hour to complete per camera, but I work slow and thoroughly read instructions and options. You can probably be done in 30 min if you work quicker than I do. The Tapo app is pretty good. It gives you lots of options to customize zones, light timers, which motion events you want (motion, vehicle, person, etc) and many other things you would expect from a floodlight camera. If you see these on sale for around $100 or so, I would definitely pick them up. I've attached a photo of what the camera looks like from over my garage.
Posted by IanS
- Rated 5 out of 5 stars
First Security Camera
Super easy install on existing power from old unit. Great picture, and notifications are easily configured. No need for subscription just get a nice 256gb micro sd card and your gold. Currently recording on a loop and i just download a clip if i wanna save it. Already got the doorbell from TP-link on the way.
Posted by Wallace
- Rated 3 out of 5 stars
Need to reboot twice, not quite reliable
At the start was happy about this camera, but now I’m feeling frustrated, it appeared to be not so reliable camera. Need to reboot and reinstall twice already. It will show off line when the weather is bad . When it rained hard last time it has this problem, and now it is cold and it is off line again and I need to reboot. What happens if you are not home to do the reboot - this camera would be worthless. It’s only $185 . I got Wyze installed at the back of the house it’s cheaper. They were installed 1 week apart and the Wyze has no problem since installed.
Posted by Jept
- Rated 5 out of 5 stars
Easy Installation and easy to use
Loving my flood light camera so far it's been about a month. Easy to set up. I thought it would take hours I'm not an electrician but the directions were very easy to follow. No need to twist wires with existing wiring thankfully. Time will tell how long this lasts
Posted by Daniel
- Rated 5 out of 5 stars
Good build quality, good lights, super wide FOV.
TLDR: Great quality camera with huge FOV, adjustable direction/brightness LED floodlights, I’m buying more! My front driveway floodlight was getting pretty broken up. I had already make a couple of “good enough” repairs, then the motion detector stopped motioning. I already have a couple of Tapo cameras already and they’ve all been really reliable, so this floodlight/camera combo caught my eye. The white color “matches” the soffit where the light is mounted, which is great, but now it makes my white paint look less white :D I’m sure it will get it’s fair share of dust and spider webs soon. One thing to remember, this is not a standard battery-operated security camera, you should think of it as a light fixture that has a camera on it as well. You will need to make connections for the camera to the electrical lines that are in an existing fixture, or you will need to add a box and an electrical feed for the position you want to mount the fixture. A note on the connection to the camera from the power lines, there are two (white and black) “pigtails” included in the package, you should splice these on to your 120VAC line, then use these pigtails to connect to the mounting plate. The terminals on the mounting plate have a silicone rubber gasket that goes all the way around the 120V connection and the wires must go through two small holes on that gasket. The wires must be inserted ALL THE WAY in to the terminals and the jacket of the wire should be past the silicone boot, this gives you better weather/pest protection on the inside of the unit. When you are tightening the screws on the terminals, make sure to use a properly sized flathead screwdriver to fit in the terminal hole, if you use one that is too small, you’ll either break the screwdriver tip if it’s too small, and if it’s too big, you can get fooled into thinking the terminal is tight when it is not. This connection is the most important on the unit for reliability and safety, so take your time and make sure to pull on the wires with a good tug after you’ve snugged the screws, if they move, loose the terminal(s) completely, make sure the wires are inserted all the way in there again, then tighten down snug. I used a Snap-On SSDE44B, with a .125” wide and .018” thick blade, and it fits perfectly and I was able to apply plenty of torque on the fitting. There are markings embossed on the base plate of “L” (Line/Hot) and “N” (Neutral), but are a little hard to see, so make sure you check to make sure the white wire is on the “N” side and your black goes on the “L” side. The packaging is great, in normal TP-Link fashion. Nothing damaged or missing, almost everything in and of the box is recyclable. There are paper alternatives to the bubble wraps inside the box on the device, it would be nice to peel off the non-recyclable cellophane, grab all the goodies and drop everything in the recycling. We do notice these things! A little bit of insight from a 20 year surveillance camera tech that worked with wireless cameras since they were commercially viable… This camera is obviously primarily for outdoor use. Wi-Fi signal strength should not be measured by the router or other inside equipment. You should get a Wi-Fi scanner app for your Android phone or laptop, go to the spot where the camera is and check for overlapping Wi-Fi channels and signal strength from your own router FROM THE POSITION OF THE CAMERA. I am lucky and got to skip the wifi signal hunting, since I already added a node to reach the garage door opener. You really must sort your Wi-Fi, figure out what you are going to do with your network and build/upgrade it accordingly. If you think you have enough Wi-Fi, you don’t. When you mount this camera, odds are good it will be in a similar situation as mine is, on the farthest corner of the house on the other side of the garage. If you need professional or nerd support, just do it, overkill on Wi-Fi 6 (802.11ax) or a better mesh system, the bigger the number after “ax” in the router model’s name will offer a smoother experience for everyone on the network, you need lots of overhead. If you want to know why, check out some of the wifi router reviews from the real nerds like Tom’s Hardware, and check out how incredibly fast wifi signal strength, link quality, speed and connection stability fall off a cliff as you move from the antennas (inverse square law, can’t outrun physics). I run three 802.11ax nodes in a 1968 split level, and I am going to need to add another for the back cameras to get stronger signal. Some folks will get lucky and want to put the camera outside where it’s right next to the ISP gateway and never have a problem. Once you are outside your house, you must know the camera out there is fighting with a lot of interference from all the neighbors. I would venture to say that like almost every outdoor fixture there will be a lot of returns because folks think the hype about Wi-Fi is true, so “it can’t be the Wi-Fi, it’s gotta be this new thing I just added…” is almost always – wrong. If you have ANY issue with this camera, it’s your Wi-Fi first, then maybe the camera, but it’s still probably your Wi-Fi - after you’re done walking over to the camera (with the garage door open) and looking at your phone and seeing all those bars… it has to be the camera, because bars! - It’s still your Wi-Fi, I’m not joking. This camera is rock solid. – A little PS on this, I could not find a significant change in the Wi-Fi’s S/N (2.4GHz channel 9) when the lights were on or off, I was concerned because some LEDs are quite noisy (CREE) in the 2.4GHz bandspace, so whatever these lights are, they do not cause undue interference to my 802.11 connection and did not change my ability to view or access the camera! Very thoughtful design. I set the camera up first on ASUS, then TP-Link 802.11x Wi-Fi 6 mesh systems with wired backhaul and had great luck with the camera on both networks. It did not have any issue jumping on the closest node in the TP-Link “EasyLink” system, nor did it have any issues with the ASUS AiMesh system, I think if you’ve got one of these with at least three nodes and strong signal at the camera, you should have good connectivity. I am able to stream on the wireless network at “2K” with no problem, it has the ability to stream at 720p which is important for installation location flexibility- if the camera has iffy streaming from bad Wi-Fi, drop the quality to 720p, and it may clear up. So, this camera/light is on the corner of my garage, looking toward the side of the house and down most of the front driveway. The picture quality is really good. I can read my wife’s car license plate in the dark with the camera on the monochrome night mode. That’s impressive. I have to admit, we primarily use the cameras for catching all the animals that are scooting around the yard in the dark. There is built-in “AI” for identifying People, Cars, Animals and a couple of other pretty slick detection tools. These allow you to get notifications from your cameras that will tell you what type of activity the camera picked up, then you can live view the stream or watch the clip recorded from the trigger. The notifications are quick, not a quick as Apple Home notifications, but quick. I would not want to use a doorbell that had this kind of delay on it, but for yard cameras, this works great. If you are using the MicroSD slot on the side of the camera, you can have local recordings available at the camera, which you can download right off the card with your Tapo app. -Buy the best SD card you can find, I'm using the Samsung Pro Endurance 256 in each of my Tapo cameras, recording a lot, and have had great luck with them. Don't go cheap on your memory card, it will fail from the camera's constant writing.- If your network signal is weak, add the SD card, the camera will still make its own recordings on the card, then you can adjust your router to get better signal on the camera, download your recordings, then go about your day. One of the most important features, in my opinion, is the direct access TP-Link allows to the camera’s RTSP network video feeds. This allows you to use the camera with a third-party NVR, or even to set up this camera for use with a HomeBridge server to add it to your Apple Home system (soon!). This access is for slightly more advanced users but is still easy to set up and operates flawlessly, just like the rest of the camera’s functions. Another note, RTSP streams on your network are not encrypted and very easy to intercept and watch, so make sure you trust whatever people or devices will be sharing this network or use a VLAN/Guest Network for your RTSP devices. I’m sticking with Tapo cameras for now, I think the value proposition for the whole line of Tapo products is the best in the market, I think you should check them out. I would buy this camera again without a second thought!
Posted by Buddy Brown