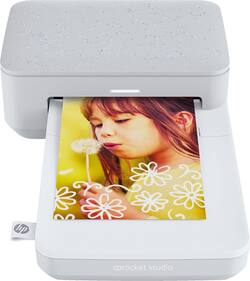
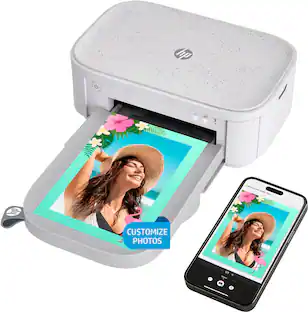
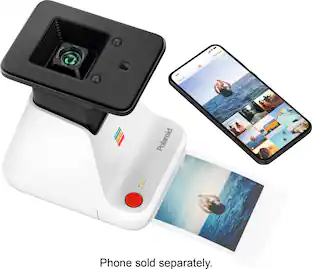
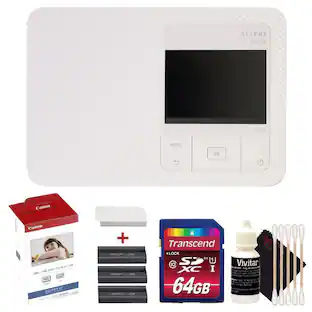
HP - Sprocket Studio 4" x 6" Photo Printer
- Key Specs
- Networking: Not Applicable
- ENERGY STAR Certified: true (Devices carrying the ENERGY STAR service mark, such as computer products and peripherals, kitchen appliances, and other products, generally use 20% to 30% less energy than required by federal standards.)
- Printer Type: Printer
- Printer Resolution (Color): Up to 300 (Refers to the number of pixels/dots, both horizontally and vertically, of the image produced by the printer in colored ink. Generally, the higher the resolution, the sharper and cleaner the produced image.)
- General
- Brand: HP
- Model Number: 3MP72A#1H6
- Product Name: Sprocket Studio 4" x 6" Photo Printer
- Dimensions
- Product Height: 2.68 inches (The out of box height of the item. Height is measured as the vertical distance from the bottom of the item to the top as it would be primarily used or placed.)
- Product Width: 6.65 inches (The out of box width of the item. Width is measured as the horizontal distance from one side of the item to the other as it would be primarily used or placed.)
- Product Weight: 2.05 pounds (The out of box weight of the item.)
- Connectivity
- Connector Type(s): None (Type of interface connection found on the device.)
- Minimum System Requirements: Android: 5.0 and above; iOS: compatible with iPhone 5 and above, iPad (4th generation) and above, Pro 12.9-inch (1st generation) and above, iPad Pro 10.5-inch, iPad Pro 9.7-inch, iPad Air 2, iPad Air, iPad mini 2 and above, iPod touch (6th gen)
- Ink
- Dye-Sublimation Printer: true (Uses heat to transfer dye, infusing it deeper than the topical level. This process produces a high-resolution full color print that resists fading, cracking, or peeling under normal conditions.)
- Paper Info
- Maximum Photo Length: 6 inches
- Maximum Photo Width: 4 inches
- Supported Paper Sizes: 4 x 6 in
- Tray Capacity: 20
- Memory
- Memory Card Slot: false
- Other
- UPC: 194850120428
Turn your favorite moments from your smartphone into effortless photo creations. Designed to use with Bluetooth and the HP Sprocket app, you can easily transform photos from your camera roll or social media into sharable memories.
Creates a 4" x 6" photo-quality print in as little as 61 seconds*
- Your own personal photo lab: Sprocket Studio wakes instantly from sleep mode. Quickly print with the HP Sprocket app using Bluetooth.
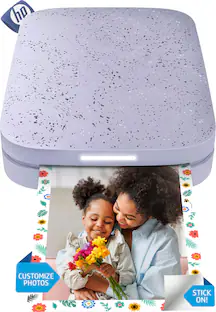
- Worry-free photo creations: Use the HP Sprocket app to get helpful templates for building photo albums, cards, collages and more.
- Photo prints that last as long as your memories: Print bright, glossy photos that are smudge proof, instantly dry, water resistant, and tear resistant.
Whats Included
- HP Sprocket Studio 4" x 6" Photo Printer
- HP Sprocket Studio ink cartridge
- Power supply, power cord
- Photo paper (10 photo prints)
- Owner's manual
Product Manuals
Q: What photo paper should I buy and also do I need to buy an ink cartridge?
A: There is a special paper that is especially for the Sprocket and the cartridge comes in it. I bought the 80 paper package and it came with 2 cartridges. It's one cartridge per 40 sheets of paper.
Q: Does this HP Sprocket Studio 4x6 instant photo printer come with a cartridge?
A: Yes, this Sprocket Studio printer comes with one HPISC80 cartridge.
Q: will this printer print photos from original photos?
A: No, the Sprocket Studio prints photos from your Smartphone or Social Media. iOS & Android, Bluetooth 5.1.
Q: Are you able to do 2x3 prints? Two different pics on one sheet?
A: Thank you for your question. The HP Sprocket Studio prints on 4 x 6 inches sheets. You can utilize the collage creator to have multiple pictures printed on one sheet of 4 x 6 inches through the HP Sprocket App. The application can be downloaded from the App Store or Google Play Store.
A: I'm really sorry to hear that. Your best option would be to contact the HP support team to see if it's just a defective printer. You can go to the support link at https://bit.ly/3mULd9E . You can also reach them by phone at 1-800-474-6836.
Q: Is sprocket compatible with iPhone 5
A: Yes, you can use the sprocket with an iphone.
Q: do I need to download or do anything else to make it work? I have an iPhone 7, software versin15.2.1
A: Hello. Thanks for your question. We recommend using the HP Sprocket app with this HP Sprocket Studio printer.
Q: How long does a hp cartridge last? And what does red light mean?
A: The Sprocket Studio printer comes with enough ink and paper to print 10 photos. The replacement ink/paper sold for this printer includes 80 sheets of photo paper and 2 ink cartridges. The Status Indicator light blinks red and a Low On Supplies message displays in the HP sprocket app. The cartridge is almost empty, and the paper is running low. Both need to be replaced soon.
People also viewed
 $279.99The price was $329.99
 $329.99The price was $379.99
 $1,559.95The price was $1,829.95

Today's top picks
 $479.99The price was $729.99
 $199.99The price was $249.99
 $799.99The price was $1,199.99
 $789.99The price was $1,049.99