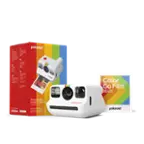
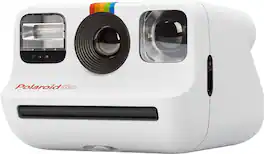
Polaroid - Go Camera-Everything Box
FREE shipping to
Related Item

Specifications
- AutofocusYes
- Key Specs
- Autofocus: true (Allows the camera to automatically focus through the lens, rather than by adjusting the lens manually.)
- General
- Brand: Polaroid
- Model Number: 6036
- Product Name: Go Camera-Everything Box
- Dimensions
- Product Width: 3.3 inches (The out of box width of the item. Width is measured as the horizontal distance from one side of the item to the other as it would be primarily used or placed.)
- Product Height: 2.42 inches (The out of box height of the item. Height is measured as the vertical distance from the bottom of the item to the top as it would be primarily used or placed.)
- Product Depth: 4.13 inches (The out of box depth of the item. Depth is measured as the distance from the front of the item to the back as it would be primarily used or placed.)
- Product Weight: 0.53 pounds (The out of box weight of the item.)
- Included
- Batteries Included: true (Indicates whether the product comes with the required batteries for its operation.)
- Film Included: false
- Exposure Control
- Flash Range: true (The greatest distance or range of distances at which light from the flash can illuminate a subject.)
- Autofocus: true (Allows the camera to automatically focus through the lens, rather than by adjusting the lens manually.)
- Performance
- Shutter Speeds: 1/125-30sec (The length of time the shutter remains open when the shutter release is activated, expressed in fractions of seconds. The longer the shutter is open, the more light that is able to be captured by the camera sensor.)
- Power
- Battery Size: Cell (The battery size required for operation.)
- Features
- Automatic Flash: true
- Other
- UPC: 9120096771286
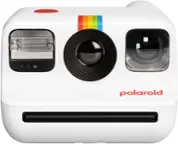
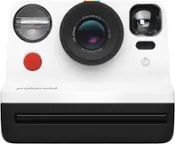
Oh, the places you’ll go! And the times you’ll share and treasure, all captured with your Polaroid Go. Pocket-sized and built to go go go wherever adventure takes you. Get to know a more grownup instant camera featuring artful double exposure, selfie mirror, and a self-timer for the days you step inside the frame. The Everything Box also includes 2 packs of film.
- Selfie Ready: Selfie-mirror and Self-Timer built into camera
Q: Does this come with some sort of strap?
A: Yes, a wrist strap is included with the camera.
Q: Can I save the pictures on an SD card as well as printing them instantly?
A: No, this is a completely analog camera. It does not have digital sensors so it does not save any digital images.
A: My camera did not come with film, but you can buy the bundle and a pack of film comes with it. The film are really inexpensive.
Q: What size photo does this print?
A: 3x3
Compare similar products
Oh, the places you’ll go! And the times you’ll share and treasure, all captured with your Polaroid Go. Pocket-sized and built to go go go wherever adventure takes you. Get to know a more grownup instant camera featuring artful double exposure, selfie mirror, and a self-timer for the days you step inside the frame. The Everything Box also includes 2 packs of film.

Capture real life on the Go. Our most portable, wearable, take anywhere-able Polaroid Go Generation 2 instant camera has been upgraded with a large aperture range, precise light sensor, and on-point-exposure settings to make your pictures even better. It’s really small (the smallest instant camera in the world) but comes with big creative potential featuring a selfie mirror, self-timer, double exposure, and can be paired with its own teeny tiny color filters. All in the classic design, and now made with 30% recycled materials. Compatible with Polaroid Go film, our smallest Polaroid instant film format.

Capture real life on the Go. Our most portable, wearable, take anywhere-able Polaroid Go Generation 2 instant camera has been upgraded with a large aperture range, precise light sensor, and on-point-exposure settings to make your pictures even better. It’s really small (the smallest instant camera in the world) but comes with big creative potential featuring a selfie mirror, self-timer, double exposure, and can be paired with its own teeny tiny color filters. All in the classic design, and now made with 30% recycled materials. Includes a Polaroid Color Go Film Double Pack for 16 color instant photographs with white frames. Compatible with Polaroid Go film, our smallest Polaroid instant film format.

Whether you're an avid traveler, social influencer, nostalgic partygoer, or on-the-go photographer, one thing is certain, printing pictures takes too many steps. Now, with the New KODAK Step Touch Instant Print Camera, printing full-color photographs is as simple as point, shoot, and print. This 3-in-1 instant picture camera features a powerful 13MP mini digital camera, 1080p HD camcorder, and a built-in printer with ZINK Zero Ink Paper technology. Photos printed in this Kodak instant camera come out clear, bright, colorful, and covered with an extra layer of protective coating to prevent smudges, rips, and water damage. Bluetooth is also built right into the portable camera, so you can connect to your favorite smartphone or tablet to print memories from long ago. Use our extensive editing tools in the mini instant camera to apply flattering filters, funny emojis, decorative frames, and other personalized flairs.
| Pros for Polaroid - Go Camera-Everything Box | |||
|---|---|---|---|
| There were no pros for this product— | Picture Quality | Ease of use | There were no pros for this product— |
| Cons for Polaroid - Go Camera-Everything Box | |||
| There were no cons for this product— | There were no cons for this product— | Picture Quality | There were no cons for this product— |
Specs


Reviews
Customer Images
The vast majority of our reviews come from verified purchases. Reviews from customers may include My Best Buy members, employees, and Tech Insider Network members (as tagged). Select reviewers may receive discounted products, promotional considerations or entries into drawings for honest, helpful reviews.
- Rated 5 out of 5 stars
Small camera with a big impact
I love it. A cute camera to have and casually use where ever you go. Surprisingly, the size of the lens and viewfinder don't suffer, despite it's tiny build. You can get nice pictures out of it. Will they come out perfect all the time? No. Instant film is always unpredictable at times but this is such an easy to use camera, and very straightforward. And it also comes with a timer, flash toggle, and double exposure. What's not to love?
This review is from Polaroid - Go Camera-Everything Box
PolaroidPlusplus Posted
- Rated 3 out of 5 stars
Compact & light, prints just ok
It’s been a long time since I’ve used a Polaroid analog instant camera, but it’s every bit as fun as I’d remembered. The Polaroid Go is currently the smallest version of the classic Polaroid instant camera, and while not tiny, is small enough to carry in a bag or oversized pockets. It’s roughly the size of my mirrorless digital camera. The body is made from a durable yet light plastic and contains a rechargeable battery that powers the camera and the flash. Rather than a typical camera neckstrap, the camera is bundled with a wrist strap that you attach to a corner on the base. The Everything Box also comes with two film cartridges containing 8 film sheets each and a set of fun rainbow colored stickers to decorate your prints and camera. On a full charge, the battery should last for about 15 cartridges before needing to be recharged via the included microUSB cable. Loading the film is super easy. Just open one of the aluminum foil sealed pouches containing a cartridge, slide the door latch mechanism on the bottom of the camera, and insert the cartridge wide end first with the arrows on the cart and camera lined up. When a new cartridge is inserted, the dark slide on the top protecting the film from light exposure ejects automatically. You’ll also receive an 8-pack of small double-sided round stickers with each cartridge to adhere or display your prints on other surfaces. When you turn the camera on, it automatically charges up the flash and displays the number of shots remaining in the cartridge on a small LED display next to the power button. A small dot next to the counter indicates when the flash is enabled and pressing the white flash key on top toggles it on or off for your next shot. Note that the flash will automatically re-enable after each photo is taken. Despite having only three buttons, I was surprised to learn that the camera supported double-exposure and self-timer modes, though the quick start guide was lacking on how to enable these features. To enable the self timer, just press and hold the flash key for two seconds until an orange light appears next to the flash on the front of the camera. Then after pressing the red shutter button, you’ll have 9 seconds to position yourself in front of the camera. Keep in mind there is no threaded mounting point on the camera, so it cannot be attached to a tripod, and you’ll need to find a flat stable surface to set your camera when not using handheld. For double-exposure mode, long press the flash button until a ‘1’ flashes on the counter display, indicating it’s ready for the first exposure. After taking the first photo, a ‘2’ will flash on the display when the camera is ready for the second exposure. You can even turn the camera off if you’re not immediately ready to take the second exposure; the camera will pick up where it left off when you turn it on again. This mode allows you to creatively merge two images together for surprising and interesting prints. The camera has a built-in selfie mirror on the opposite side of the viewfinder to help you frame up your shots when taking them in front of the camera. It’s okay and usable, but in very bright conditions may be hard to see. The built-in flash is eye-wateringly bright when it goes off but its reach is limited, so you’ll need to be somewhat close to your subject and/or the background if you wish to illuminate both. For beginners, it may take a bit of trial and error and practice to produce decent looking prints. First and foremost, the images don’t actually appear instantly, and you should place them face down or in a dark place, like a pocket, for 15-30 minutes to allow the film to develop fully. If allowed to develop face-up in the presence of light your image may become overexposed and blurry. The second thing is that the focal range of the camera is 1.5 feet and greater, so you’ll want your subject to be at least that distance from the camera if you want it to be clearly in focus. That means no macro or close-up shots. If you’re planning on scrapbooking or putting these photos in an album, the recommendation is to not compress or seal them in plastic for at least 30 days to allow the chemical processes in the film to halt and dry out. The photos are approximately 1-3/4 inch square and with the frame, the print dimensions are about 2-1/8W x 2-5/8H, so they’re fairly small, but that’s not a surprise since the camera itself is compact. The print quality was slightly disappointing though, and I felt that the color saturation was not very vibrant, the focus a bit soft, and the contrast too low. A friend of mine remarked that the photos looked like they had a “vintage filter” on them due to their washed out appearance, which may or may not be a desirable quality depending on what you’re going for. While they’re a fun size, the price per print is on the high end for what you end up with. Overall, I do find taking photos with the Polaroid Go fun. Once you’re familiar with how the film behaves and what sorts of print you’ll be able to produce with it, playing around with lighting and shooting conditions can help you create artful and stylized prints. It may not be the best camera for ultra crisp fashion portraits, but if you’re looking to give the world of instant film cameras a try, the Polaroid Go offers you that opportunity in a cute palm-sized camera.
This review is from Polaroid - Go Camera-Everything Box
ReviewedByPhil Posted
- Rated 4 out of 5 stars
Almost perfect!
I absolutely love this little camera so much!!! It’s so cute and tiny and I take it with me everywhere. I’d give it 5 stars but the camera takes better pictures outdoors than it does indoors (you can do selfie’s indoors but the background is black). The film can be a little inconsistent but for the most part my photos have turned out great!
This review is from Polaroid - Go Camera-Everything Box
JessicaL Posted