“We did not receive any instruction book with this coffee maker and would like to know how to program the different options. as we have tried different ways and now the pot shuts off when thru making coffee, and the warm plate doesn't stay on.”
Answer This Question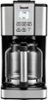
1-2 of 2 Answers
Hello, thanks for reaching out. Please reach us at 1 866-832.4843 or email us at [email protected] and we will be happy to email it to you. SETTING UP THE MACHINE IMPORTANT: Before brewing, always check to make sure water level is past the MIN line and add water if needed. Never exceed the MAX fill line. NOTE: The amount of brewed coffee will always be less than the amount of water placed into the water reservoir; as much as 10% is absorbed by coffee grounds and filter. 1. Lift to open the Coffee Maker lid. Fill carafe with cold water and pour into water reservoir at the back of the unit. The transparent water gauge can be easily viewed inside unit. 2. Place empty carafe on the warming plate. 3. Place the permanent filter in the removable filter holder. Measure 2 level tablespoons or 1 scoop with the provided scooper cup, of drip or regular ground coffee for each cup of coffee desired. For stronger or milder coffee, adjust amount of coffee to suit your taste. 4. Lower the filter holder down into the housing. Close the lid. 5. Plug the power cord into 120V/60HZ power supply socket, the background indicator will illuminate, and “AM 12:00” will flash. The backlight indicator will go into sleep mode within 15 seconds if no further buttons are selected. 6. Press the ON/OFF button. The Coffee Maker will begin the brew cycle. NOTE: To interrupt the brew process at any time, press the ON/OFF button until you hear a beep. 7. Upon completion of the brew cycle, wait at least 1 minute until the dripping coffee from the flow valve into the carafe has stopped. The carafe lid should be kept in place to facilitate safe serving and help keep coffee at a proper serving temperature. Tilt the carafe slightly and pour the hot coffee very slowly, so that the flow of the brewed coffee does not exceed the width of the spout. Once the brew cycle is complete, the LCD screen will show the TIME SINCE BREW icon and 0:00 will begin counting up. This represents the time since the brew cycle finished. To shut down the unit, press the ON/OFF button. 8. Press ON/OFF button to turn the Coffee Maker OFF when the carafe is empty or when unit is not in use. SETTING THE CLOCK 1. When the coffee maker is plugged in “AM 12:00” will flash. 2. Press HOUR button to select the Hour. Press and hold HOUR to toggle quickly. 3. Press MINUTE button to select the minutes. Press and hold MINUTE to toggle quickly. 4. Press on the PROGRAM button to confirm the time 5. To re-set the clock: press and hold the PROGRAM button until the previously settime flashes. Then follow the clock setting method. BREW STRENGTH SELECTION 1. To select the strength of coffee push on the strength button. 2. For regular strength press once. 3. For gourmet strength press twice.The gourmet setting adjusts the brewing cycle of a full pot of coffee to extract a higher percent of solubles. This results in a more flavorful pot of coffee. 4. For bold strength press three times.The Bold setting adjusts the brewing cycle of a full pot of coffee, allowing more time for the coffee to “steep” to extract further oils and flavor from the coffee bean. This results in a bolder tasting pot of coffee 5. For 1-4 cup mode press 4 times. Automatically adjusts the brewing process for maximum flavor when brewing small quantities. Ideal for brewing 4 cups of coffee. * If 14 cups of water are poured into the water tank then 14 cups of coffee will brew. SETTING THE AUTO START Press the PROGRAM button. The clock will flash 12:00 AM. Follow the clock setting method to set hour and minute. To confirm your selection, press the program button. The unit will beep and display the current time along with the word PROGRAM. Once the current time reaches the set time for the auto brew, the unit will automatically start the brewing cycle. PAUSE AND SERVE If you wish to serve a cup of coffee before the brew cycle is complete, simply remove carafe from the warming plate. Dripping will automatically cease. Return the carafe onto the warming plate; dripping will resume. CAUTION: To prevent injury when utilizing the pause and serve feature, replace carafe within 30 seconds after removing during the brewing process. 1. After approximately 2 cups of coffee have been brewed, the carafe may be slowly removed and the coffee will stop dripping. 2. The flow valve is located on the bottom of the filter holder and is activated when the carafe is removed. (See Figure 1.) This design makes it possible for you to remove the carafe and pour a cup of coffee before the entire carafe is brewed. IMPORTANT: When replacing the filter holder, the flow valve must be properly inserted into the front hole of the machine, so that it can be seen as it sits on the top of the carafe lid. (See Figure 1.) 3. When using this feature, make sure that the carafe is replaced under the filter holder within 30 seconds to prevent overflow. KEEP WARM MODE To set the time for the Keep Warm feature press the KEEP WARM button. The KEEP WARM icon will appear and 2:00 hours will flash. The default keep warm time is 2 hours. To select the period of keep warm time push the KEEP WARM button. Each time the button is pushed the keep warm time will increase by increments of 30 minutes. The keep warm time is between 0 minutes up to 4 hours. Once the desired keep warm time is reached, press the PROGRAM button to confirm the selection. The coffee maker will beep. TIME SINCE BREW When the brew cycle is complete, TIME SINCE BREW will appear on the LCD display and the TIME SINCE BREW will count up from 0:00 to the selected KEEP WARM TIME to let you know how fresh your coffee is. After the KEEP WARM TIME is reached, the coffee maker will beep and the TIME SINCE BREW icon will disappear. The current time will reappear on the LCD display. AUTO SHUT OFF The coffee maker will automatically shut off once the keep warm time has elapsed after brew. 1. After approximately 2 cups of coffee have been brewed, the carafe may be slowly removed and the coffee will stop dripping. 2. The flow valve is located on the bottom of the filter holder and is activated when the carafe is removed. (See Figure 1.) This design makes it possible for you to remove the carafe and pour a cup of coffee before the entire carafe is brewed. IMPORTANT: When replacing the filter holder, the flow valve must be properly inserted into the front hole of the machine, so that it can be seen as it sits on the top of the carafe lid. (See Figure 1.) 3. When using this feature, make sure that the carafe is replaced under the filter holder within 30 seconds to prevent overflow. KEEP WARM MODE To set the time for the Keep Warm feature press the KEEP WARM button. The KEEP WARM icon will appear and 2:00 hours will flash. The default keep warm time is 2 hours. To select the period of keep warm time push the KEEP WARM button. Each time the button is pushed the keep warm time will increase by increments of 30 minutes. The keep warm time is between 0 minutes up to 4 hours. Once the desired keep warm time is reached, press the PROGRAM button to confirm the selection. The coffee maker will beep. TIME SINCE BREW When the brew cycle is complete, TIME SINCE BREW will appear on the LCD display and the TIME SINCE BREW will count up from 0:00 to the selected KEEP WARM TIME to let you know how fresh your coffee is. After the KEEP WARM TIME is reached, the coffee maker will beep and the TIME SINCE BREW icon will disappear. The current time will reappear on the LCD display. AUTO SHUT OFF The coffee maker will automatically shut off once the keep warm time has elapsed after brew. Hope this helps. Have a great day. The BELLA Team.
Sorry, there was a problem. Please try again later.i haven’t had a problem programming mine really only because i didn’t have to. i don’t like old coffee that’s why i didn’t program anything except for the time/clock. sorry won’t be able to help.
Sorry, there was a problem. Please try again later.