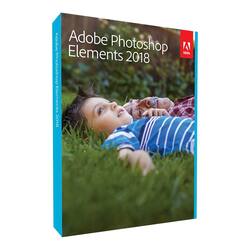
Adobe - Photoshop Elements 2018 - Windows, Mac OS
- Key Specs
- Number of Users: 1
- Number of Licenses: 1
- Operating System Compatibility: Windows, Mac OS
- Software Format: Physical (Physical software requires a disc, cartridge, etc. be inserted into the gaming console or computer to download and/or operate the software. Digital software allows for downloading and/or playing the software on the gaming console or computer without a physical disc, cartridge, etc. Physical (Download Code Only) software is purchased in physical form with a code that allows for downloading and/or playing the software on the gaming console or computer without a physical disc, cartridge, etc.)
- General
- Brand: Adobe
- Model Number: ADO951800F085
- Product Name: Photoshop Elements 2018
- Publisher: Adobe
- Features
- Software Subject: Photo editing
- Editing Type(s): Image
- Automatic Editing Options: true
- Templates Included: true
- Tutorials Included: true
- Language(s): Czech, Dutch, English, French, German, Italian, Japanese, Polish, Russian, Spanish, Swedish
- Purchase Rights
- Number of Users: 1
- Number of Licenses: 1
- Purchase Rights: 1
- Compatibility
- Operating System Compatibility: Windows, Mac OS
- Software Format: Physical (Physical software requires a disc, cartridge, etc. be inserted into the gaming console or computer to download and/or operate the software. Digital software allows for downloading and/or playing the software on the gaming console or computer without a physical disc, cartridge, etc. Physical (Download Code Only) software is purchased in physical form with a code that allows for downloading and/or playing the software on the gaming console or computer without a physical disc, cartridge, etc.)
- Number Of Discs: 1
- Requirements
- Download Requirements: Microsoft DirectX 9 or 10 compatible display driver DVD-ROM drive (for installation from DVD) Internet connection required for product activation and content download
- Download File Size: 5 gigabytes
- Other
- UPC: 883919272962
Go from hundreds of mystery folders to a visual view of your photos automatically sorted by date, subject, people, and places. See your best photos auto-curated based on quality, faces, subjects, and more. Make your photos look amazing with automated photo editing options, and create and share printed artwork, new dynamic slideshows, photo collages, and gifts for friends and family.
- Effortless organization: Finally - a photo Organizer that makes it effortless. Go from hundreds of mystery folders scattered across your computer to a visual view of your photos automatically sorted by date, subject, people, and places.
- Intelligent editing: Automated photo editing so you have more time to be creative. Open closed eyes like magic, make precise selections effortlessly, and get step-by-step help with artistic techniques and creative effects.
- Stunning creations: Create beautiful printed artwork, new dynamic slideshows, photo collages, and gifts for friends and family. Make calendars, scrapbook pages, and cards you can print at home.
- Shareable memories: Share with friends and family any way you like - via print, slideshows, Facebook, YouTube, Vimeo, Twitter, and more.*
Q: The normal Photoshop is a monthly purchase, is this a one-time purchase?
A: Elements is a One time purchase, but you will have to pay when they come out with a later version and you want to upgrade
A: No. Internet is not necessary. Any photo/art project you already have on your device can be edited.
Q: Does it come with a download or only a disc?
A: Disks for Mac & Windows. You can download from Adobe with serial & code.
Q: How many computers can this software be installed on?
A: I read through the licensing agreement and it says that you can install it on two computers, but you can only use it on one computer at a time.
A: Yes, it has all of the above
Q: If you purchase the disk , do you need to pay for a monthly subscription?
A: No, you don’t! :)
A: As long as your not using it on more than two computers, you should be ok. If I remember correctly I had to talk to them because they know if your trying to pull the wool over their eyes.
A: I have it installed on my Mac desktop and on my PC with no problems.
People also viewed

Today's top picks
 $449.99The price was $829.99
 $2,449.99The price was $3,199.99
 $199.99The price was $249.99
 $999.98The price was $1,639.98
 $1,099.99The price was $1,499.99
 $799.99The price was $1,199.99
 $549.99The price was $749.99