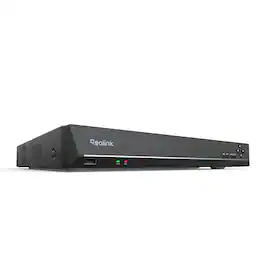
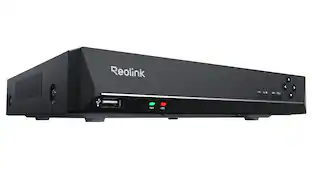
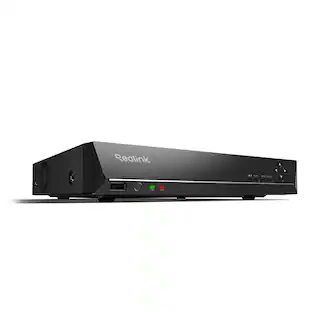
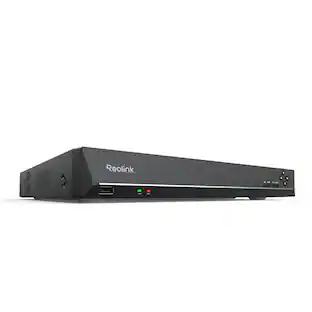
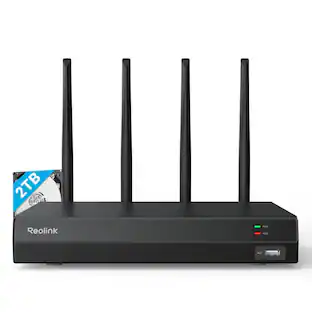
Reolink - RLN4E 6-Channel NVR Built-In 4 PoE Ports and Local AI Video Search Up to 8TB HDD 16MP, Heatmap & Data Encryption - White
Reviews coming soon
About this product
【Unlock Next-Gen Power with AI Video Search】Instead of scrubbing manually through hours of video, just type in some simple keywords for example, a person in blue to instantly find the moment that matters most. Whether it's a person or an object, ReoNeura will search it for you, ensuring quick and precise results. Enjoy the convenience of AI Video Search, all while keeping your data secure and private, free of monthly fees. All Reolink cameras compatible with RLN4E (including PoE cameras, battery-powered Wi-Fi cameras, and plug-in Wi-Fi cameras) realize AI Video Search, though the cameras themselves do not support AI Video Search.【Your Security Center, Be Versatile】The RLN4E with 4 PoE ports supports up to 4 PoE cameras and 2 Wi-Fi cameras, plug-in or battery-powered, which could serve as a security center covering multiple scenes. Enjoy complete protection provided by RLN4E by managing all cameras at one stop. 【microSD Card】A built-in microSD card slot supports up to a 512GB microSD card, enabling offline storage that can keep your recordings safe even without a network connection. *Note: If you use a microSD card from other brands, please make sure its read or write speed is Class 10 or above.【HDD Storage】The RLN4E supports up to an 8TB 3.5''/2.5'' HDD (HDD not included) to keep recordings from all connected cameras. All the data is well stored in the NVR. Cast away your worries about data loss, and enjoy peace of mind. *Note: If purchasing an HDD separately, you must use a surveillance-grade HDD rated at 5400 RPM spindle speed or lower.【Quick Setup, Plug & Play】Equipped with Power over Ethernet technology, this NVR can connect to Reolink cameras in minutes, providing plug & play convenience.【Option 1. Setup via Reolink App】【Step 1 Set Up Devices】Connect the NVR to your router and a power outlet, and turn it on. Next, connect your camera to any PoE port using an Ethernet cable.【Step 2 Download Reolink App】Scan the QR code in the Operational Instructions to download the Reolink App.【Step 3 Complete Configuration】Scan the QR code on the NVR with the Reolink App and follow the instructions to finish setup.【Option 2. Setup via Monitor/TV】【Step 1 Set up the NVR】Connect the NVR to your router and a monitor/TV, then to a power outlet and turn it on.【Step 2 Set up the Camera】Connect your camera to any PoE port on the NVR with an Ethernet cable.【Step 3 Follow the Initiation Instructions】When you power on the NVR for the first time, follow the instructions to complete the basic configuration.
Features
Heatmap: Traffic Made Visible
Visualize the activity pattern in your area. Turn the flow rate into sensible insights: the density of people, vehicles, and animals in a specific area is shown in different colors to see it in a split second. With Heatmap analysis, you can arrange the layout of your store as well as adjust security measures.
Uninterrupted Transmission via PoE
Free from complex cabling, install your cameras more flexibly at a lower cost. Connect the camera to the RLN4E with only one Ethernet cable that guarantees a stable power supply while transmitting data without delay. Experience the unmatched reliability of PoE connection.
Your Security, Be Reliable & Smart
Video Encryption: Enjoy advanced data protection with the exclusive encryption algorithm of RLN4E. Without permission, any attempts to access the storage are prevented, even if your device or microSD card is stolen.
Smart Video Compression
The multiple compression methods of intelligent H.265+/H.265/H.264 allow for efficient memory occupation as well as backward compatibility.
Live View & Remote Access
Enjoy the freedom to view live feed and control your cameras wherever you are. Stay connected to your home or business anytime, anywhere.
Specifications
- BrandReolinkModel NumberRLN4EProduct NameReolink RLN4E 6-Channel NVR Built-In 4 PoE Ports and Local AI Video Search Up to 8TB HDD 16MP, Heatmap & Data EncryptionColorWhiteCamera ConnectivityWiredCamera CompatibilityReolink
Reviews
This product doesn't have any reviews yet.
Compare similar products
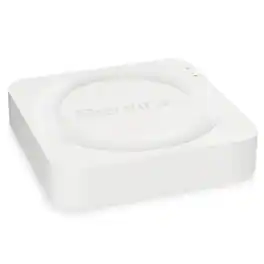
【Unlock Next-Gen Power with AI Video Search】Instead of scrubbing manually through hours of video, just type in some simple keywords for example, a person in blue to instantly find the moment that matters most. Whether it's a person or an object, ReoNeura will search it for you, ensuring quick and precise results. Enjoy the convenience of AI Video Search, all while keeping your data secure and private, free of monthly fees. All Reolink cameras compatible with RLN4E (including PoE cameras, battery-powered Wi-Fi cameras, and plug-in Wi-Fi cameras) realize AI Video Search, though the cameras themselves do not support AI Video Search.【Your Security Center, Be Versatile】The RLN4E with 4 PoE ports supports up to 4 PoE cameras and 2 Wi-Fi cameras, plug-in or battery-powered, which could serve as a security center covering multiple scenes. Enjoy complete protection provided by RLN4E by managing all cameras at one stop. 【microSD Card】A built-in microSD card slot supports up to a 512GB microSD card, enabling offline storage that can keep your recordings safe even without a network connection. *Note: If you use a microSD card from other brands, please make sure its read or write speed is Class 10 or above.【HDD Storage】The RLN4E supports up to an 8TB 3.5''/2.5'' HDD (HDD not included) to keep recordings from all connected cameras. All the data is well stored in the NVR. Cast away your worries about data loss, and enjoy peace of mind. *Note: If purchasing an HDD separately, you must use a surveillance-grade HDD rated at 5400 RPM spindle speed or lower.【Quick Setup, Plug & Play】Equipped with Power over Ethernet technology, this NVR can connect to Reolink cameras in minutes, providing plug & play convenience.【Option 1. Setup via Reolink App】【Step 1 Set Up Devices】Connect the NVR to your router and a power outlet, and turn it on. Next, connect your camera to any PoE port using an Ethernet cable.【Step 2 Download Reolink App】Scan the QR code in the Operational Instructions to download the Reolink App.【Step 3 Complete Configuration】Scan the QR code on the NVR with the Reolink App and follow the instructions to finish setup.【Option 2. Setup via Monitor/TV】【Step 1 Set up the NVR】Connect the NVR to your router and a monitor/TV, then to a power outlet and turn it on.【Step 2 Set up the Camera】Connect your camera to any PoE port on the NVR with an Ethernet cable.【Step 3 Follow the Initiation Instructions】When you power on the NVR for the first time, follow the instructions to complete the basic configuration.
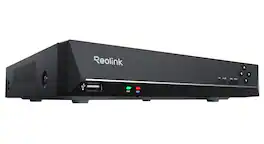
【Centralized Security Camera Management】The PoE NVR Reolink RLN8-410 brings all your security cameras together in one system. Easily monitor live feeds, manage recordings, and play back footage from a single interface. Whether for home or business security, it simplifies multi-camera management and helps you keep an eye on your entire property. *The RLN8-410 (hardware version N7MB01) supports up to 12 cameras: 8 PoE or plug-in Wi-Fi cameras plus 4 battery-powered Wi-Fi cameras, or 12 battery-powered Wi-Fi cameras.【Wide Compatibility with Reolink Security Cameras】The RLN8-410 supports a wide range of Reolink security cameras, including PoE, plug-in Wi-Fi, and battery-powered Wi-Fi models. With support for up to 12 cameras, you can combine different camera types in one system to suit different installation needs, without being limited to a single connection type. *To connect with battery Wi-Fi cameras, make sure the NVR hardware version is N7MB01, the cameras are current models on sale, and your Reolink app is updated to the latest version.【Quick Setup, Plug & Play】Equipped with Power over Ethernet technology, this Reolink NVR can connect to Reolink cameras in minutes, providing plug & play convenience.【Step 1 Set up the NVR】Connect the NVR to your router and a monitor/TV, then to a power outlet and turn it on.【Step 2 Set up the Camera】Connect your camera to any PoE port on the NVR with an Ethernet cable.【Step 3 Follow the Initiation Instructions】When you power on the NVR for the first time, follow the instructions to complete the basic configuration.【View Live Anytime, Locally or Remotely】The RLN8-410 NVR supports both local and remote live viewing. For local monitoring, connect the NVR to a monitor or TV to view multiple camera feeds without an internet connection. For remote access, use the Reolink App or Client to check live footage from your phone or computer, even when you're away from the property.
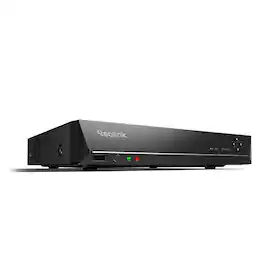
【Your Security Center】Seamlessly integrating and managing all connected cameras, the RLN16-410 NVR provides unified surveillance that adapts to various environments, whether at the office, or at home. You can easily oversee your entire property from a single interface and enjoy continuous, all-around protection hassle-free. *The RLN16-410 (hardware version N6MB01) supports up to 24 cameras: 16 PoE or plug-in Wi-Fi cameras plus 8 battery-powered Wi-Fi cameras, or 24 battery-powered Wi-Fi cameras.【Expandable Local Storage】With an expandable storage up to 16TB (2×8TB SATA), the NVR eliminates storage worries, making it ideal uninterrupted continuous monitoring from multiple cameras.【Seamless Integration with the Reolink Ecosystem】The RLN16-410 offers outstanding expandability and is compatible with various Reolink cameras — be it PoE, plug-in Wi-Fi or battery-powered Wi-Fi models. Customize your surveillance system according to your needs by connecting up to 24 devices to the NVR. Your system, your choice. * To connect with battery Wi-Fi cameras, make sure the NVR hardware version is N6MB01, the cameras are current models on sale, and your Reolink app is updated to the latest version.【Quick Setup, Plug & Play】Equipped with Power over Ethernet technology, this NVR can connect to Reolink cameras in minutes, providing plug & play convenience.【Step 1 Set up the NVR】Connect the NVR to your router and a monitor/TV, then to a power outlet and turn it on.【Step 2 Set up the Camera】Connect your camera to any PoE port on the NVR with an Ethernet cable.【Step 3 Follow the Initiation Instructions】When you power on the NVR for the first time, follow the instructions to complete the basic configuration.
【Manage Up to 36 Cameras with One Reolink NVR】Eliminate the need to split your security system across multiple recorders. The Reolink RLN36 NVR brings up to 36 PoE, Wi-Fi, or battery-powered camera feeds together into a single, intuitive dashboard on the Reolink App or Client. Manage, monitor, and configure all your indoor and outdoor cameras from one unified hub and mobile interface.【Always Recording, Always Ready】The Reolink RLN36 NVR delivers continuous 24/7 video recording and up to 48TB of subscription-free local storage across three internal SATA hard drive bays.【Continuous 24/7 Video Surveillance】Never miss a critical moment. By recording continuously 24 hours a day, the RLN36 captures everything that happens on your property—allowing you to go back and examine unflagged activity, background movements, or context before and after an incident.【Up to 48TB Local HDD Capacity】Equipped with 3 internal SATA hard drive slots supporting up to 16TB each, the RLN36 scales up to a 48TB total capacity. This local-first setup gives high-channel installations the storage headroom needed for weeks or months of continuous video history without monthly service fees.【Connect External Sensors with 8 Alarm Inputs and 4 Alarm Outputs】【Quick Plug & Play Setup and Installation】Get your Reolink RLN36 36-channel NVR operational in three simple steps: powered local setup, camera network connection, and instant mobile pairing. For detailed installation instructions, refer to the Reolink RLN36 manual.【Step 1 Set Up and Power the NVR】Connect the RLN36 to your local router using an Ethernet cable, and attach a monitor or TV via HDMI/VGA. Plug the power cable into an electrical outlet and flip the rear power switch on.【Step 2 Connect Security Cameras to the System】Connect an external PoE switch to any standard network port on the RLN36 harness, then plug your PoE cameras into the switch. For wireless setups, connect Reolink Wi-Fi cameras to the same local network or sync them directly to the NVR interface.【Step 3 Initialize and View Feeds on the Reolink App】Open the Reolink App on your mobile device, tap the + icon, and scan the QR code located on the RLN36 housing. Follow the on-screen prompts to set a master password and access live video feeds.
Specs
Be the first to ask a question.
We’ll try to get your question answered within 24 hours by a Best Buy customer or brand representative.
More to consider
eufy (Add-On) PoE Turret Cam E41, 4K UHD, 122° FOV,Pure Color Night, 24/7 Recording, AI Human/Vehicle/Pet, Strobe,Plug & Play
Black Friday Deal$99.99The price was $129.99eufy (Add-On)PoE Bullet Cam E40, 4K UHD, 122° FOV,Pure Color Night, 24/7 Recording, AI Human/Vehicle/Pet,Strobe, Plug & Play
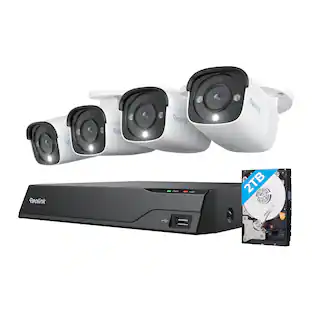
Black Friday Deal$99.99The price was $129.99Reolink 8-Channel, 4 - Bullet Camera Indoor/Outdoor 4K 8MP PoE 2TB Smart NVR Security Surveillance System
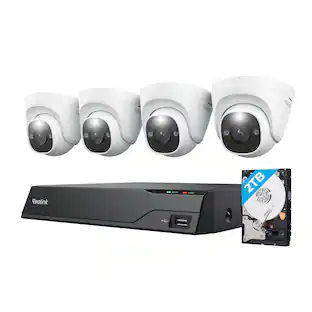
$549.99The price was $699.99Reolink 8-Channel, 4 - Dome Camera Indoor/Outdoor 4K 8MP PoE 2TB Smart NVR Security Surveillance System
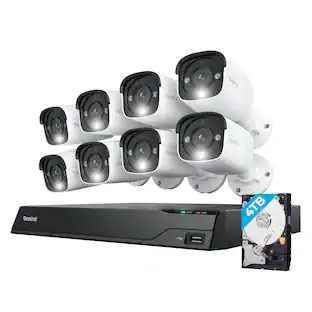
$549.99The price was $699.99Reolink 16-Channel, 8 - Bullet Camera Indoor/Outdoor 4K 8MP PoE 4TB Smart NVR Security Surveillance System
$999.99The price was $1,199.99eufy 4K NVR S4 Max, PoE Wired, 24/7 Recording, Triple‑Lens Bullet‑PTZ, 360° PTZ, 16CH, Cross‑Cam, 8× Zoom, Smart Search, 2TB
Black Friday Deal$999.99The price was $1,499.99eufy 4K NVR S4 Max & 2 PoE Cam S4, PoE Wired, 24/7 Recording, Triple‑Lens Bullet‑PTZ, 360° PTZ, 16CH, Cross‑Cam, 8× Zoom, 2TB
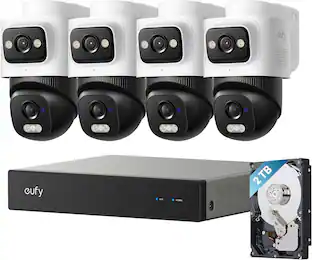
$1,399.99The price was $1,849.99eufy Security NVR System E50,4-Cam Kit,4K Dual-Lens Bullet-PTZ (2TB HDD)
$759.99The price was $1,199.99





Control, Comfort, Convenience Sponsored
eufy eufyCam S4 Triple Lens Wireless Solar Security Camera with 360° View, Auto Tracking, No Monthly Fees
$259.99The price was $349.99eufy eufyCam E40 2-Cam Kit (HomeBase S380) Outdoor Wireless Solar Security Camera, Local Storage, No Monthly Fee
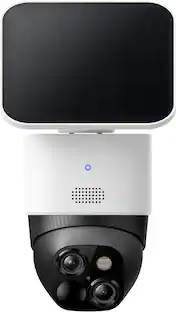
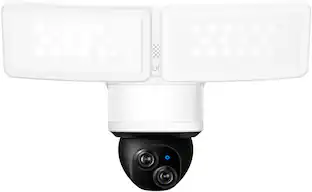
$294.99The price was $379.99eufy E340 Outdoor Wired 3K PTZ Security Camera with Floodlights and Dual Lens
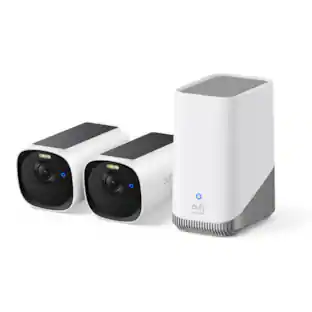
$149.99The price was $219.99eufy eufyCam 3, 2-Outdoor Wireless 4K Solar Powered Security Cameras with HomeBase 3
$299.99The price was $469.99eufy SoloCam S220, 2-Outdoor Wireless 2K Solar Powered Security Cameras with Homebase 3
$264.99The price was $329.99



Keep exploring
eufy 4K NVR S4 Max & 2 PoE Cam S4, PoE Wired, 24/7 Recording, Triple‑Lens Bullet‑PTZ, 360° PTZ, 16CH, Cross‑Cam, 8× Zoom, 2TB
$1,399.99The price was $1,849.99eufy (Add-On) PoE Turret Cam E41, 4K UHD, 122° FOV,Pure Color Night, 24/7 Recording, AI Human/Vehicle/Pet, Strobe,Plug & Play
Black Friday Deal$99.99The price was $129.99eufy Security NVR System E50,4-Cam Kit,4K Dual-Lens Bullet-PTZ (2TB HDD)
$759.99The price was $1,199.99eufy (Add-On)PoE Bullet Cam E40, 4K UHD, 122° FOV,Pure Color Night, 24/7 Recording, AI Human/Vehicle/Pet,Strobe, Plug & Play
Black Friday Deal$99.99The price was $129.99eufy 4K NVR S4 Max & 4 PoE Cam S4, PoE Wired, 24/7 Recording, Triple‑Lens Bullet‑PTZ, 360° PTZ, 16CH, Cross‑Cam, 8× Zoom, 2TB
$1,799.99The price was $2,049.99eufy 4K NVR S4 Max, PoE Wired, 24/7 Recording, Triple‑Lens Bullet‑PTZ, 360° PTZ, 16CH, Cross‑Cam, 8× Zoom, Smart Search, 2TB
Black Friday Deal$999.99The price was $1,499.99eufy (Add-On) PoE Bullet‑PTZ Cam S4, 4K Triple Lens, 122° FOV, 360° Pan/Tilt, 8× Zoom, AI Tracking, Strobe, Color Night, 24/7
Black Friday Deal$229.99The price was $329.99eufy Security NVR System E50, 8-Cam Kit, 4K Dual-Lens Bullet-PTZ, 4TB HDD
$1,199.99The price was $1,899.99