A:AnswerIt can work as a corner mount if you have a smaller TV. If you have a larger TV I'd recommend getting a full motion mount with more than 13" of extension. The more extension you have on the mount, the larger the TV can be in size to be placed in the corner. If you have any additional questions feel free to give our customer support team a shout at info@sanus.com we are happy to help.
Thanks,
- Haydn @ SANUS
A:AnswerHey Charlie,
Yes this mount should be compatible with your specific TV. This mount can support your TVs 300x200mm VESA pattern and your TV is under the mounts 125lbs weight limit.
Thanks,
- Haydn @ SANUS
A:AnswerHey MP,
Yes this mount should be compatible with your Sony. This mount can support your TVs 300x300mm VESA pattern and your TV is well under the mounts 125lbs weight limit.
Thanks,
- Haydn @ SANUS
A:AnswerHey KODA,
Yes this mount should be compatible with your specific TV. It will support your TVs 200x200mm VESA pattern and your TV is well under the mounts 125lbs weight limit.
Thanks,
- Haydn @ SANUS
A:AnswerHi Deecares,
Without the specific model number of your TV, I cannot for sure confirm compatibility. But after checking out a couple of different 82" LGs this mount should be compatible. The most important things to check for are, is your TV under this mount 125lbs weight limit and does it have a compatible VESA pattern (this mounts compatible with 200 x 200, 300 x 200, 300 x 300, 400 x 300, 400 x 400, 600 x 400mm patterns).
Thanks,
- Haydn @ SANUS
A:AnswerHi Hank,
Yes, this mount should be compatible with the beam mount. It attaches to the VESA pattern of your TV. The TV mount and the soundbar mount should overlap over the VESA pattern on the TV. It is drawn out in the IM on our website if you'd like a visual of how it is supposed to be installed.
Thanks,
- Haydn @ SANUS
Thanks,
- Haydn @ SANUS
A:AnswerHi,
Yes, this mount is compatible with your specific TV! It will support your TVs 200 x 200 mm VESA pattern and your TV is well under the mounts 125 lbs weight limit.
Thanks,
- Haydn @ SANUS
A:AnswerHey Shogun,
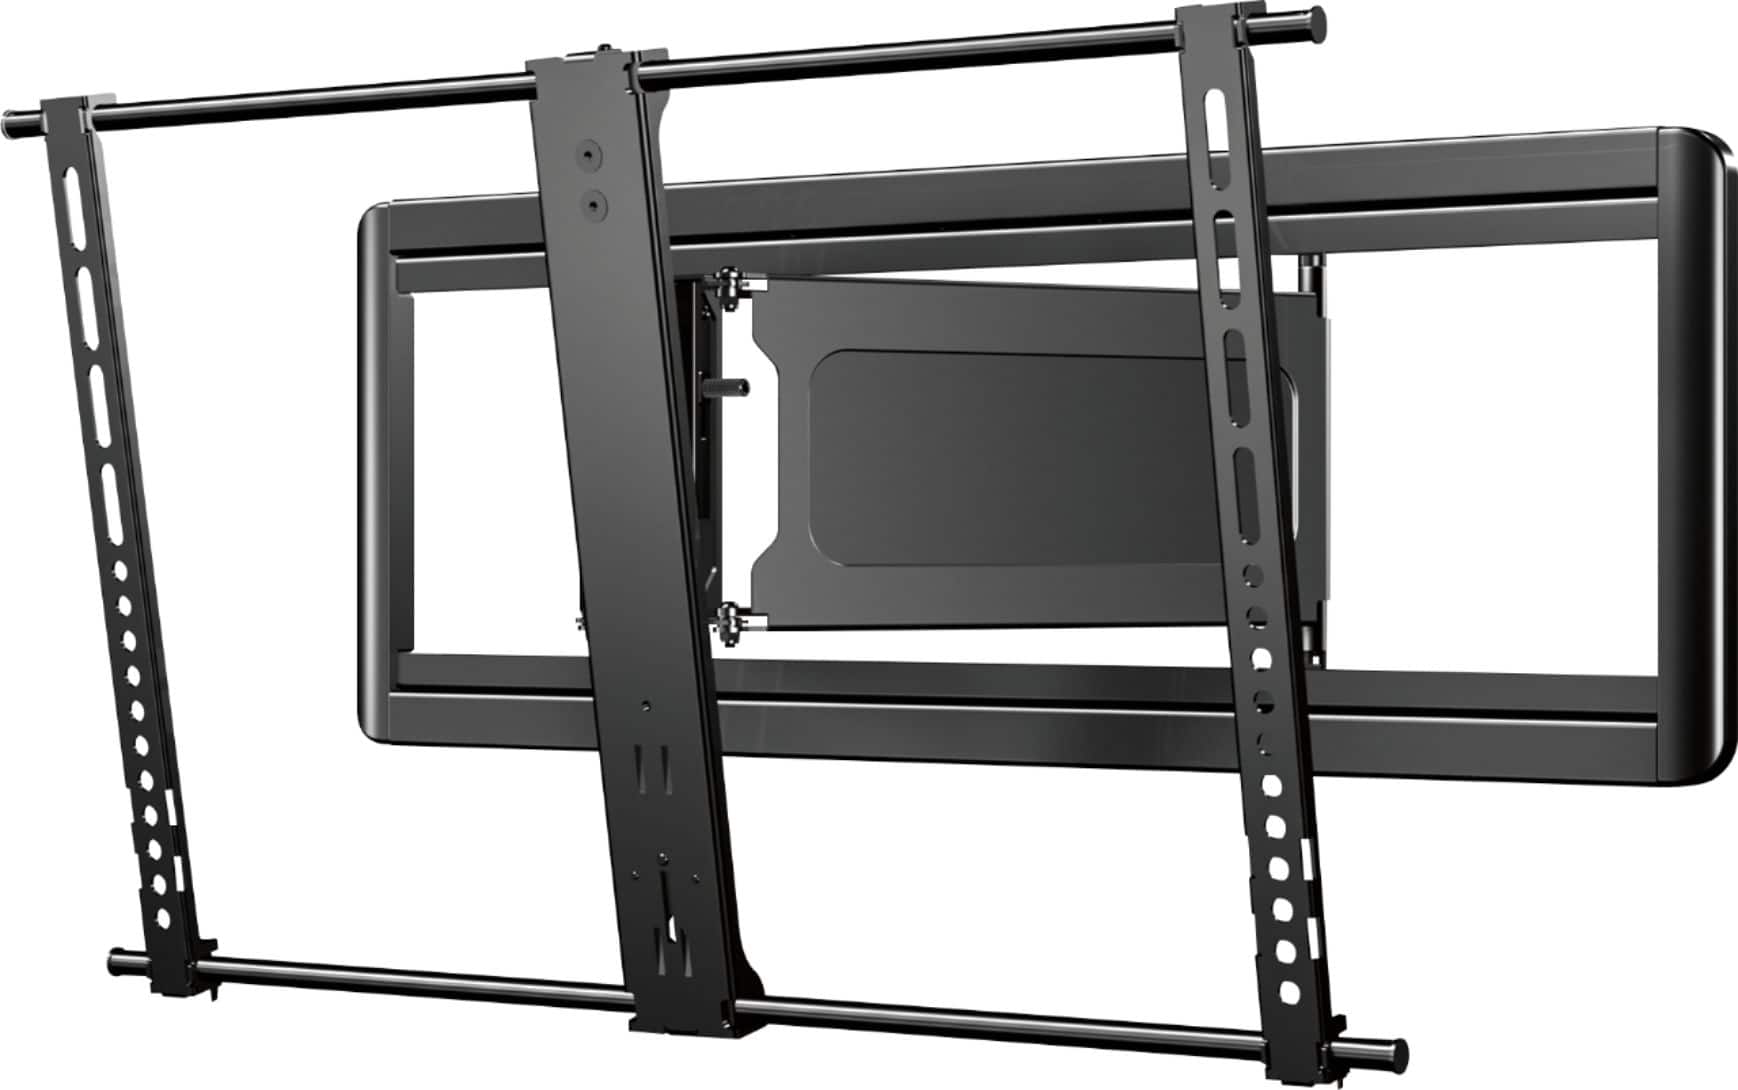
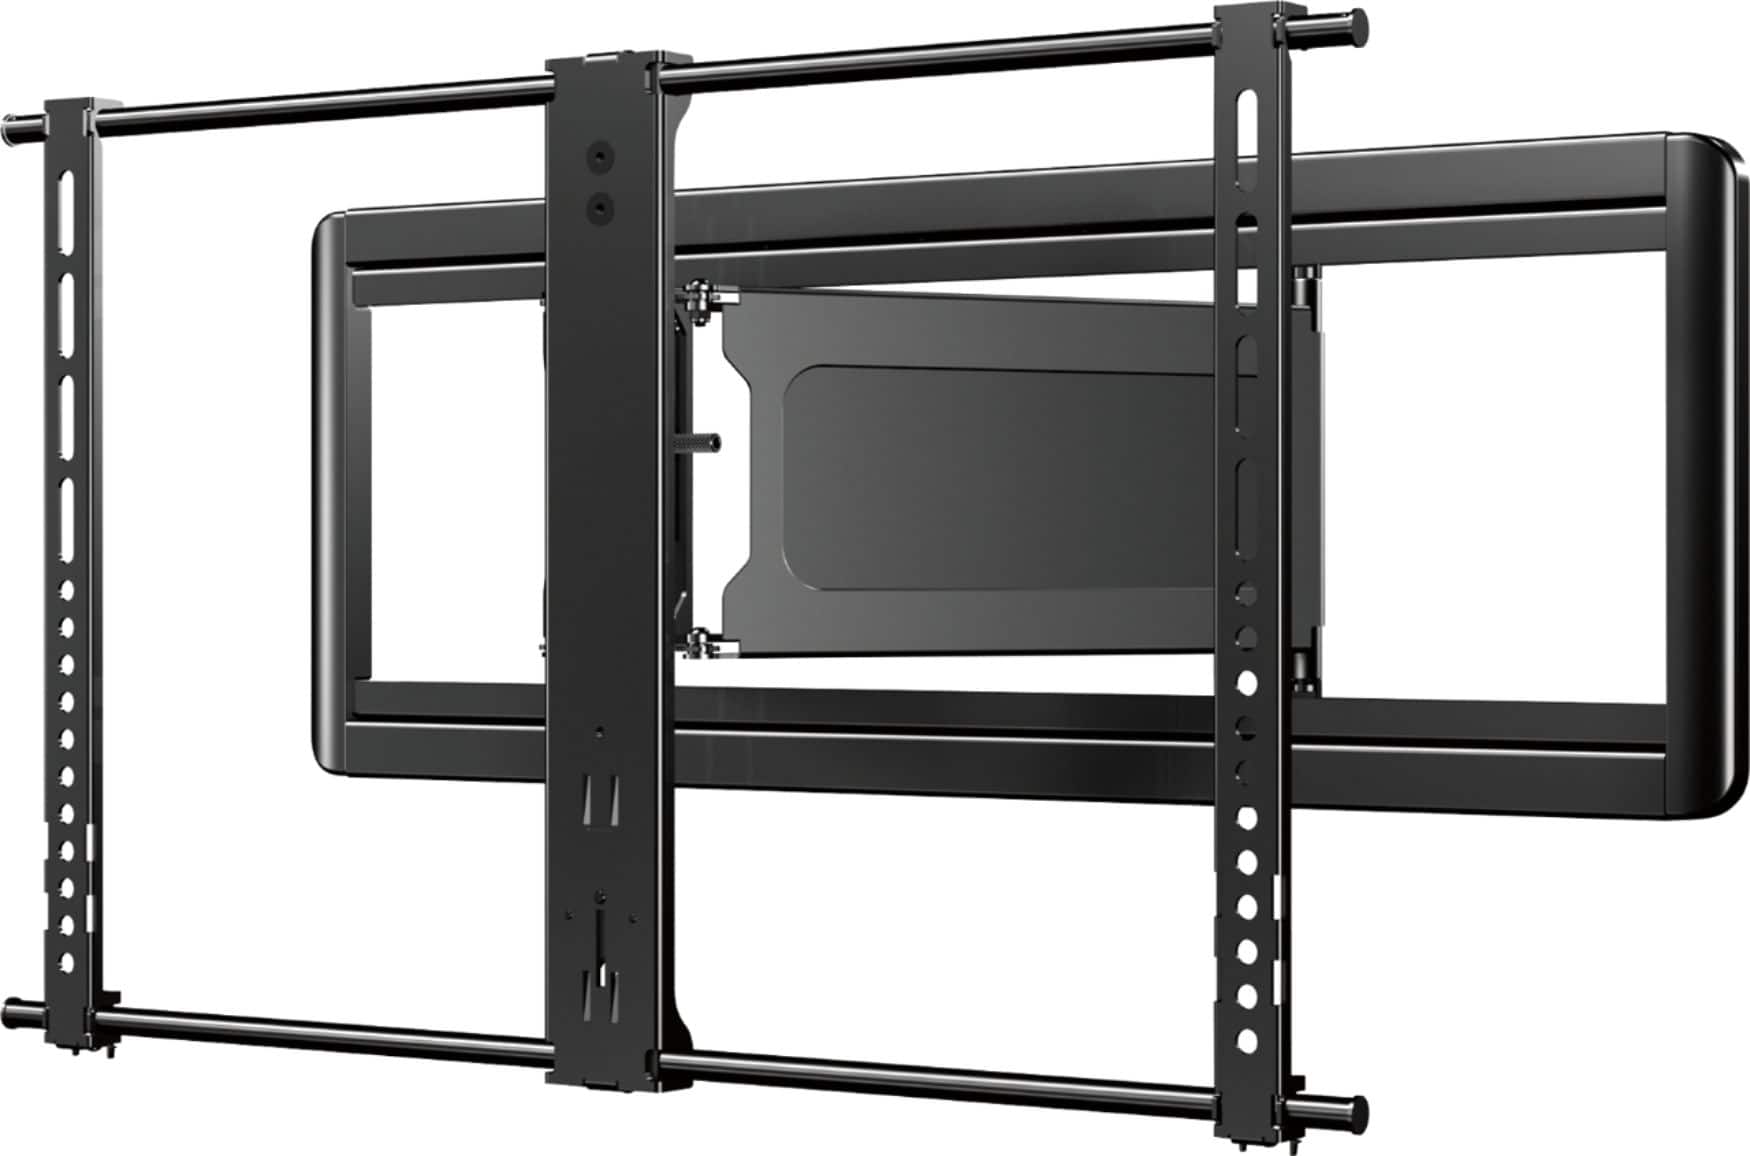
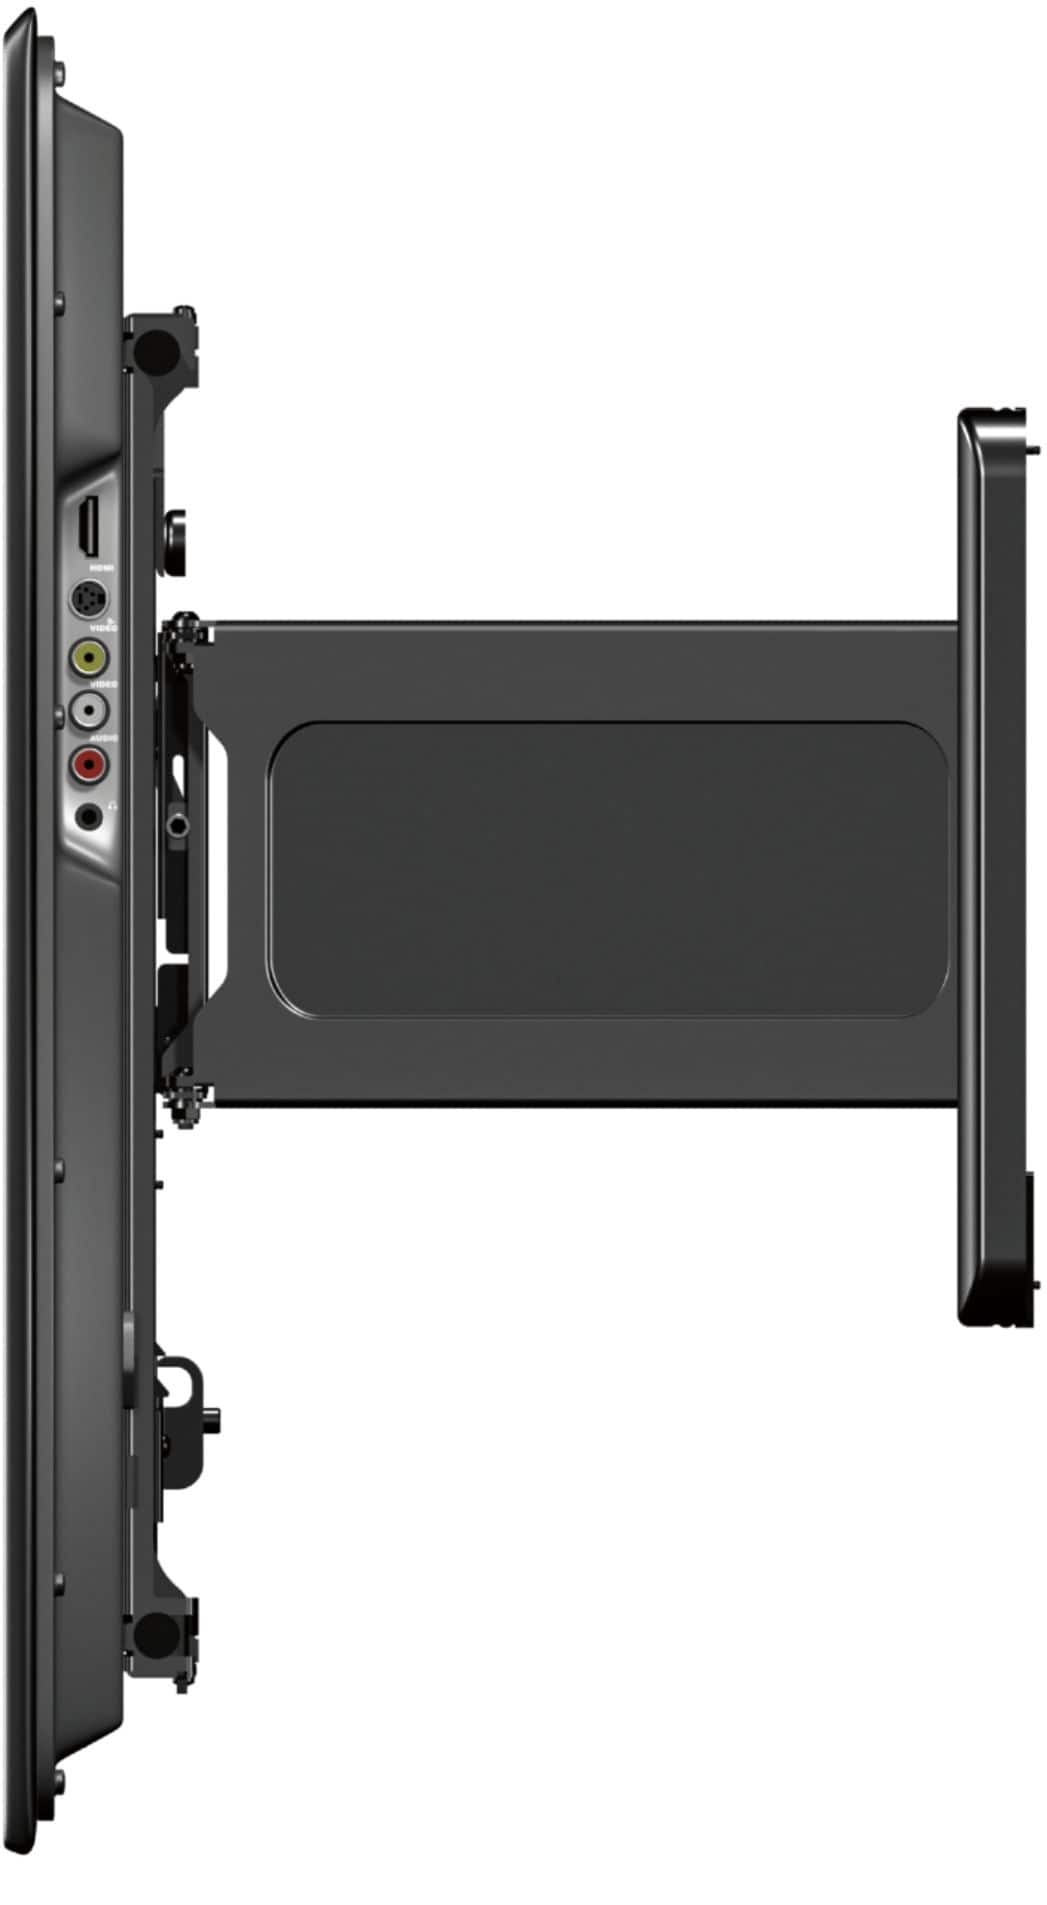
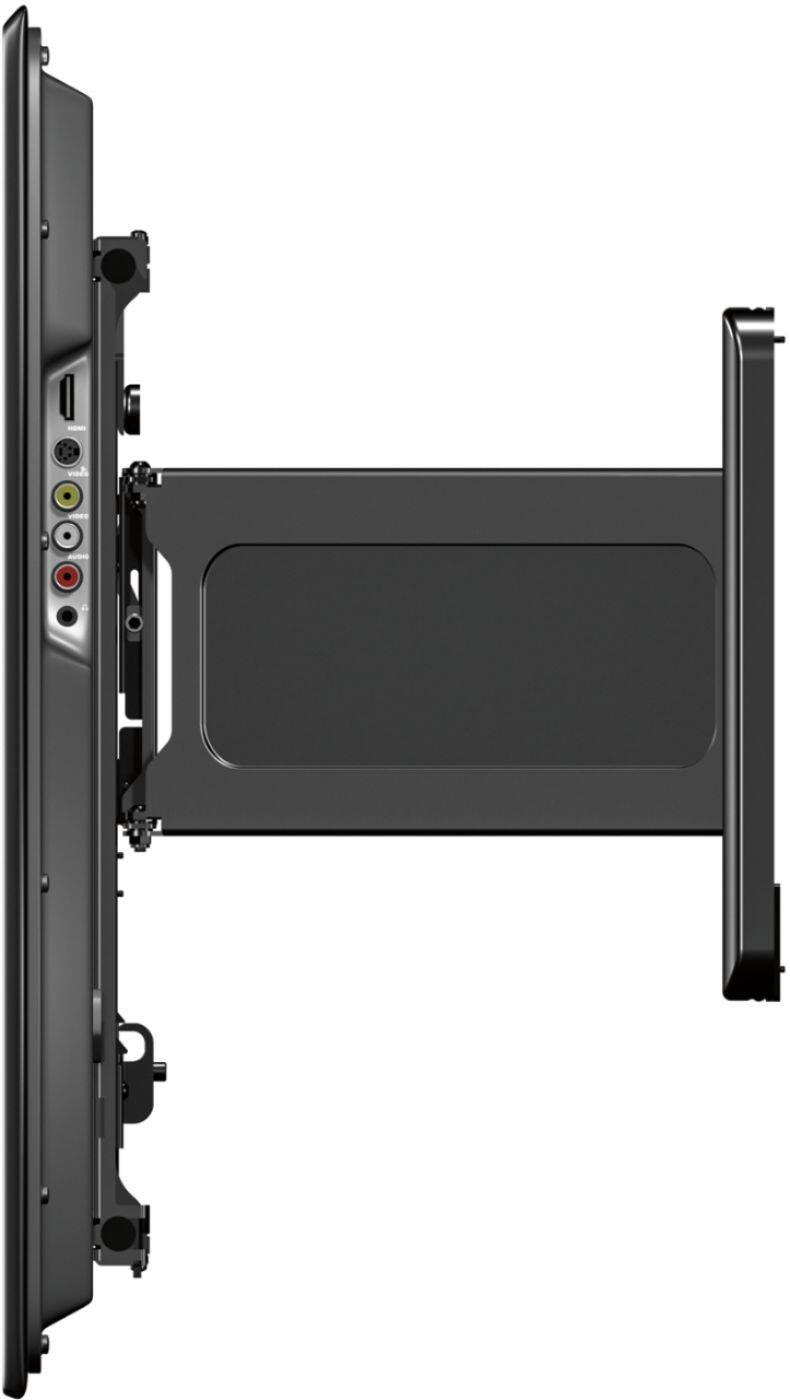
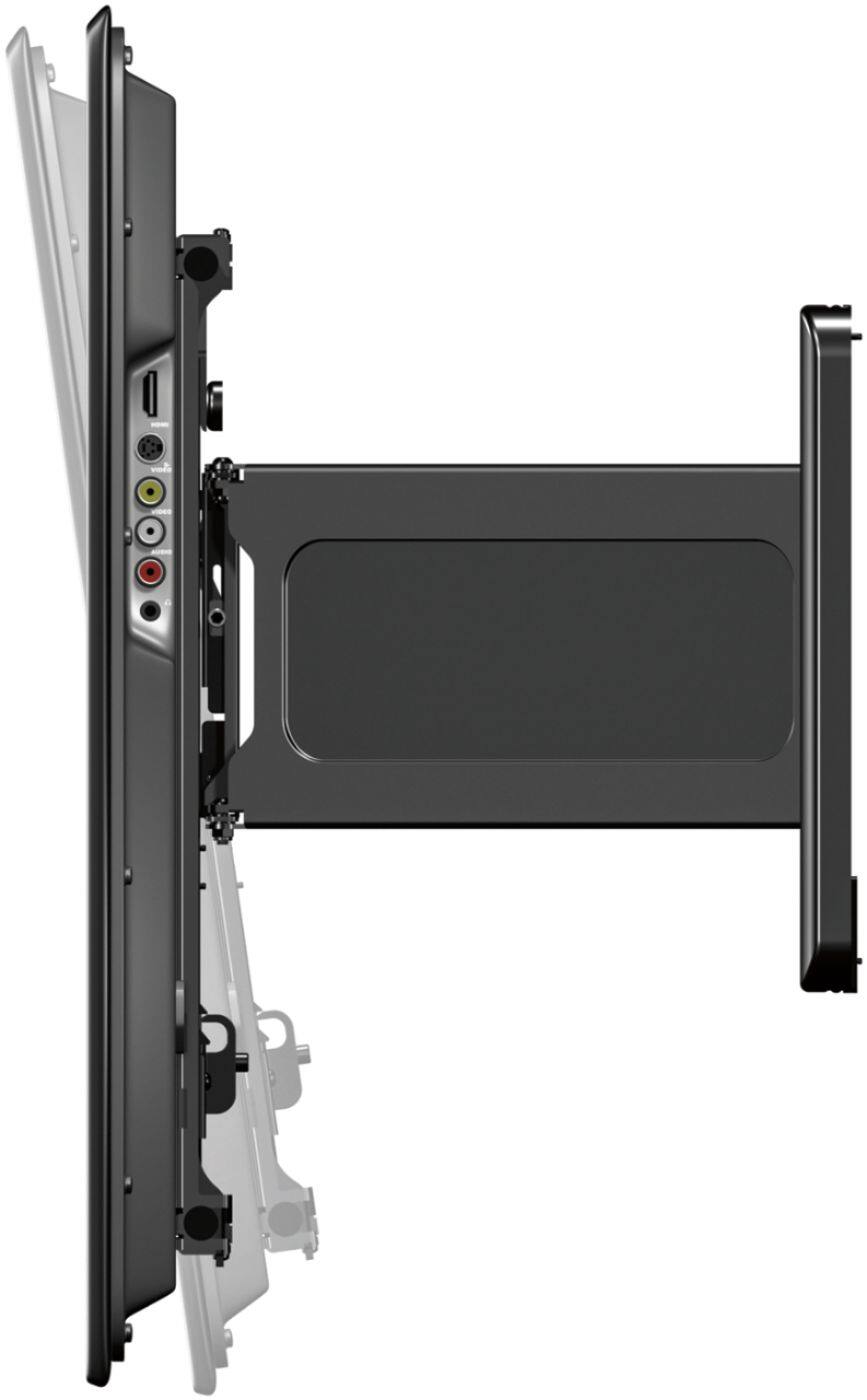
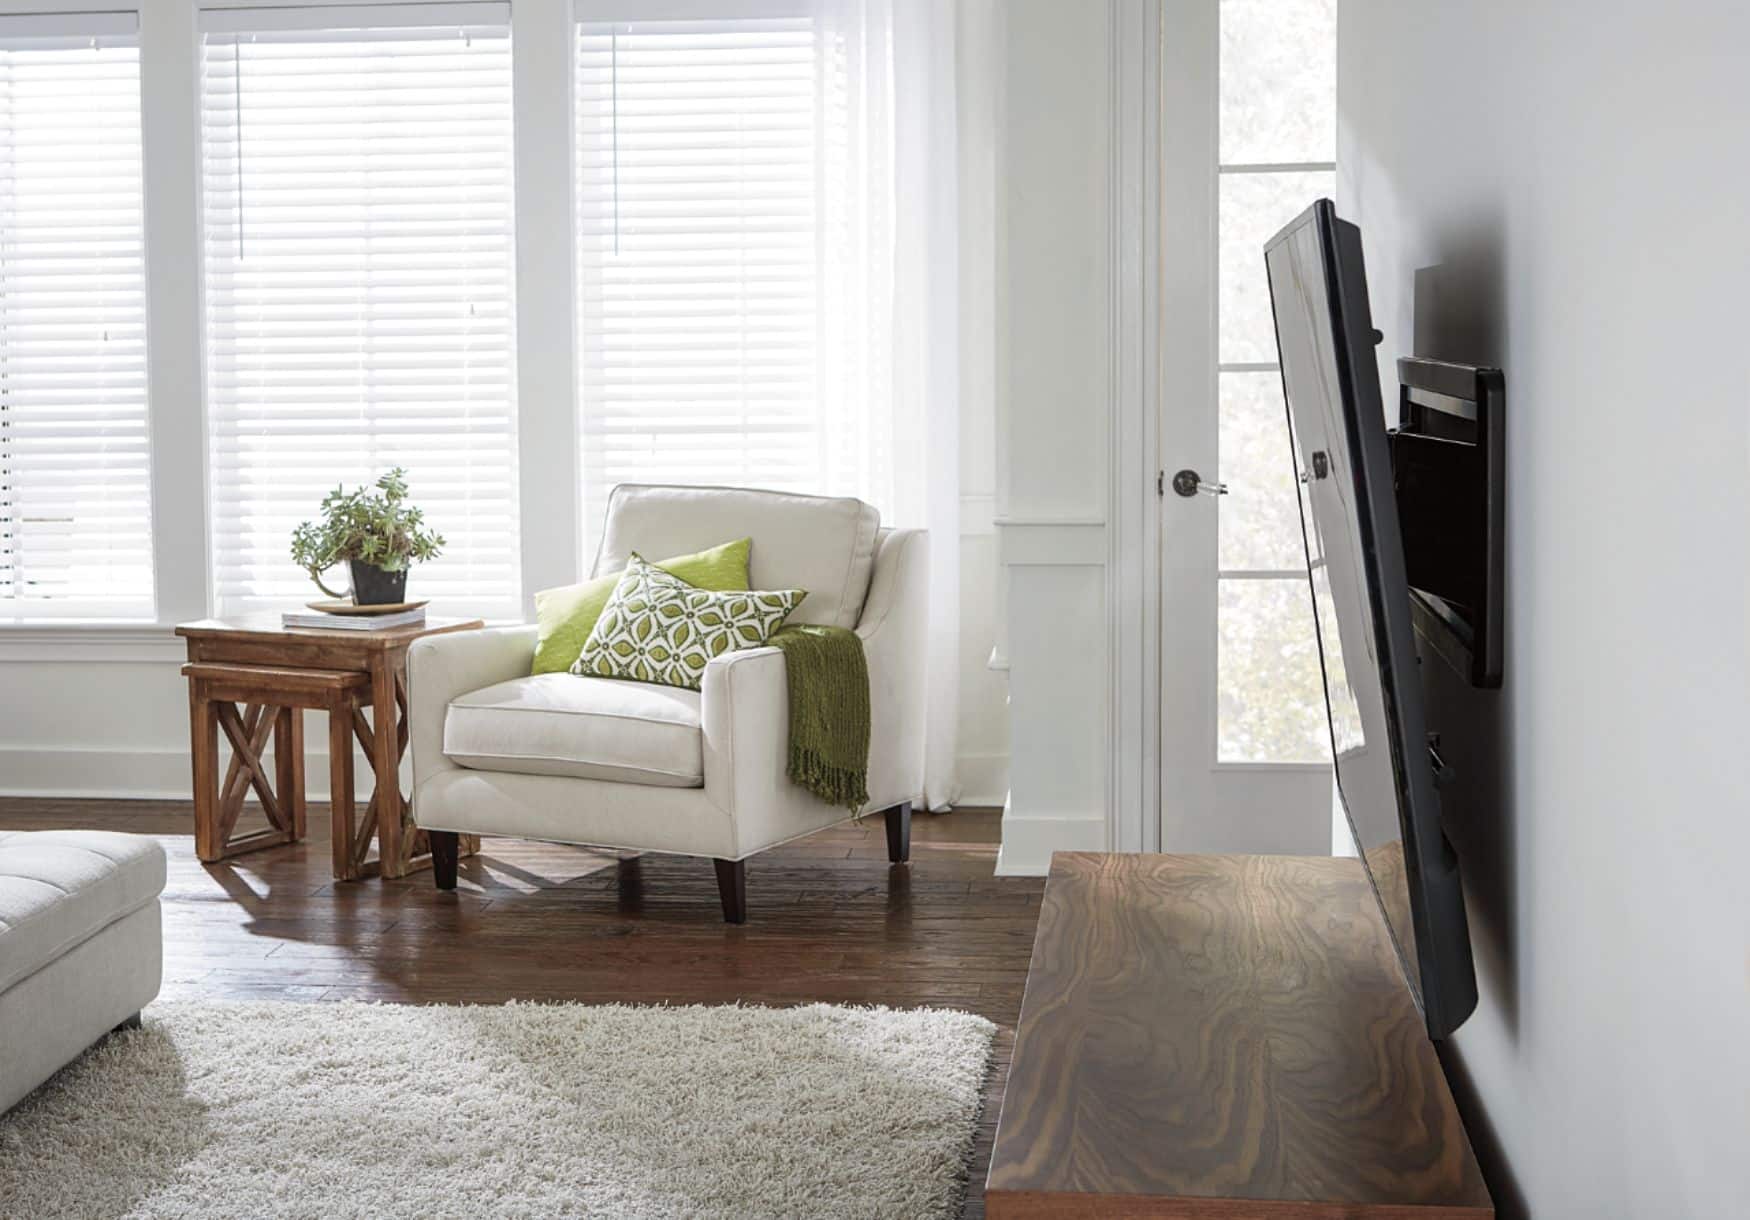
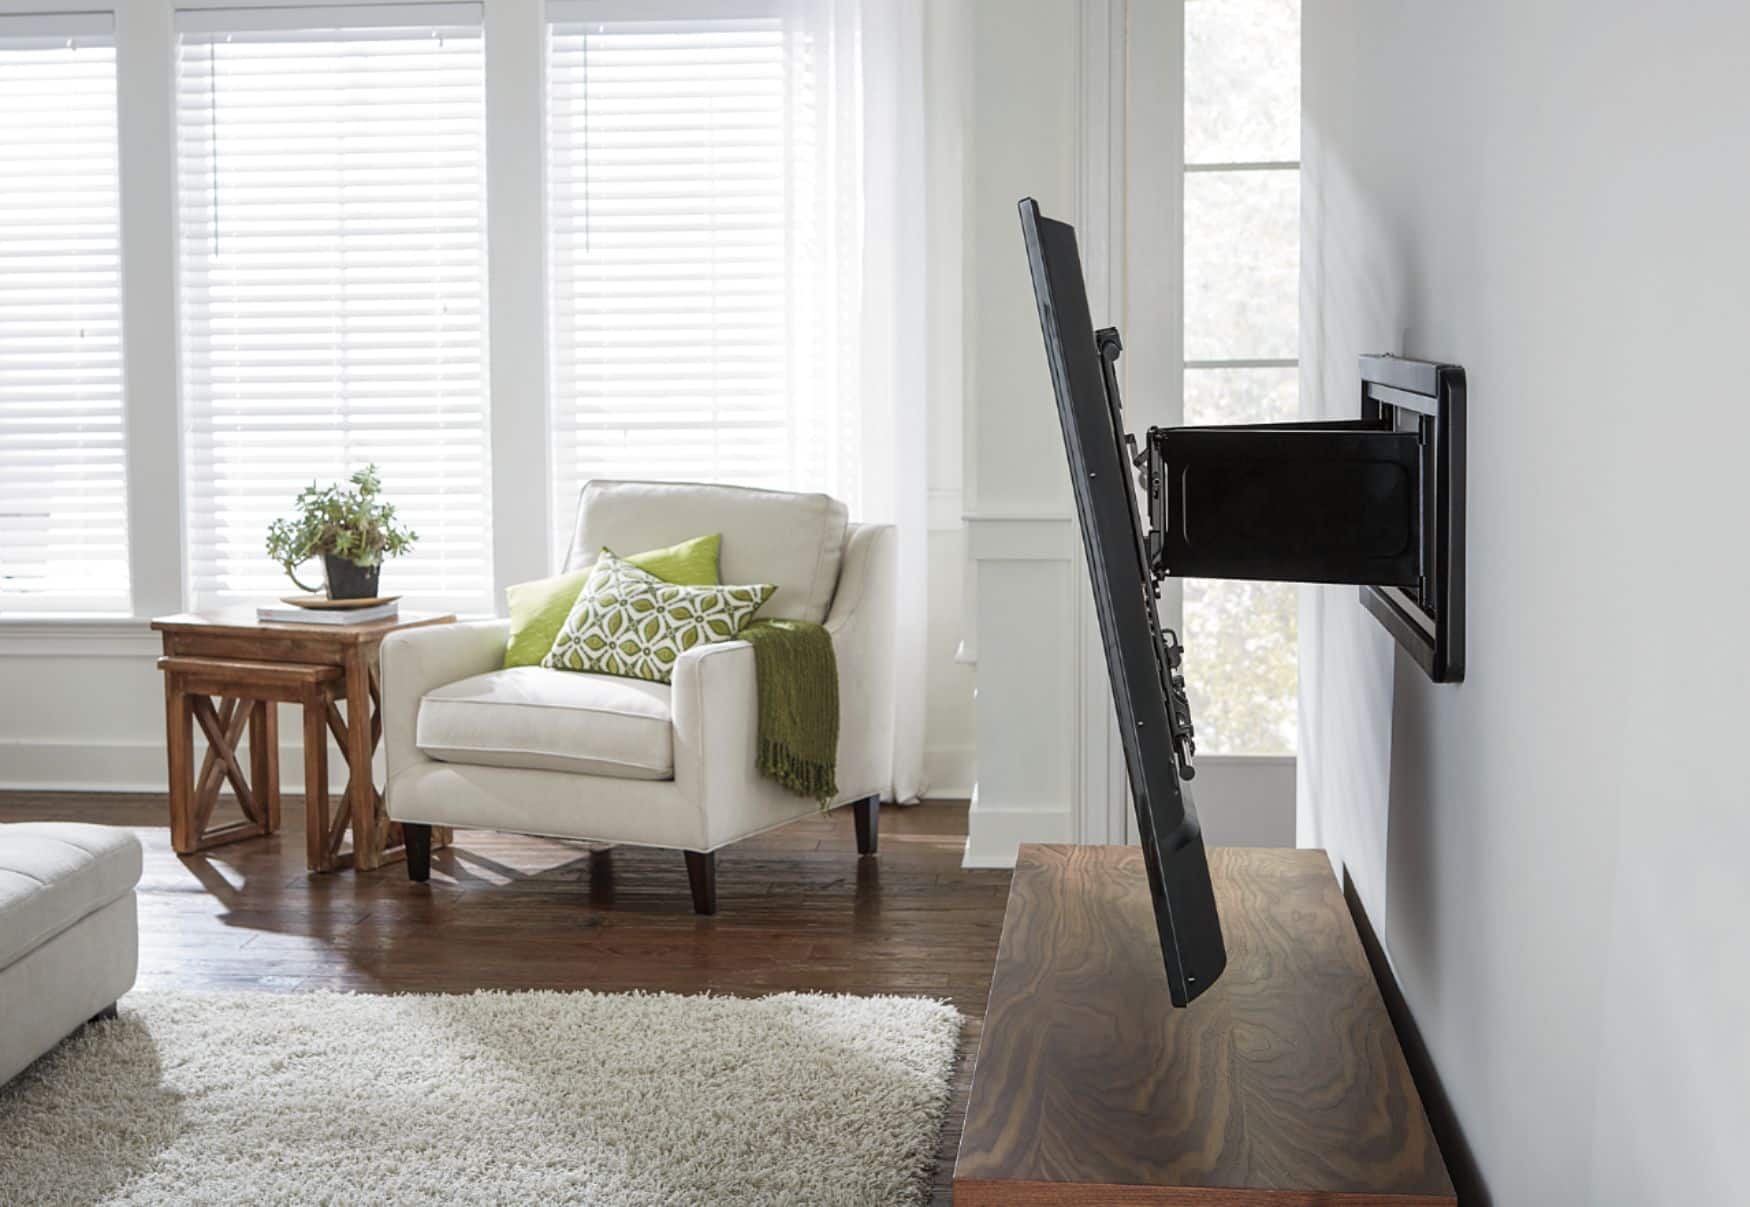
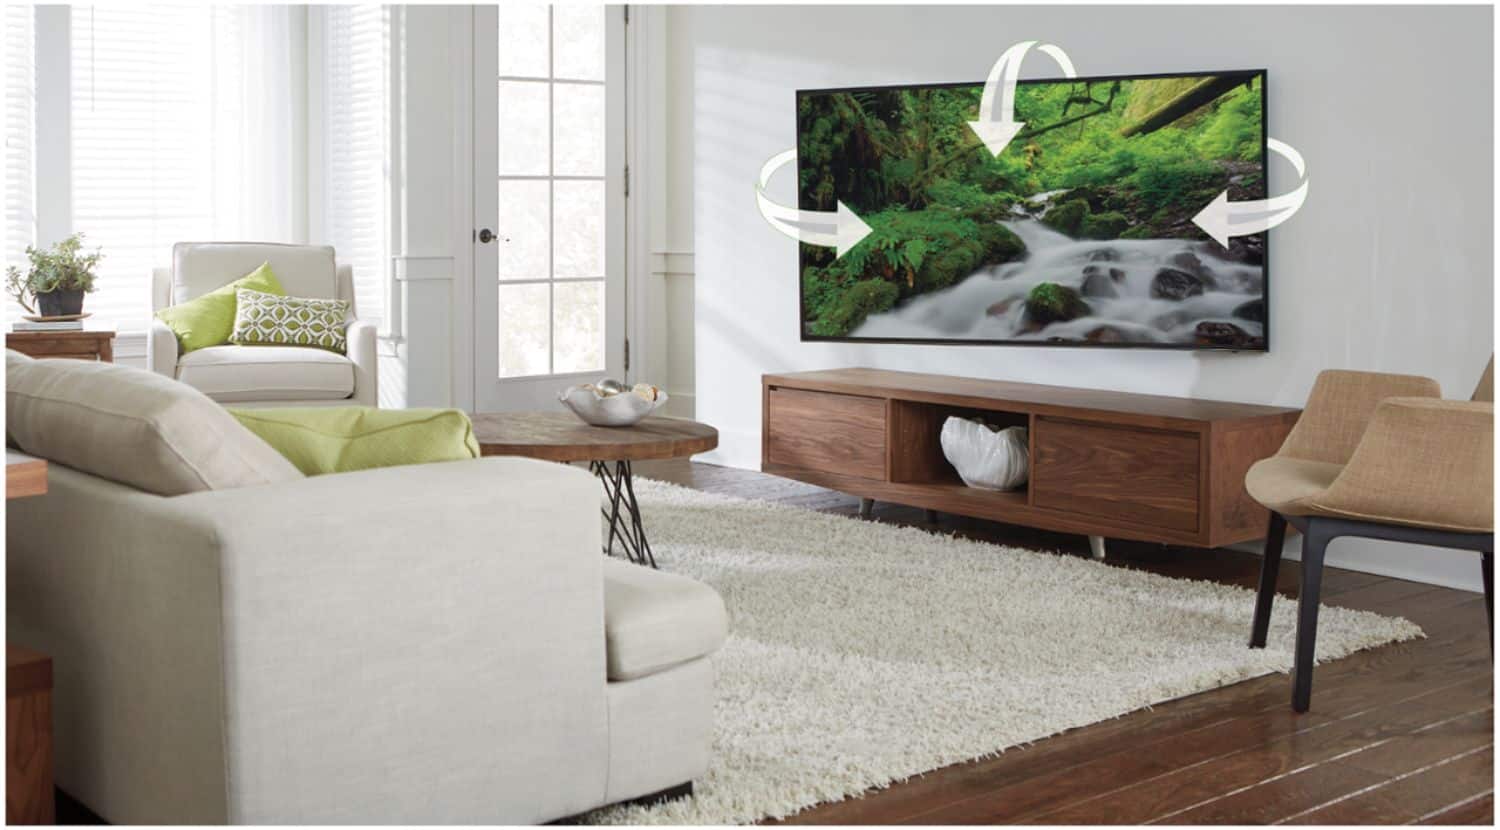
Unfortunately you cannot move the mount up and down with the TV. This mount is able to extend, tilt and swivel.
Thanks,
- Haydn @ SANUS
A:AnswerHi,
Yes it should be compatible. It can support your TVs 600x400mm VESA pattern and it looks like your TV is under the mounts 125 lbs weight limit.
Thanks,
- Haydn @ SANUS
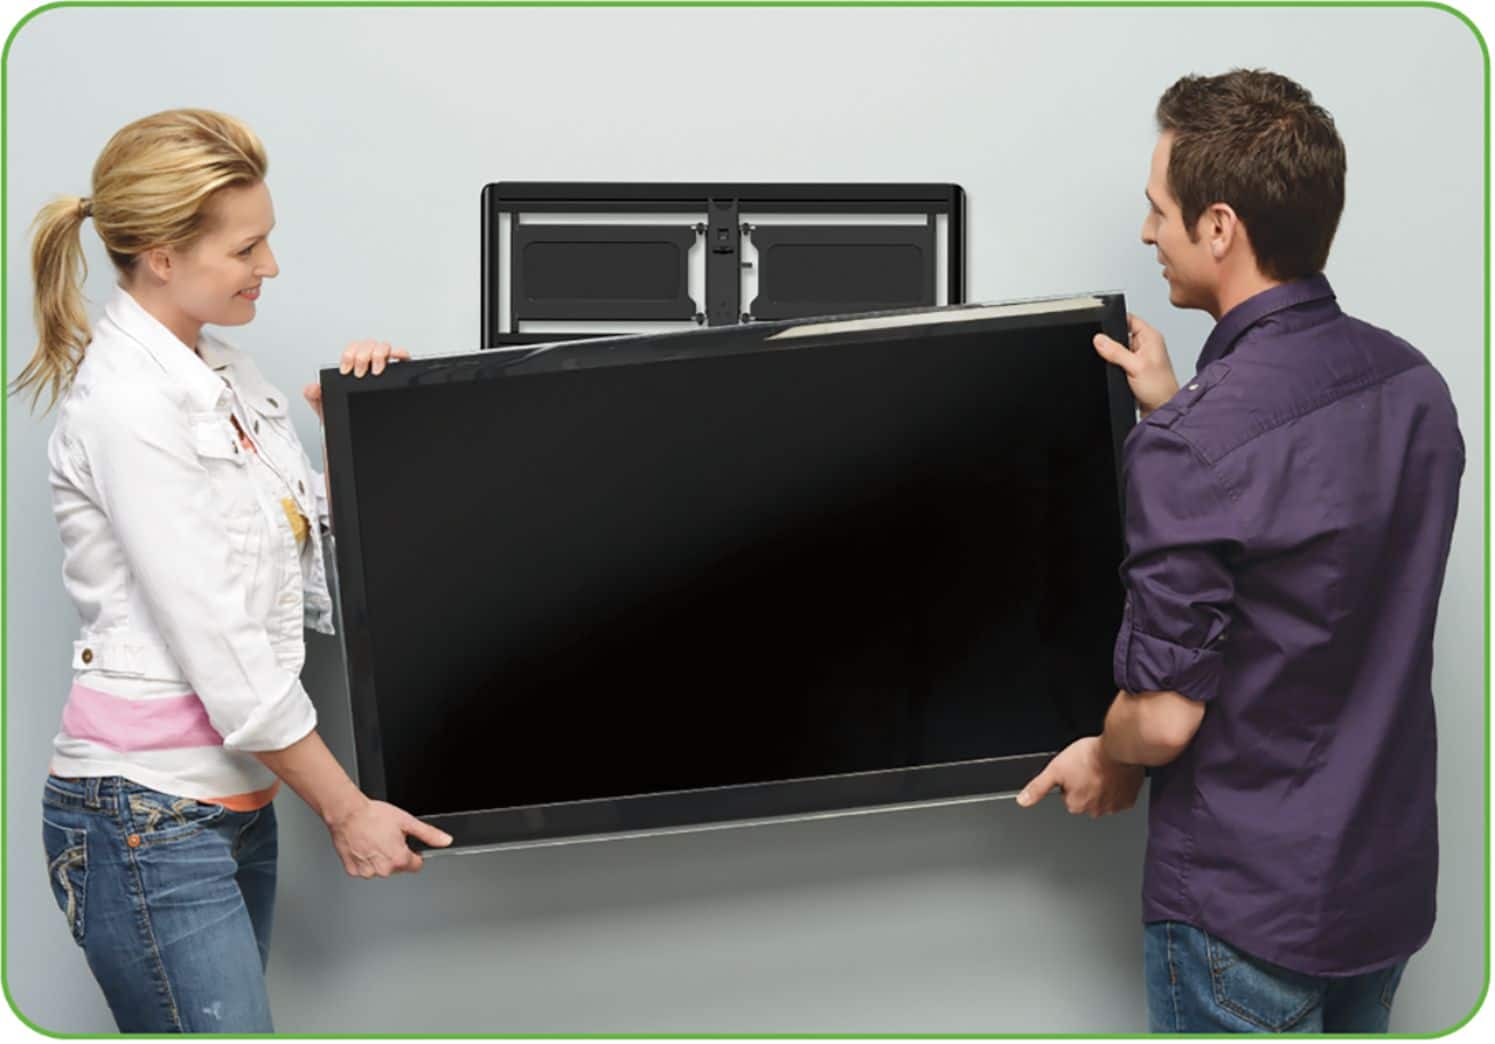
A:AnswerHey John,
1. Disconnect all cables from the TV.
2. Remove the cable holder and securement screw.
3. Pull down on the Release ring to release the TV.
4. Carefully lift the TV from the wall plate/arm assembly.
Thanks,
- Haydn @ SANUS
A:AnswerYes this mount looks to be compatible with both the 77" and 65" LG OLED. With the OLED you may want to give our customer support team a shout and ask for our PIABM adapter bracket we are happy to send it out to you. The PIABM helps center the OLED TV due to their low VESA pattern. You can reach us at info@sanus.com or at 1-800-359-5520.
Thanks,
- Haydn @ SANUS
A:AnswerUnfortunately this mount will not be compatible with your specific monitor. Your monitor has a 100 x 100 mm VESA pattern and the smallest VESA pattern this mount is compatible with is 200 x 200 mm. Check out the BMF320-B1 it will work with your monitors 100 x 100 mm VESA pattern.
Thanks,
- Haydn @ SANUS
A:AnswerI am not sure. I believe the weight is ok but having it extended is the issue. I have a 65 inch and would leave it extended for some time. I never had an issue. My TV only weighed about 50 pounds. I think extending is the issue as that changes the weight distribution and where the pressure is applied to mount.
A:AnswerHey Ben Dover,
Nice name btw. Dover's French right? Sorry to hear about your condition. I wouldn't want to ruin your padded ceiling so I wouldn't recommend mounting to it. Best of luck with the headaches.
Thanks,
- Haydn @ SANUS
A:AnswerHey Danny,
I know exactly what you're talking about. We have the same thing, they're called "Marshmallow Wall". They are great for Insulating against Heat Gain/Loss, but, unfortunately, mounting anything more than pictures frames, (using those Blue or red plastic anchors), forgot about it, you'll rip out a part of the wall and whatever you hang, will drop onto your floor.
"WORK-AROUND" You're going to have to use Two ea. 2 × 4's in the height of you interior wall. (Subtract 3", to account for the top & bottom horizontal framing). Place your TV mount in the exact location where you want it. Mark that position; set it aside. Take one of the 2 × 4's and place it onto the drywall, vertically, (perfectly measured top and bottom), so that it is centered over the left, or right side, of where your TV mount Lag bolts will be screwed in. Now, using a pencil, draw a line on both sides of the 2 × 4 all the way down, from the Ceiling to floor.
(AFTER YOU HAVE CUT YOUR TWO, (2), 2" × 4" BOARDS. USED ONE OF THEM AS THE TEMPLATE FOR THE LINES NEEDED FOR THE CUT-OUT. GO AHEAD AND SET THEM BOTH ASIDE).
*(What you are going to do is remove that strip of drywall, 3.5" wide x how ever tall your Ceiling is
{- less 3 inches}, to allow for the framing on Top and Bottom).
Note: These new Marshmallow Insulated Walls are fabricated utilizing a combination of exothermic foam and specialized H203 Ozone Rich polymers that feel like a dry firm sponge. Once they have dried, they have one of the best insulation and vapor barriers known. The materials are not hazardous or harmful to plants, animals or human beings.
Try to remove the Drywall in one long section, use a cutting wheel, and a dremel, if you have one? Try not cutting too deep into the Marshmallow itself. And, don't remove any of the Marshmallow.**
** You're going to know why soon.
Repeat the same process for the other 2 × 4 you have marked out, removing the drywall, from top to bottom, leaving the 3 inches - (1.5" at the top and 1.5" at the bottom).
(SET UP A PAIR OF SAWHORSES)
Get Those Two 2 × 4's. You Need Them Now.
With Three, (3), Toggle Anchor Bolts. The Spring Wing type; (6" × 1/4" and a 1/4" Flat Washer), drill the appropriate size holes, through the 2 × 4's, divided into fhree equal sections. Top, Middle and Bottom.
*# 1. 6" inches down, from the Top.
*# 2. 6" inches up, from the Bottom.
*# 3. In the Middle.
Go ahead and insert all Six, (6), TOGGLES, Into Both of the 2 × 4's. Remember, you should have
Six Drilled Holes, Three Holes in Each Board.
Don't forget to put the Flat Washers on Both Sides and Lock down that 1/4 x 20 x 6" Threaded Toggle using a Nut. You're going to need Two 1/4 - 20 Nuts, (One for each board, for each Toggle, so you can lock the Toggle Bolt Firmly in place on both sides of the 2 × 4 ).
And when you screw the Spring Toggle onto the Threads, only go onto the threads about One, ( 1 ), Inch.
Here's the fun part, (And, it's kind of magical too).
With a "Heat Gun", Set on Medium. Run it across one of the 2 × 4's, getting it hotter. If you have a Digital Thermometer? You're going to want the 2 × 4 to be between 130° and 160°. The hotter the better, but, DO NOT EXCEED 180°. The optimal temperature for the wood, would be 145°f. With a room temperature of 75°f.
It's easier to have the lumber laying on a sawhorse stand, so your hands are free to use the heat gun, working the length.
NOTE: (Lay a short piece of 2 × 4 against the wall, flat on the floor. Your going to use it as a guide very soon).
Once you reach your working temp of 130°+ to 160°-, using work gloves to protect from the heat, transfer the warmed 2 × 4 to the cut out.
Sit it down on the piece of wood you have on the floor, line it up with the cut out. (HERE COMES THE MAGIC). "Gently Push" the 2 × 4 against, and Into, the Exposed Marshmallow Material. You're going to feel it start to sinking into the Marshmallow itself. Go slow! You have time. Make sure you work
the 2 × 4 top and bottom, and your goal is to work it into the Marshmallow wall so that you can Replace the strip of drywall that you removed earlier.
You'll know when you're finished, you have the drywall on both sides of the 2 × 4 to guage the depth.
Now, once you have it worked in, About 10 to 15 minutes.
NOTE: THE Excess Marshmallow Material will be Absorbed into the other Marshmallow Material in the wall. It will not be a problem. It is H203, honeycomb, in microscopic design, that is easily flexible and expanded or contracted by design.
Without the heat, you would not be able to press the 2 × 4 into the Marshmallow, AT ALL.
And, once it cools, you can hang whatever you want
Hang Just About Anything You Want Danny.
That Wall will support up to *500 lbs, Hanging Weight.
* like shelving, tv stands, etc.
After replacing the drywall that was removed, go ahead and spackle it, sand it, finish it, Paint it, you will not know that there's anything behind the wall.
If you forget where you placed your supports!
You can always locate them with a Stud Location Tool.
(MATERIAL LIST)
2 EA. 2" X 4"s ( floor to ceiling), length.
6 EA. TOGGLE BOLTS X 6" LONG. (1/4" × 20).
4 EA. FLAT WASHERS. (1/4")
4 EA. 1/4" X 20 NUTS.
2 EA. SAWHORSE WORKING STANDS.
1 EA. DREMEL, (or similar device).
1 EA. CUTTING WHEEL, for the Dremel.
1 EA. FLATHEAD SCREWDRIVER.
1 EA. DRILL MOTOR
1 EA. 1/4" DRILLBIT.
1 EA. HEAT GUN.
Okay, I hope that I haven't forgotten anything or missed any steps. I've looked it over a few times and other than confusion, it seems complete.
Good luck