Automated Quick Fixes
Purpose: The Quick Fix Hub is a program intended to provide swift access a variety of Quick Fix services that ICT and You can leverage with common, easily resolved inquiries. You should utilize the Quick Fix Hub in LMI to quickly navigate to necessary settings and programs required to perform the intended Quick Fix.
Quick Fix Hub is compatible with Windows 7 to current version Windows 10.
Quick Fix Hub Tutorial Video
Run the Quick Fix Hub Script
After an LMI session has been initiated:
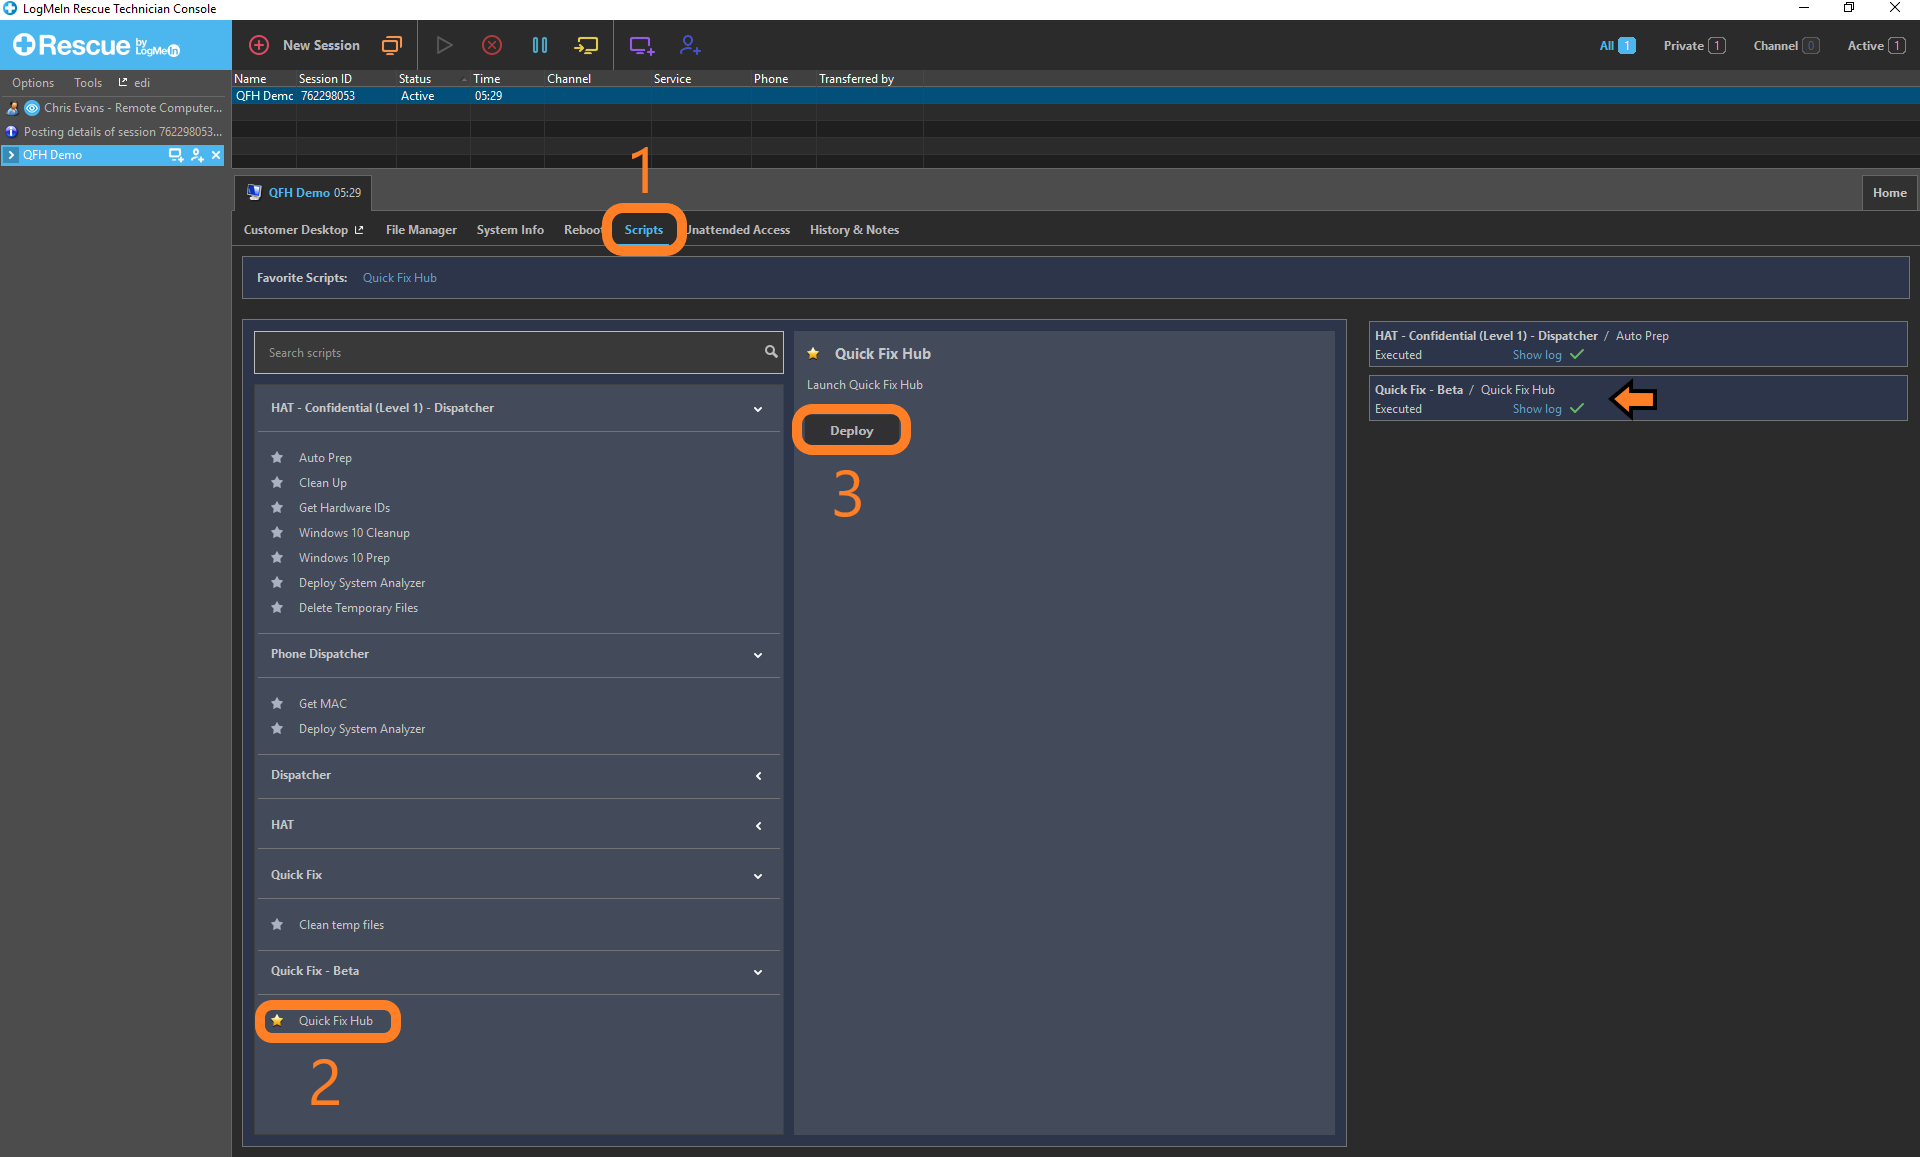
- Click on the "Scripts" tab
- Click on the "Quick Fix Hub" under the Quick Fix - Beta section.
- Click on "Deploy"
Results will appear on the left in the same manner of other scripts. If successful, a green check mark will appear to the right in the "Scripts" tab.
Navigate the Quick Fix Hub
After the "Quick Fix Hub" script has run successfully:
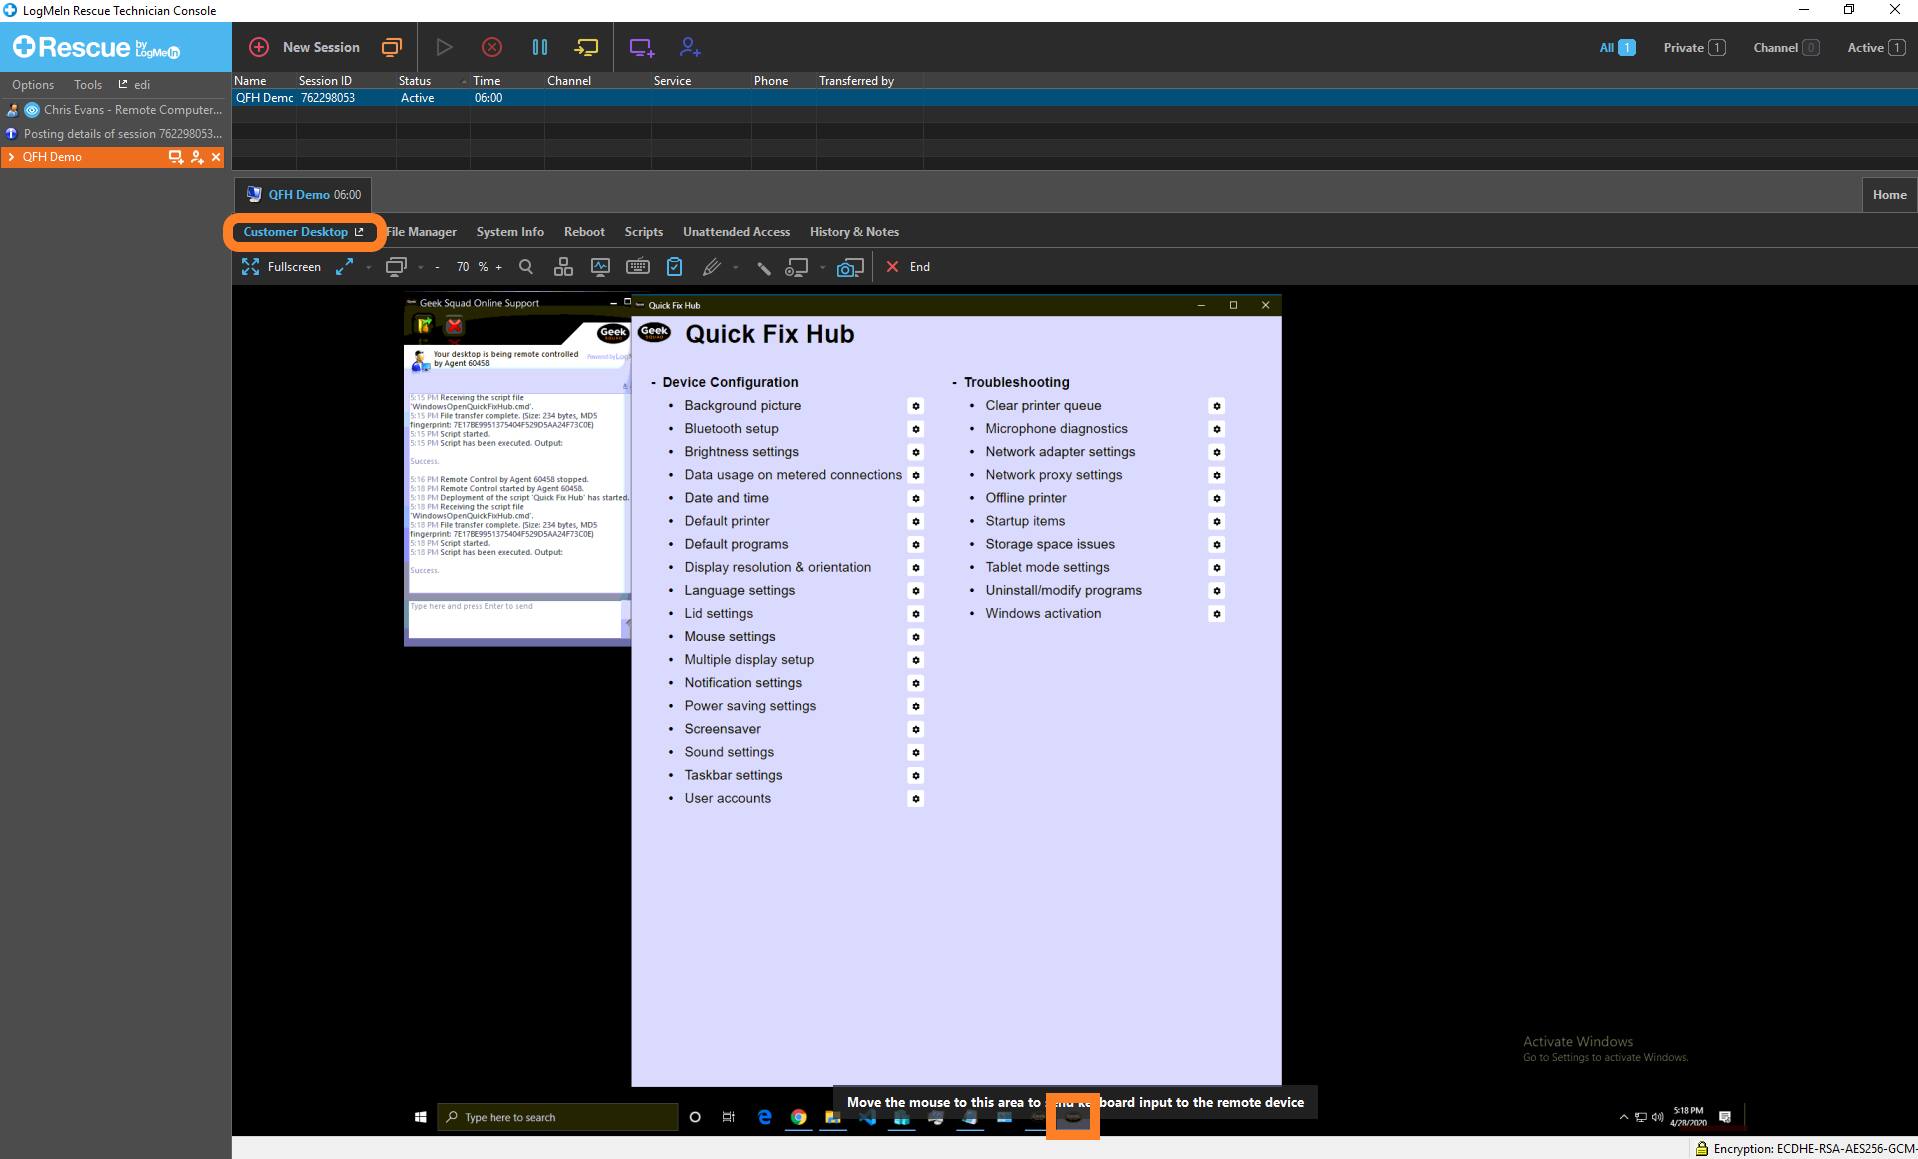
- Click on the "Customer Desktop" tab
- Locate the "Quick Fix Hub" window on the desktop.
If you do not see the window immediately, confirm there is a second Geek Squad Icon present on the taskbar and check behind other open windows.
Selecting a Quick Fix
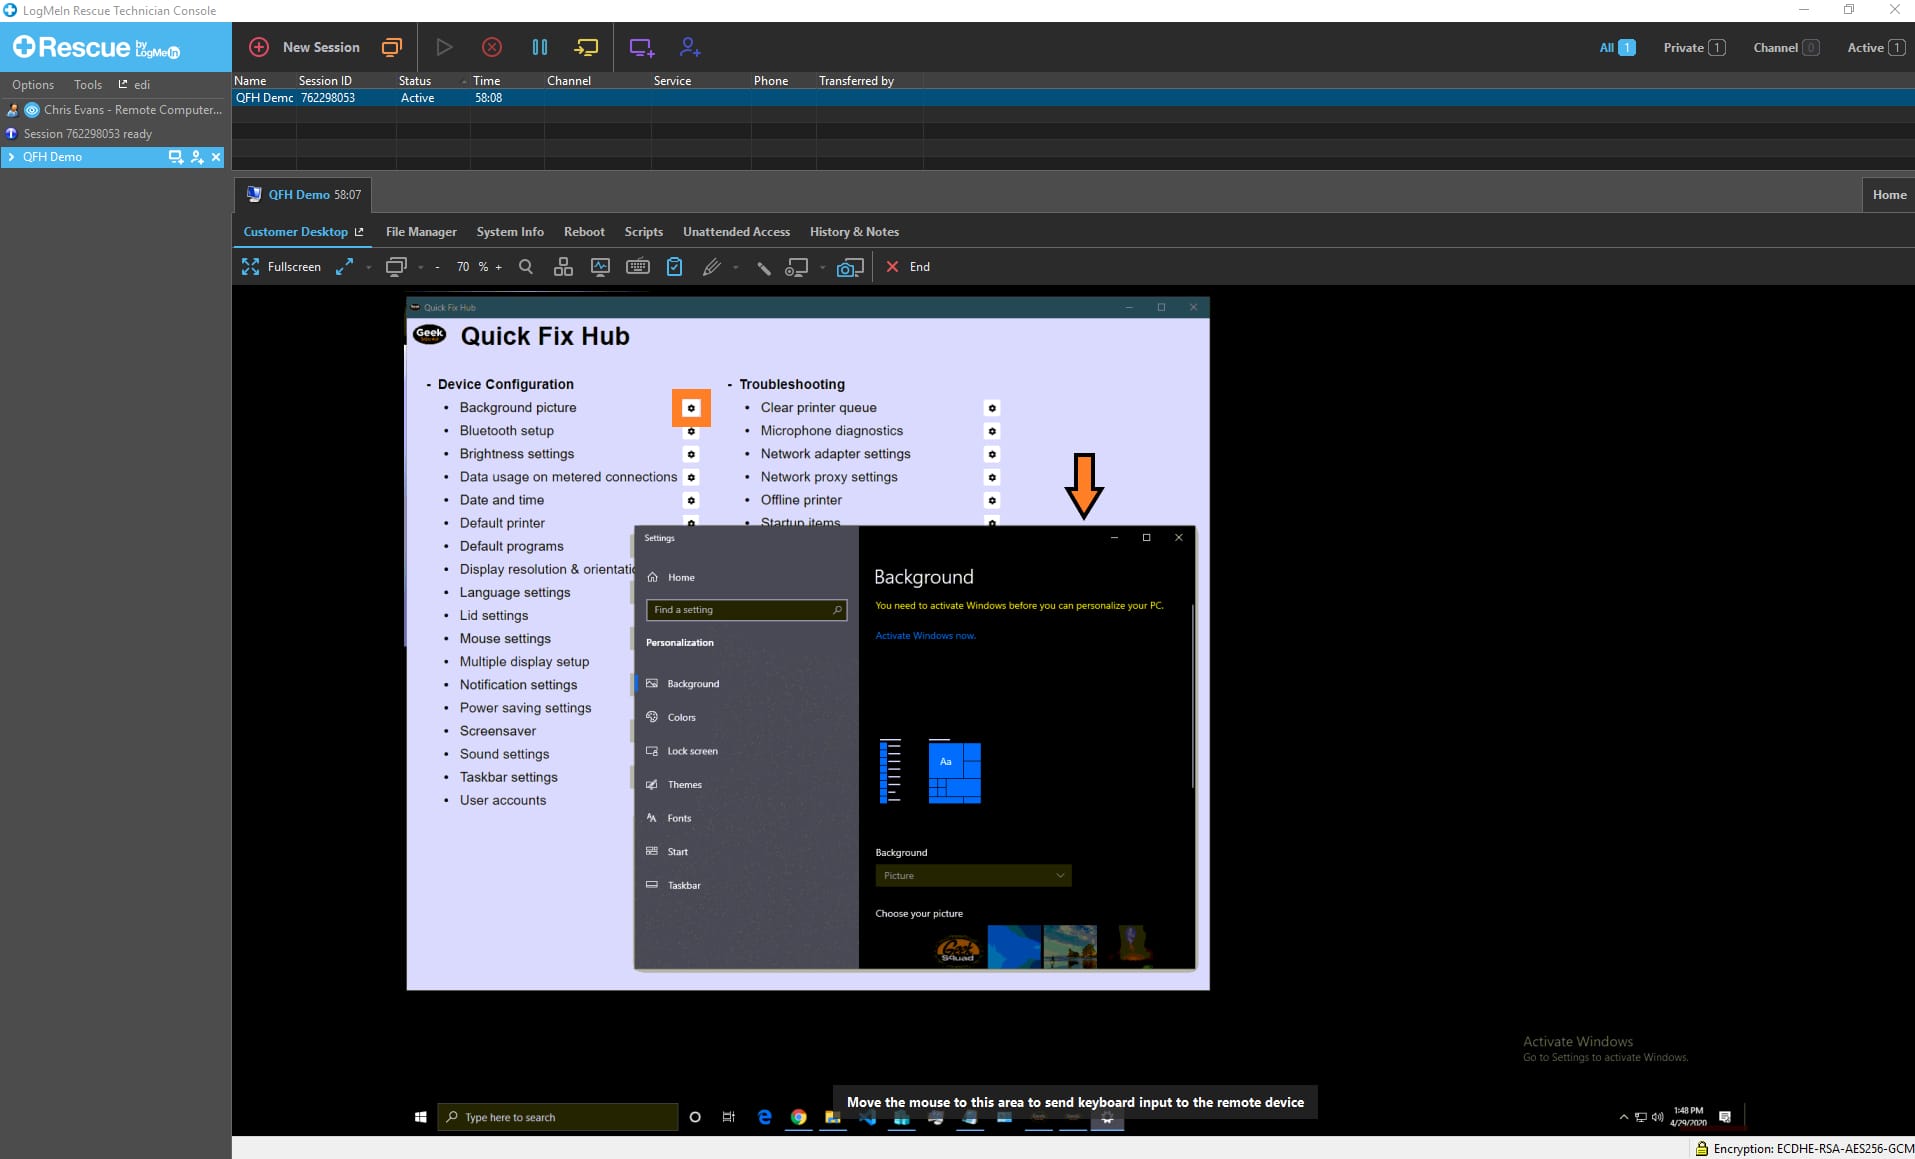
Select the desired Quick Fix from the list, using the gear icon to the right. This will open the applicable window related to the work to be performed. The Hub is able to determine which version the suspect OS is using and apply the appropriate steps. For example: clicking on the "Background Picture" fix will open the Background window in Settings, as shown below.
What Else Could Happen?
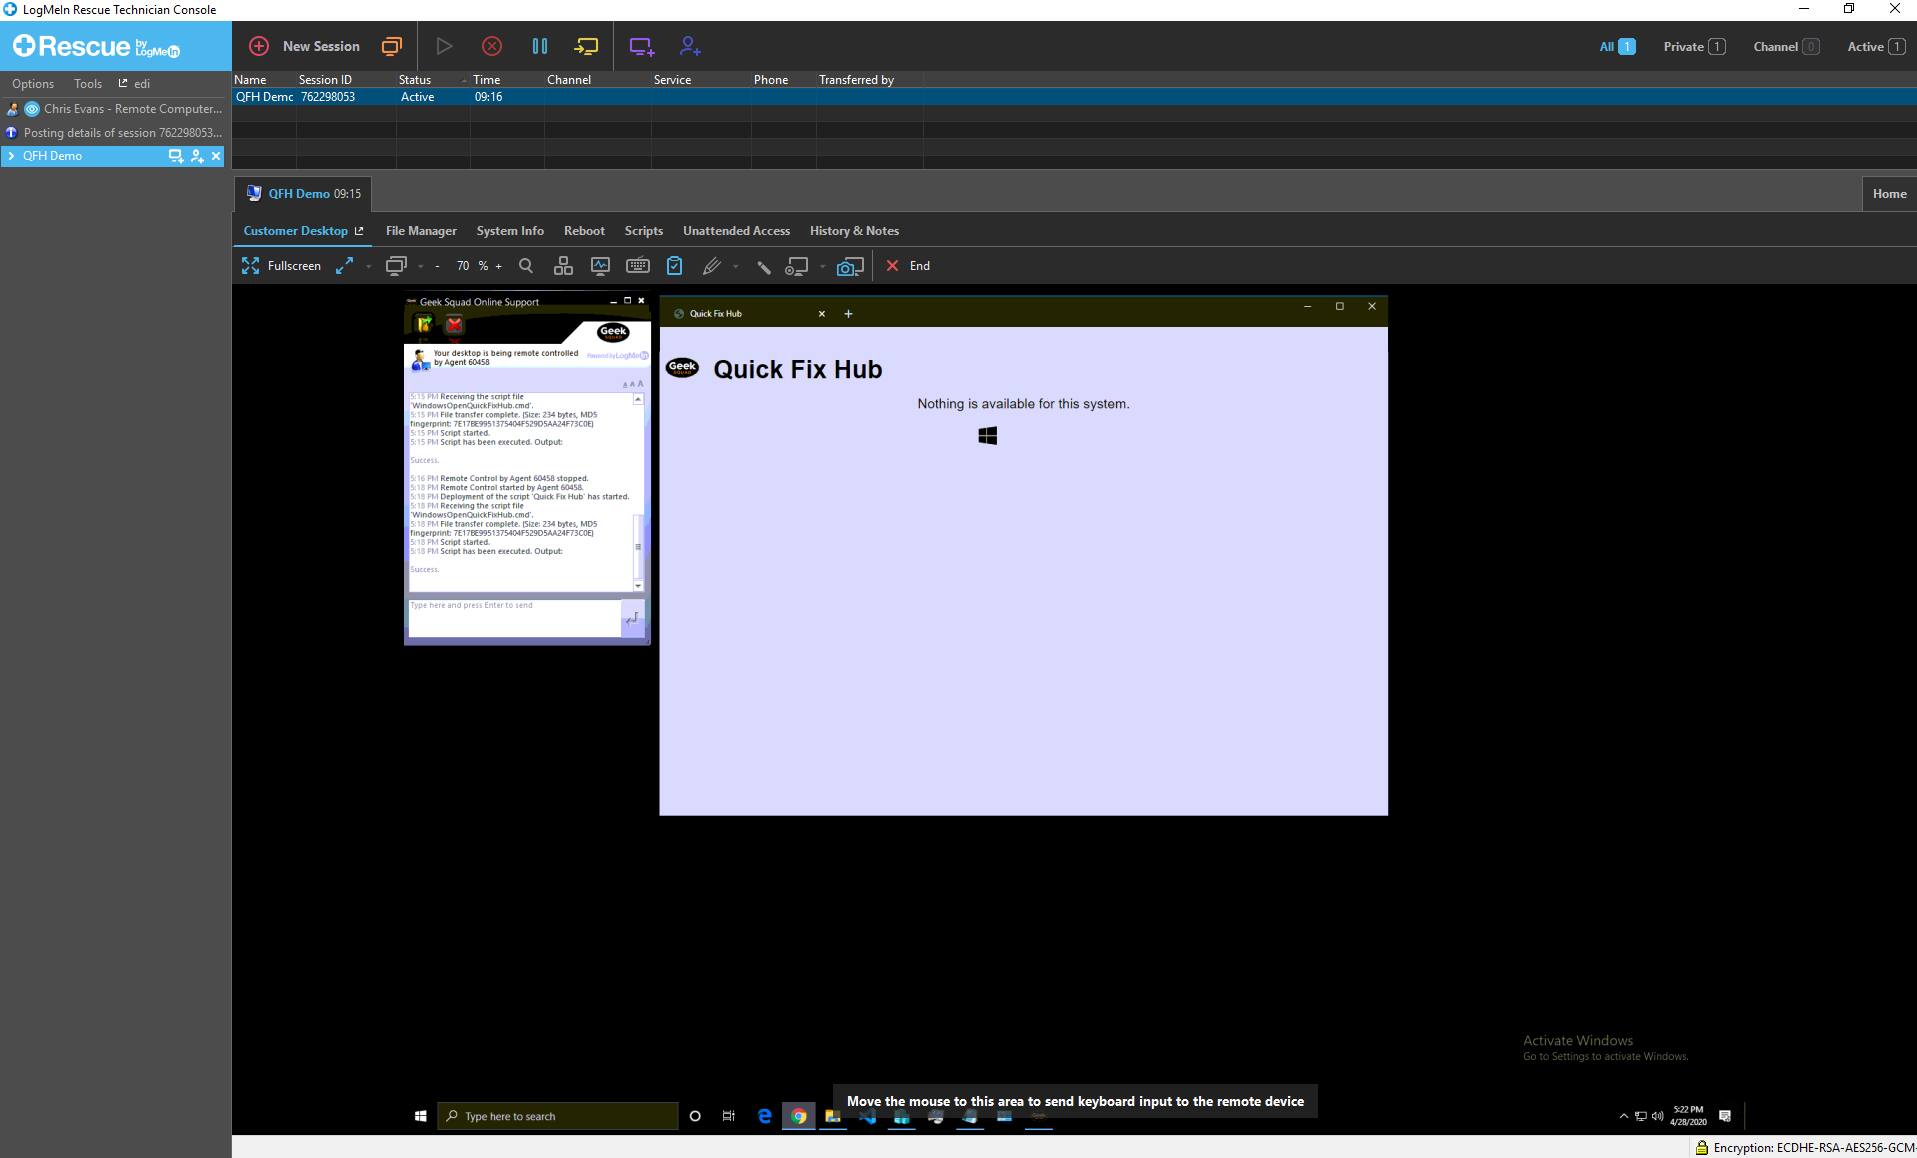
Nothing is Available
Some Operating Systems and Versions may not be supported. In the event the Quick Fix Hub script is run on an unsupported suspect, the Hub will indicate there are no available Quick Fixes to perform.
Keywords: Quick Fix Hub, Automated, LMI, Quick Fix, QF, QFH