AccuQuilt - GO! Eye Mask Die - Multicolor
Related Item

About This Item
- General
- Brand: AccuQuilt
- Model Number: 55612
- Product Name: GO! Eye Mask Die
- Color: Multicolor
- Features
- Product Type: Cutting material
- Material: Fabric
- Dimensions
- Product Height: 0.3 inches (The out of box height of the item. Height is measured as the vertical distance from the bottom of the item to the top as it would be primarily used or placed.)
- Product Length: 6.1 inches (The out of box length of the item. Length is measured as the longest dimension of the item.)
- Product Weight: 0.31 pounds (The out of box weight of the item.)
- Product Width: 5.9 ounces (The out of box width of the item. Width is measured as the horizontal distance from one side of the item to the other as it would be primarily used or placed.)
- Warranty
- Warranty - Parts: 1 Year Warranty, We may deny warranty coverage if the product is damaged from using an unauthorized part.
- Other
- UPC: 699195556128
Catching up on a little sleep never looked – or felt – so good! The die makes this project so quick! You’ll be sleeping before you know it and find yourself dreaming up new project ideas! Recommended applique space for Eye Mask is 2" high or smaller. Compatible applique dies: GO! Classic 2" Alphabet (55559) GO! Star-2", 3", 4" (small star only, 55028) GO! Heart-2", 3",4" (small heart only, 55029) GO! Funky Flowers (small flower only, 55042) GO! Queen of Hearts (Heart #4 only, 55325) GO! Crazy Petals (55326) GO! Daisy (smaller daisy only, 55327) GO! Flower Bunch (smallest flower only, 55332) GO! Summer Medley (sandal only, 55496) •AQ Cutting Mat Required: GO! Cutting Mat, 6 in. x 12 in. (15.2 cm x 30.4 cm) How to Die Cut Eye Mask Shapes: For best cutting results, position fabric on the lengthwise grain (straight of grain) as it goes under the roller. To make one eye/sleep mask: Lay one 9½" x 5" piece of lining fabric right side up on the table in front of you. Lay one 9½" x 5" piece of outer fabric on top of lining fabric, right sides together. Top with one 9½" x 5" piece of fusible fleece or batting. Place all three layers together on the GO! Eye Mask die, cover with a mat, and cut. Cut a piece of ¼" elastic to fit your head without stretching. Being careful not to twist the elastic, lay it on top of the right side of the lining piece, pinning the raw edge of the elastic to the raw edge of the lining, as shown. Keeping the cut pieces in the same order (lining fabric right side up, then outer fabric right side down, topped by batting), pin pieces together. While pinning, be careful to keep the loose part of the elastic inside, so only the two raw edges get stitched into the mask. Stitch a ¼" seam allowance around the mask, leaving a 2" opening for turning the mask inside out. Backstitch when starting and stopping. Clip curves, turn mask right side out. Batting should remain inside. Press all around the edges.
- Steps to Make One Eye/Sleep Mask: To make one eye/sleep mask: Lay one 9½ x 5" piece of lining fabric right side up on the table in front of you. Lay one 9½" x 5" piece of outer fabric on top of lining fabric, right sides together. Top with one 9½" x 5" piece of fusible fleece or batting. Place all three layers together on the GO! Eye Mask die, cover with a mat, and cut."
Reviews
This product doesn't have any reviews yet.
Compare similar products
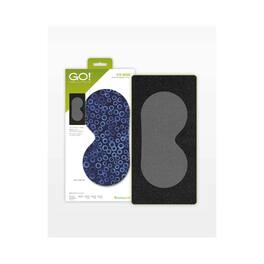
Catching up on a little sleep never looked – or felt – so good! The die makes this project so quick! You’ll be sleeping before you know it and find yourself dreaming up new project ideas! Recommended applique space for Eye Mask is 2" high or smaller. Compatible applique dies: GO! Classic 2" Alphabet (55559) GO! Star-2", 3", 4" (small star only, 55028) GO! Heart-2", 3",4" (small heart only, 55029) GO! Funky Flowers (small flower only, 55042) GO! Queen of Hearts (Heart #4 only, 55325) GO! Crazy Petals (55326) GO! Daisy (smaller daisy only, 55327) GO! Flower Bunch (smallest flower only, 55332) GO! Summer Medley (sandal only, 55496) •AQ Cutting Mat Required: GO! Cutting Mat, 6 in. x 12 in. (15.2 cm x 30.4 cm) How to Die Cut Eye Mask Shapes: For best cutting results, position fabric on the lengthwise grain (straight of grain) as it goes under the roller. To make one eye/sleep mask: Lay one 9½" x 5" piece of lining fabric right side up on the table in front of you. Lay one 9½" x 5" piece of outer fabric on top of lining fabric, right sides together. Top with one 9½" x 5" piece of fusible fleece or batting. Place all three layers together on the GO! Eye Mask die, cover with a mat, and cut. Cut a piece of ¼" elastic to fit your head without stretching. Being careful not to twist the elastic, lay it on top of the right side of the lining piece, pinning the raw edge of the elastic to the raw edge of the lining, as shown. Keeping the cut pieces in the same order (lining fabric right side up, then outer fabric right side down, topped by batting), pin pieces together. While pinning, be careful to keep the loose part of the elastic inside, so only the two raw edges get stitched into the mask. Stitch a ¼" seam allowance around the mask, leaving a 2" opening for turning the mask inside out. Backstitch when starting and stopping. Clip curves, turn mask right side out. Batting should remain inside. Press all around the edges.

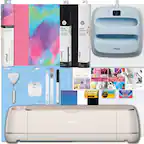
Craft in style with our Basic Tool Set in fresh, complementary hues. This 5-piece set gets you started with the basic tools you need for a Cricut crafting session. You'll be equipped to precisely and expertly handle most DIY projects, from vinyl for decals to iron-on decor projects, to cardstock masterpieces – and that's just the beginning. It's an essential companion for all Cricut cutting machines.
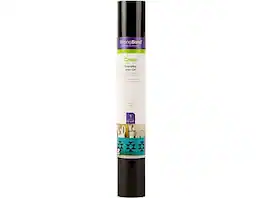
Outlasts more than 50 washes. Cricut Everyday Iron-On with StrongBond guarantee works fabulously with a wide variety of base materials, including wood. Intricate designs are simple to cut with your Cricut machine, and you'll weed with ease to prep for flawless application. Make a T-shirt with an inspirational quote, design heartwarming home decor, embellish accessories with one-of-a-kind designs, and create handmade gifts that will leave a lasting impression. Use one color or layer up to three for standout patterns and projects. For use with all Cricut cutting machines. For a flawless iron-on application, use Cricut EasyPress. Or apply with household iron.
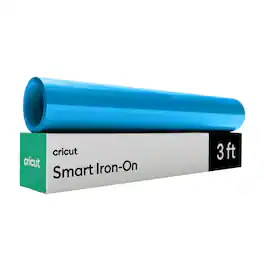
Just add heat! With Cricut Smart Iron-On Matless Heat Transfer Vinyl, you can personalize T-shirts, jackets, backpacks, and so much more. Plus, this material requires no machine mat, saving you time and simplifying your making experience. It's the same Smart Iron-On you love in bulk size and with simplified packaging, so we can pass the savings on to you. All Cricut materials are optimized for Cricut cutting machines with automatic cut settings in Design Space to ensure you have the best cutting experience. One roll Cricut Smart Value Iron-on - 13 in x 3 ft.
| Pros for AccuQuilt - GO! Eye Mask Die - Multicolor | |||
|---|---|---|---|
| There were no pros for this product— | Quality, Ease of use, Compatibility, Completeness | There were no pros for this product— | There were no pros for this product— |