A:AnswerIf you haven't done so already, try plugging it into the USB port that's right above the Type C port on the back. That's a Generation 2 port and supports higher speeds. If that doesn't work, you'll need to contact HP support to see if they can troubleshoot the issue.
A:AnswerThe power adapter can use 220V. The only problem you may have is that you may need an adapter for the plug to fit the receptacles in another country/region.
A:AnswerCache is usually tough to upgrade. Generally, it's soldered directly to the motherboard. But the computer can be upgraded to 32 gigabytes of RAM.
A:AnswerActually, storage comes from neither the graphics card nor the memory. It comes from your hard drive, which can either be a conventional hard drive or one of the newer solid state drives.
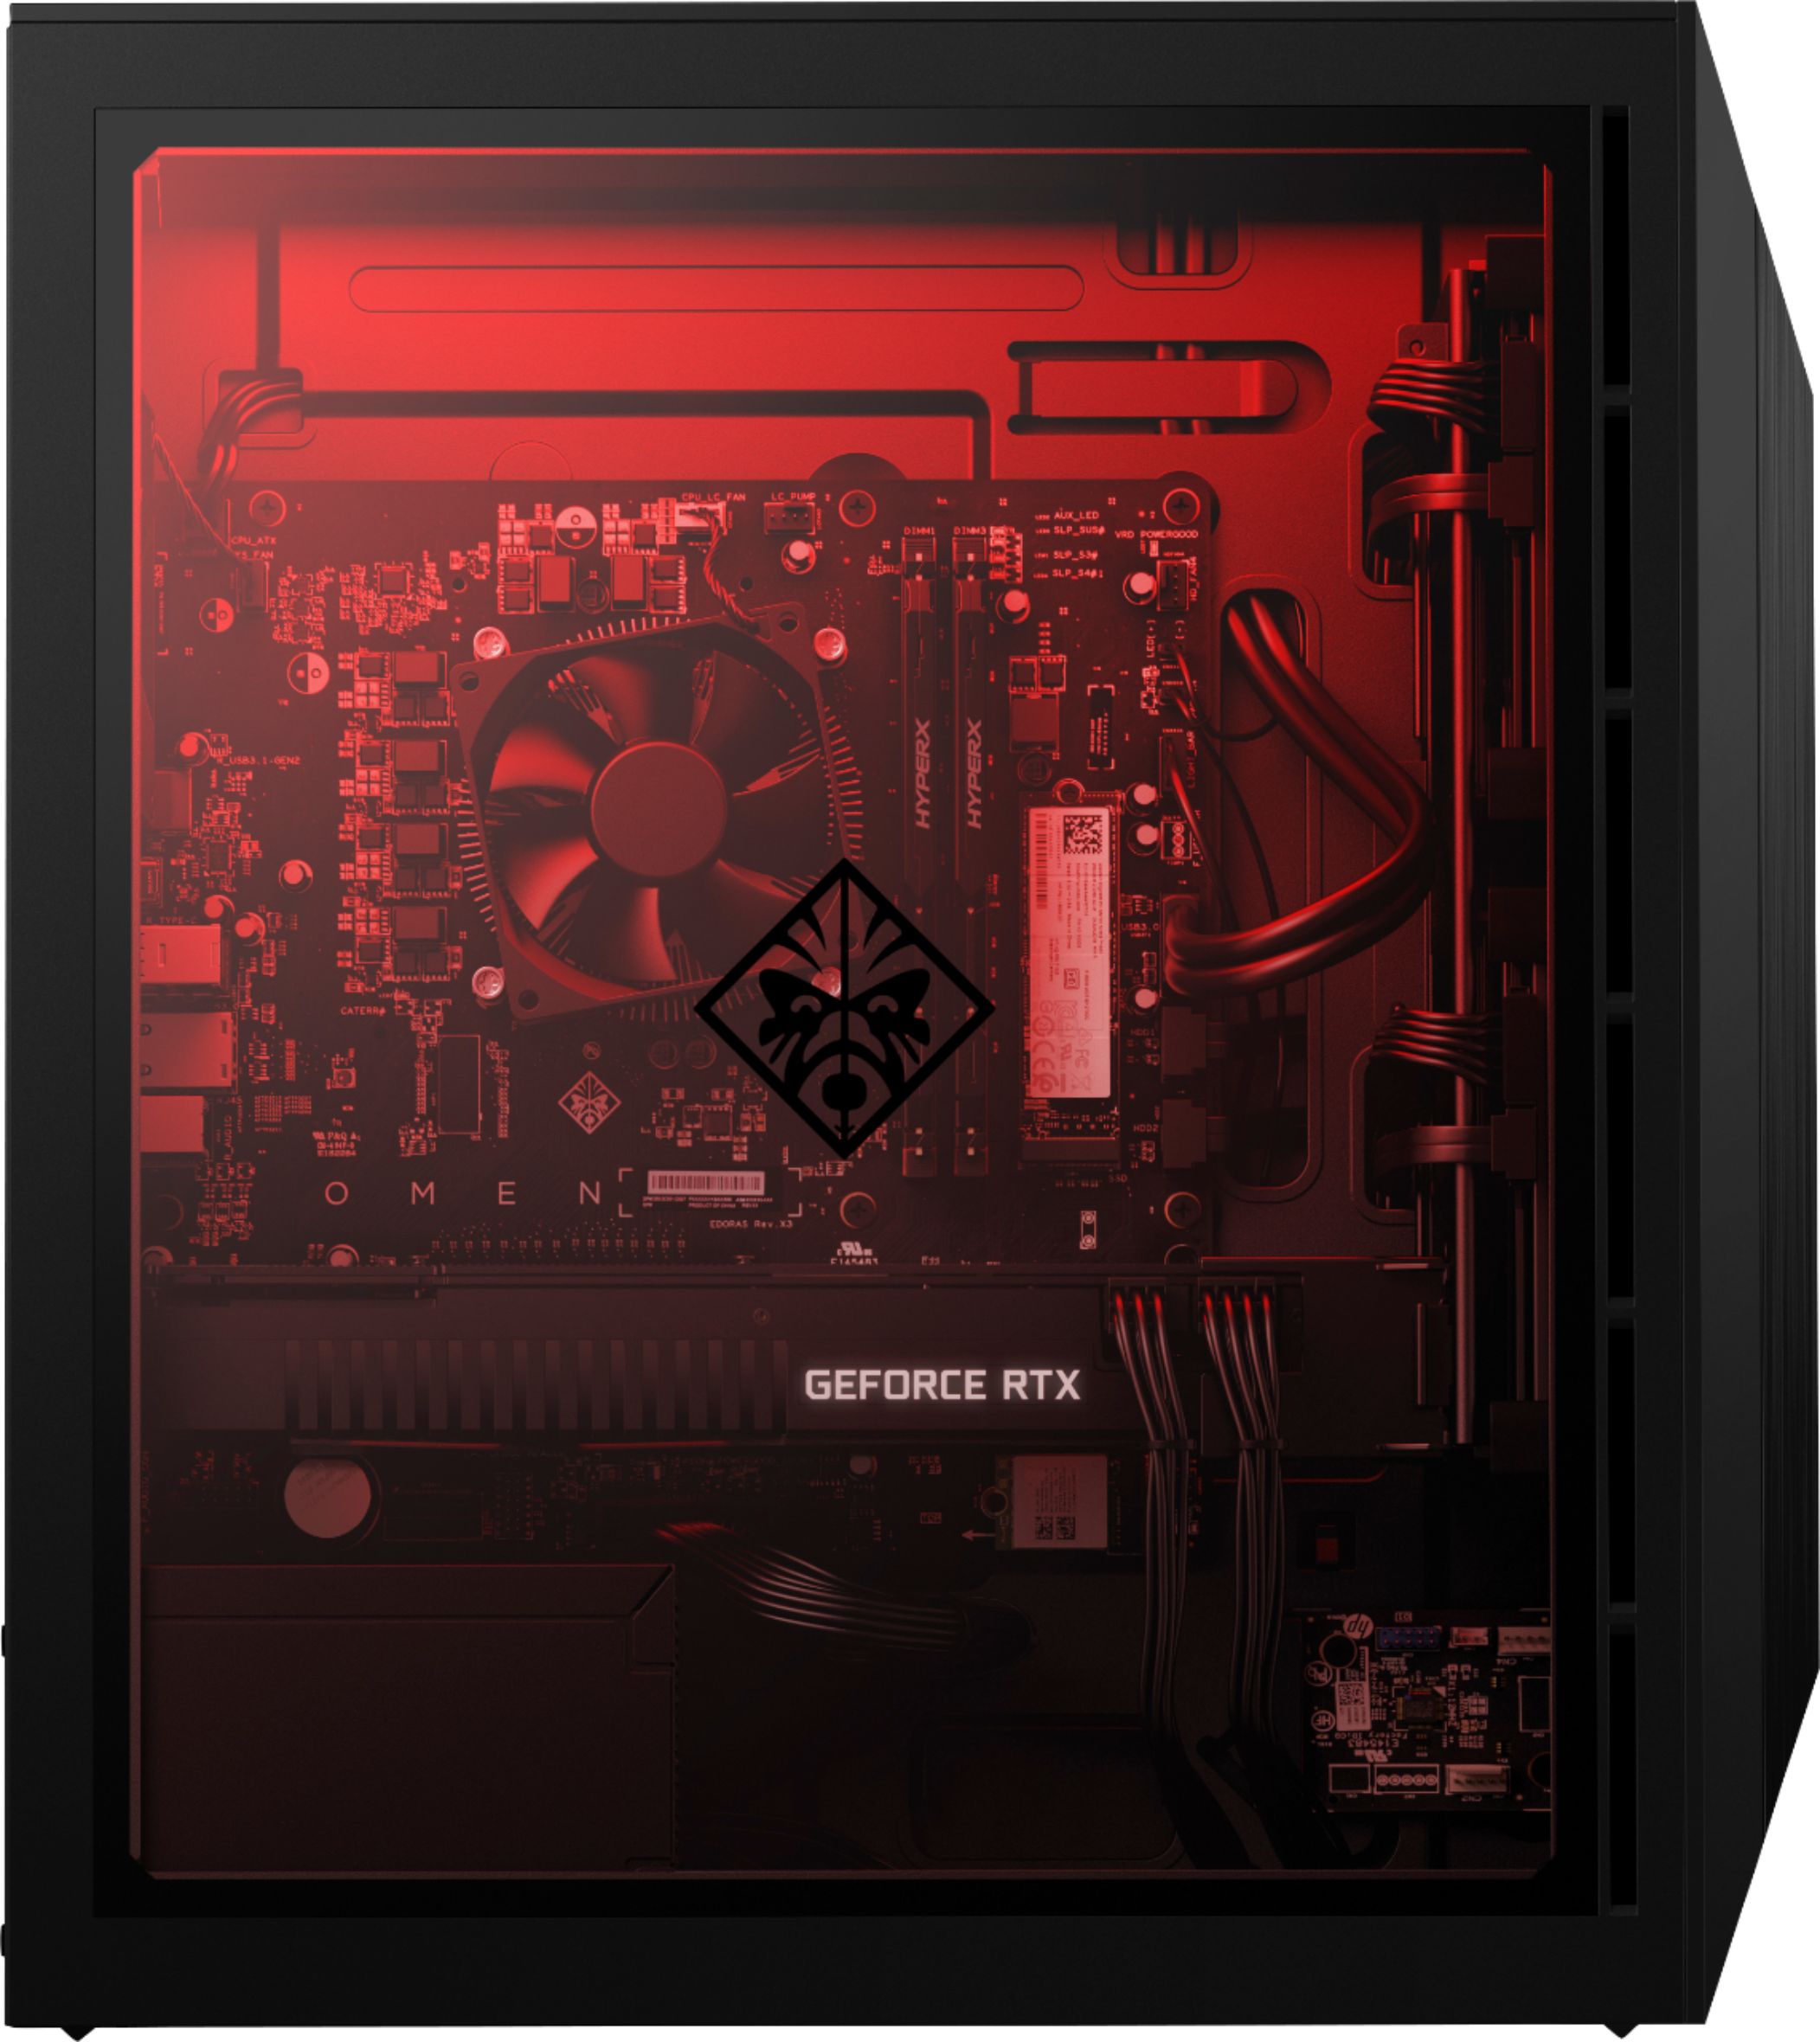
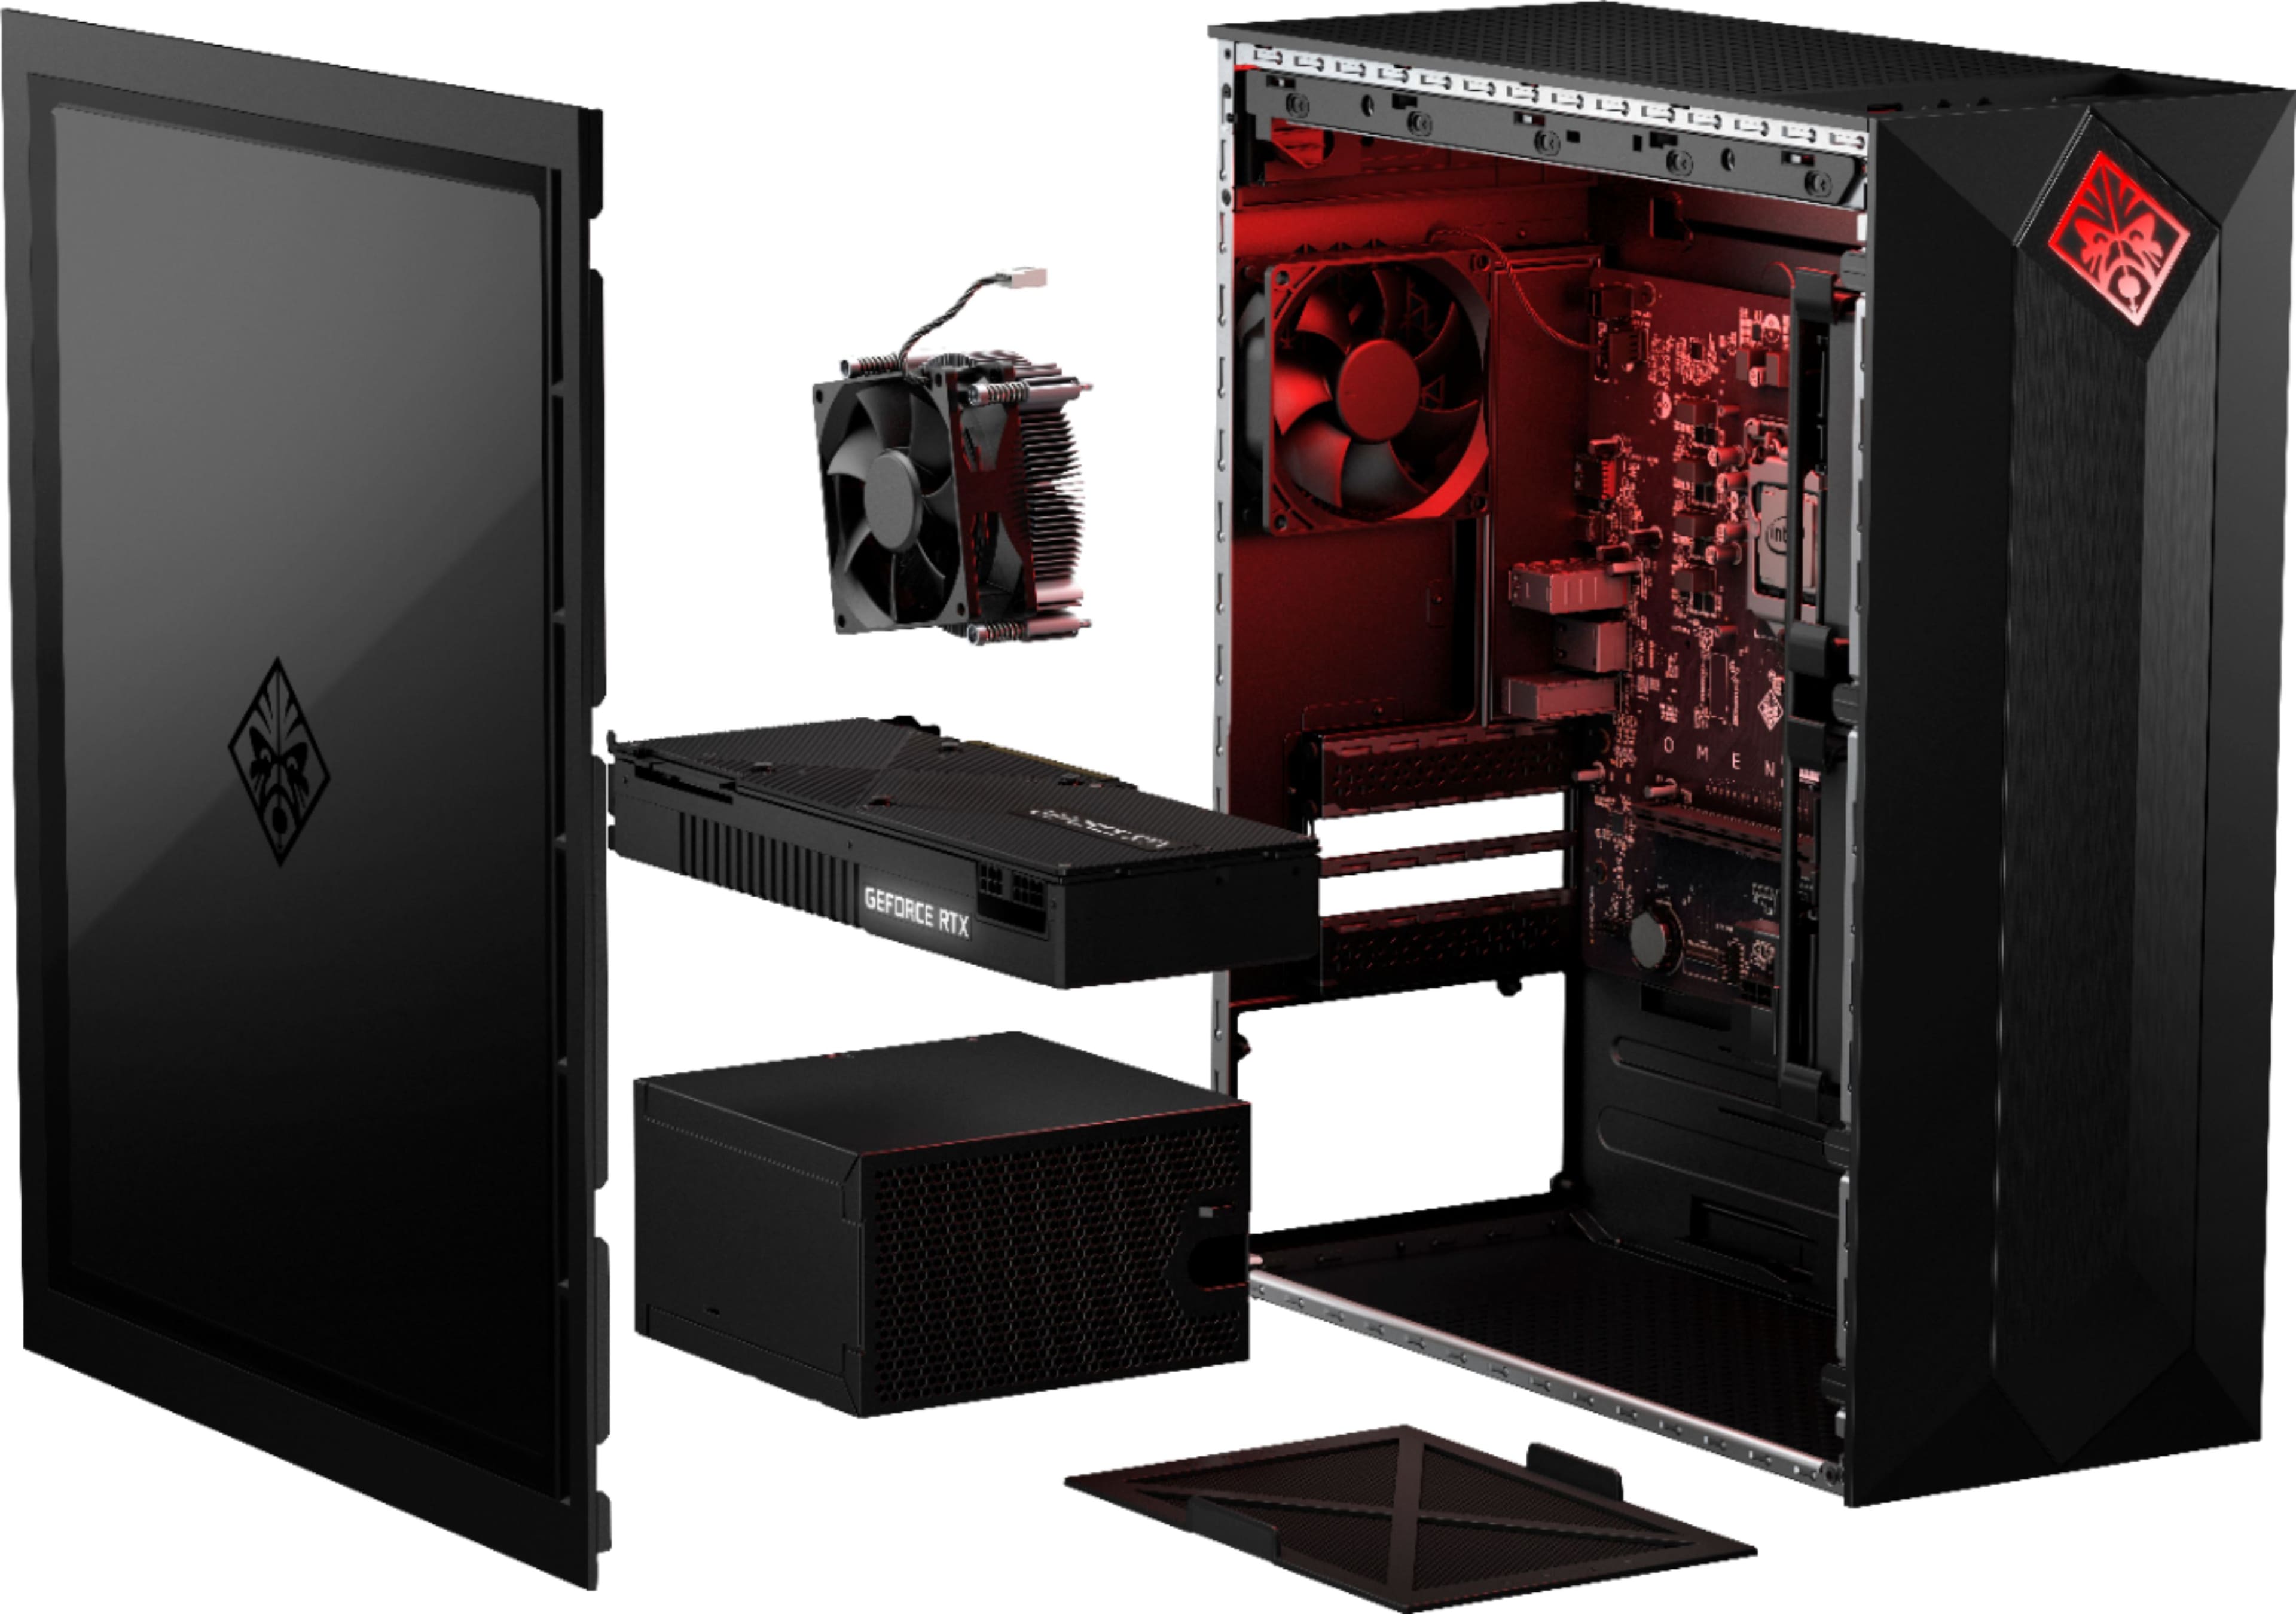
A:AnswerThis desktop has the Edoras motherboard. Here are more details: https://support.hp.com/us-en/product/omen-by-hp-875-0000-obelisk-desktop-pc-series/23302709/model/23574500/document/c06169524
A:AnswerI'm sorry that you have experienced this issue. I recommend reaching out to HP Support so they can assist you. They have access to more tools to assist you. Here's the link to HP Support: http://support.hp.com/us-en . Click "Contact HP" at the bottom left of the page. Alternatively, you can reach them by phone at 1-800-474-6836.
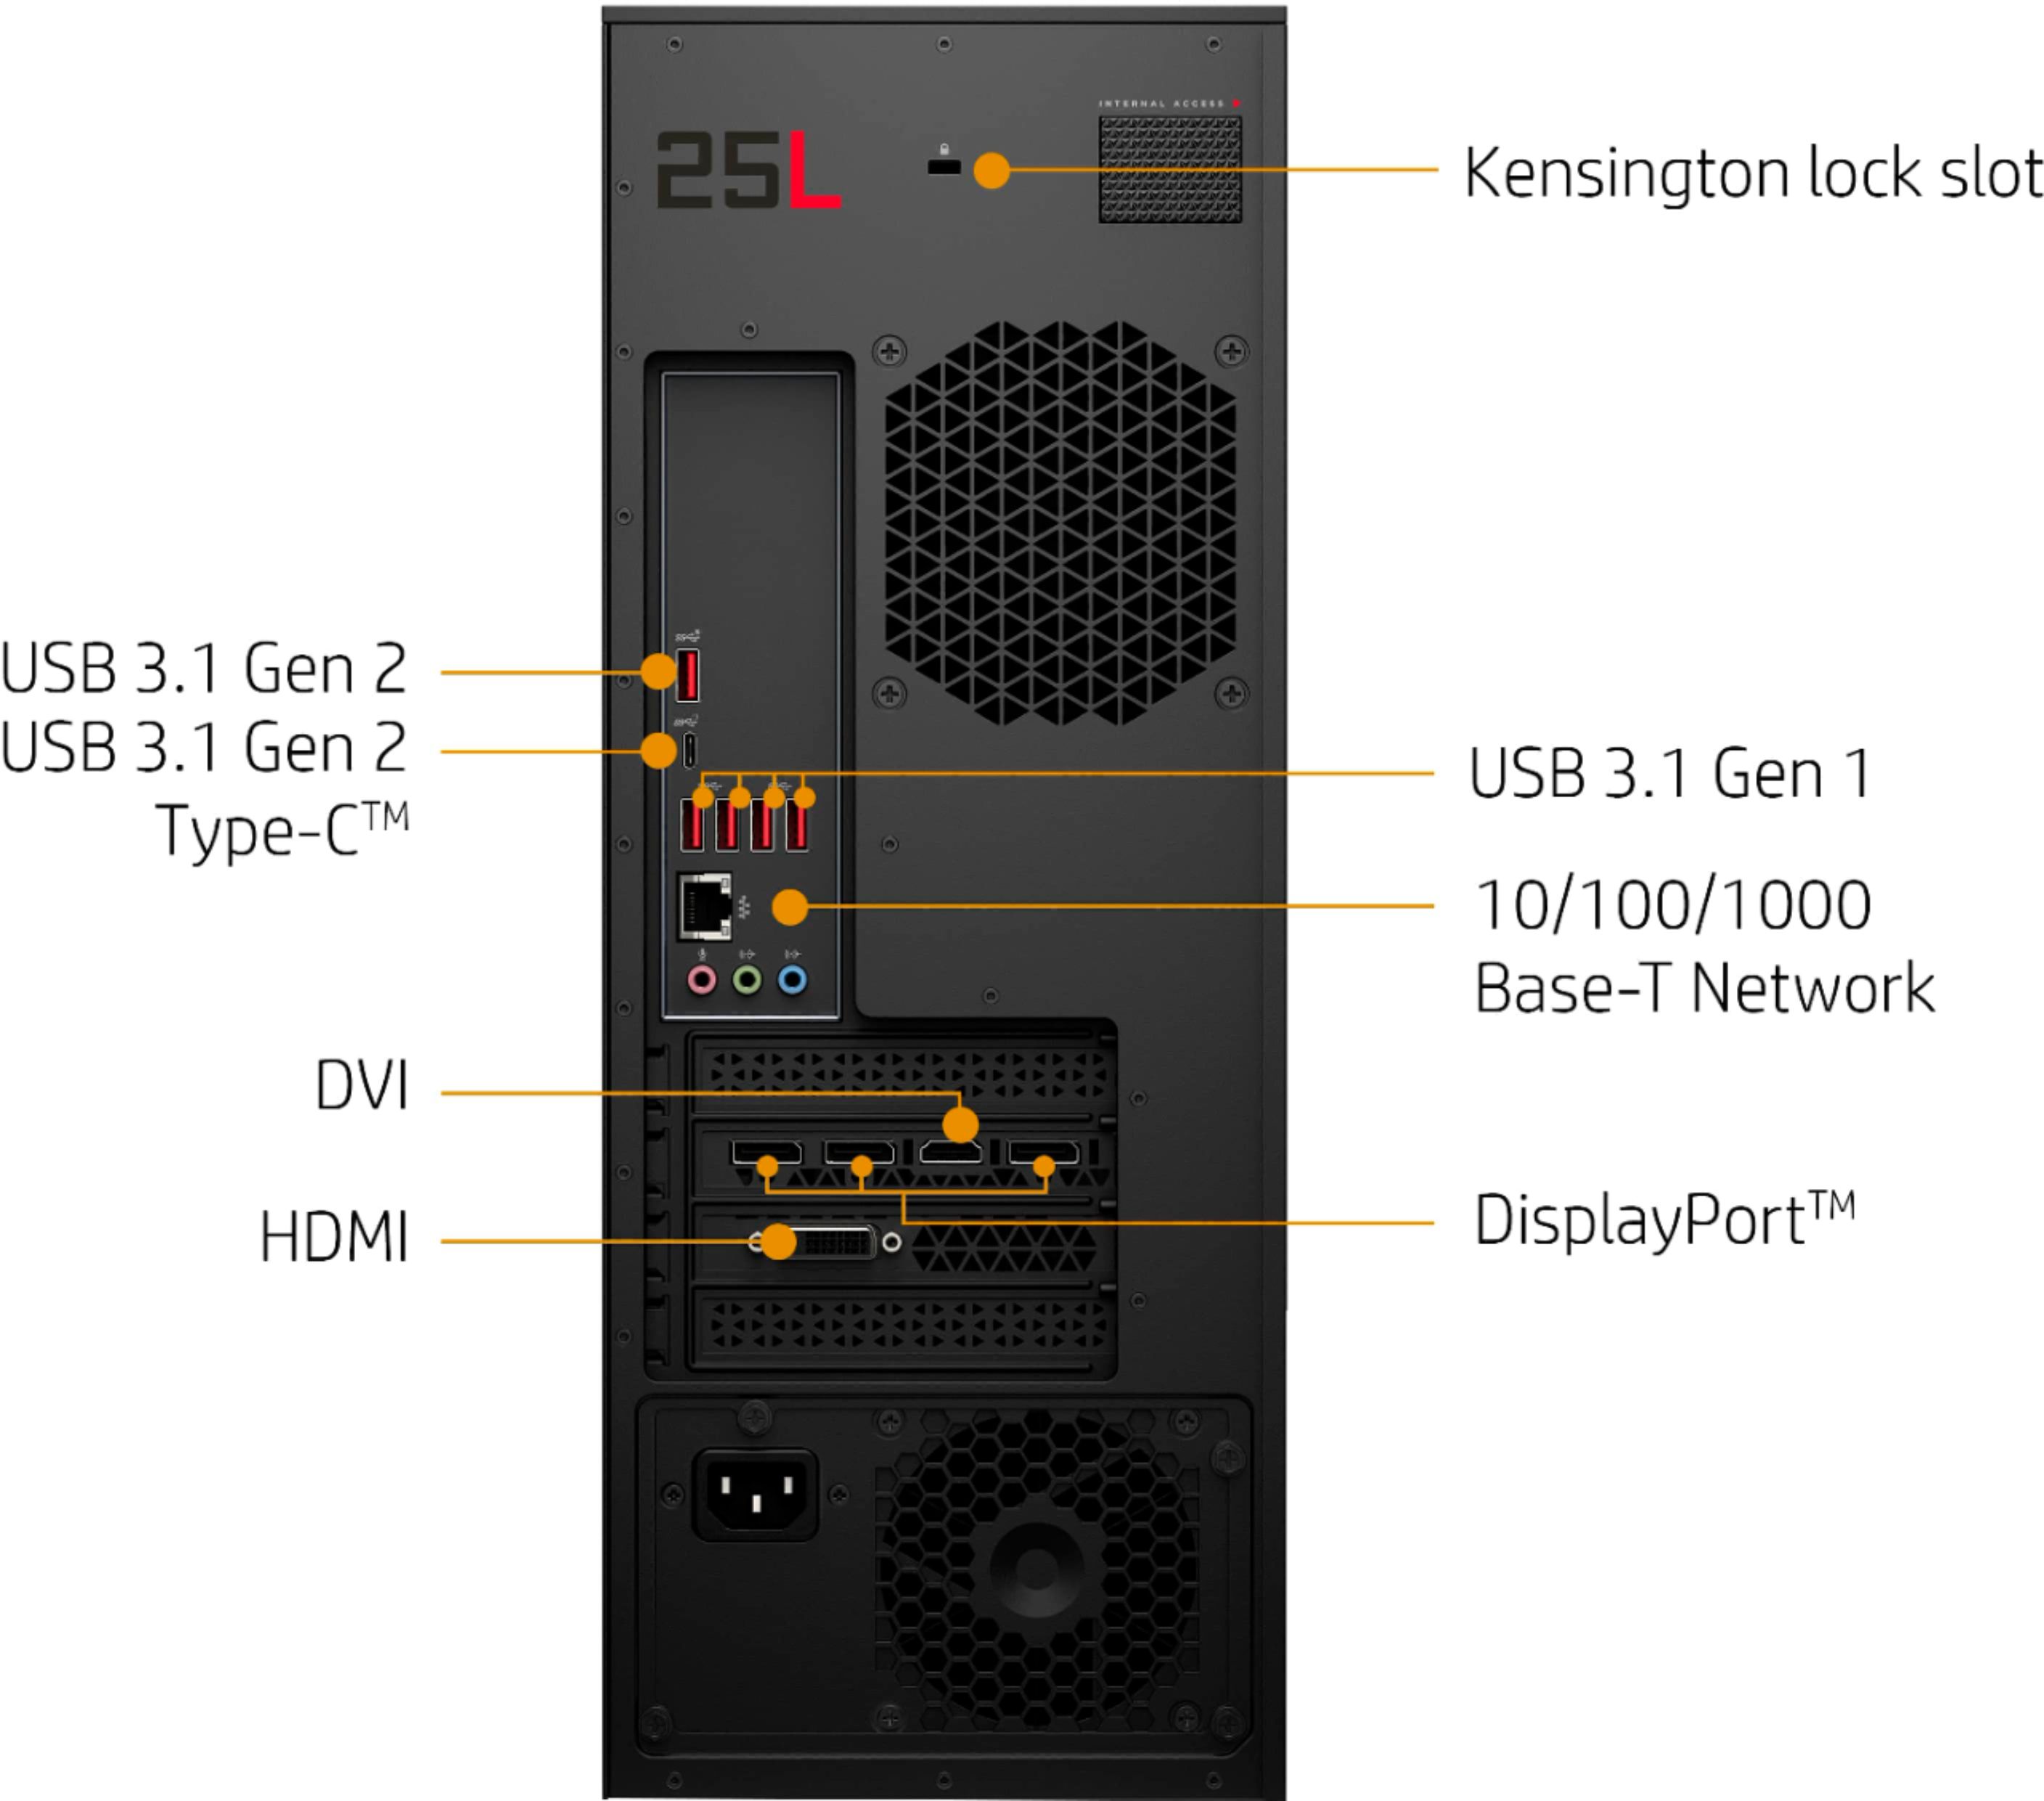
A:AnswerYou can run multiple monitors, this machine has 3 display ports and one hdmi. And it’s powerful enough that you can run separate resolutions on each monitor at one time.
A:AnswerIt maybe a CMOS setting as some Motherboards have USB ports for the front and back of the PC.
You would need to check with HP or Best Buy if you got the PC from them.
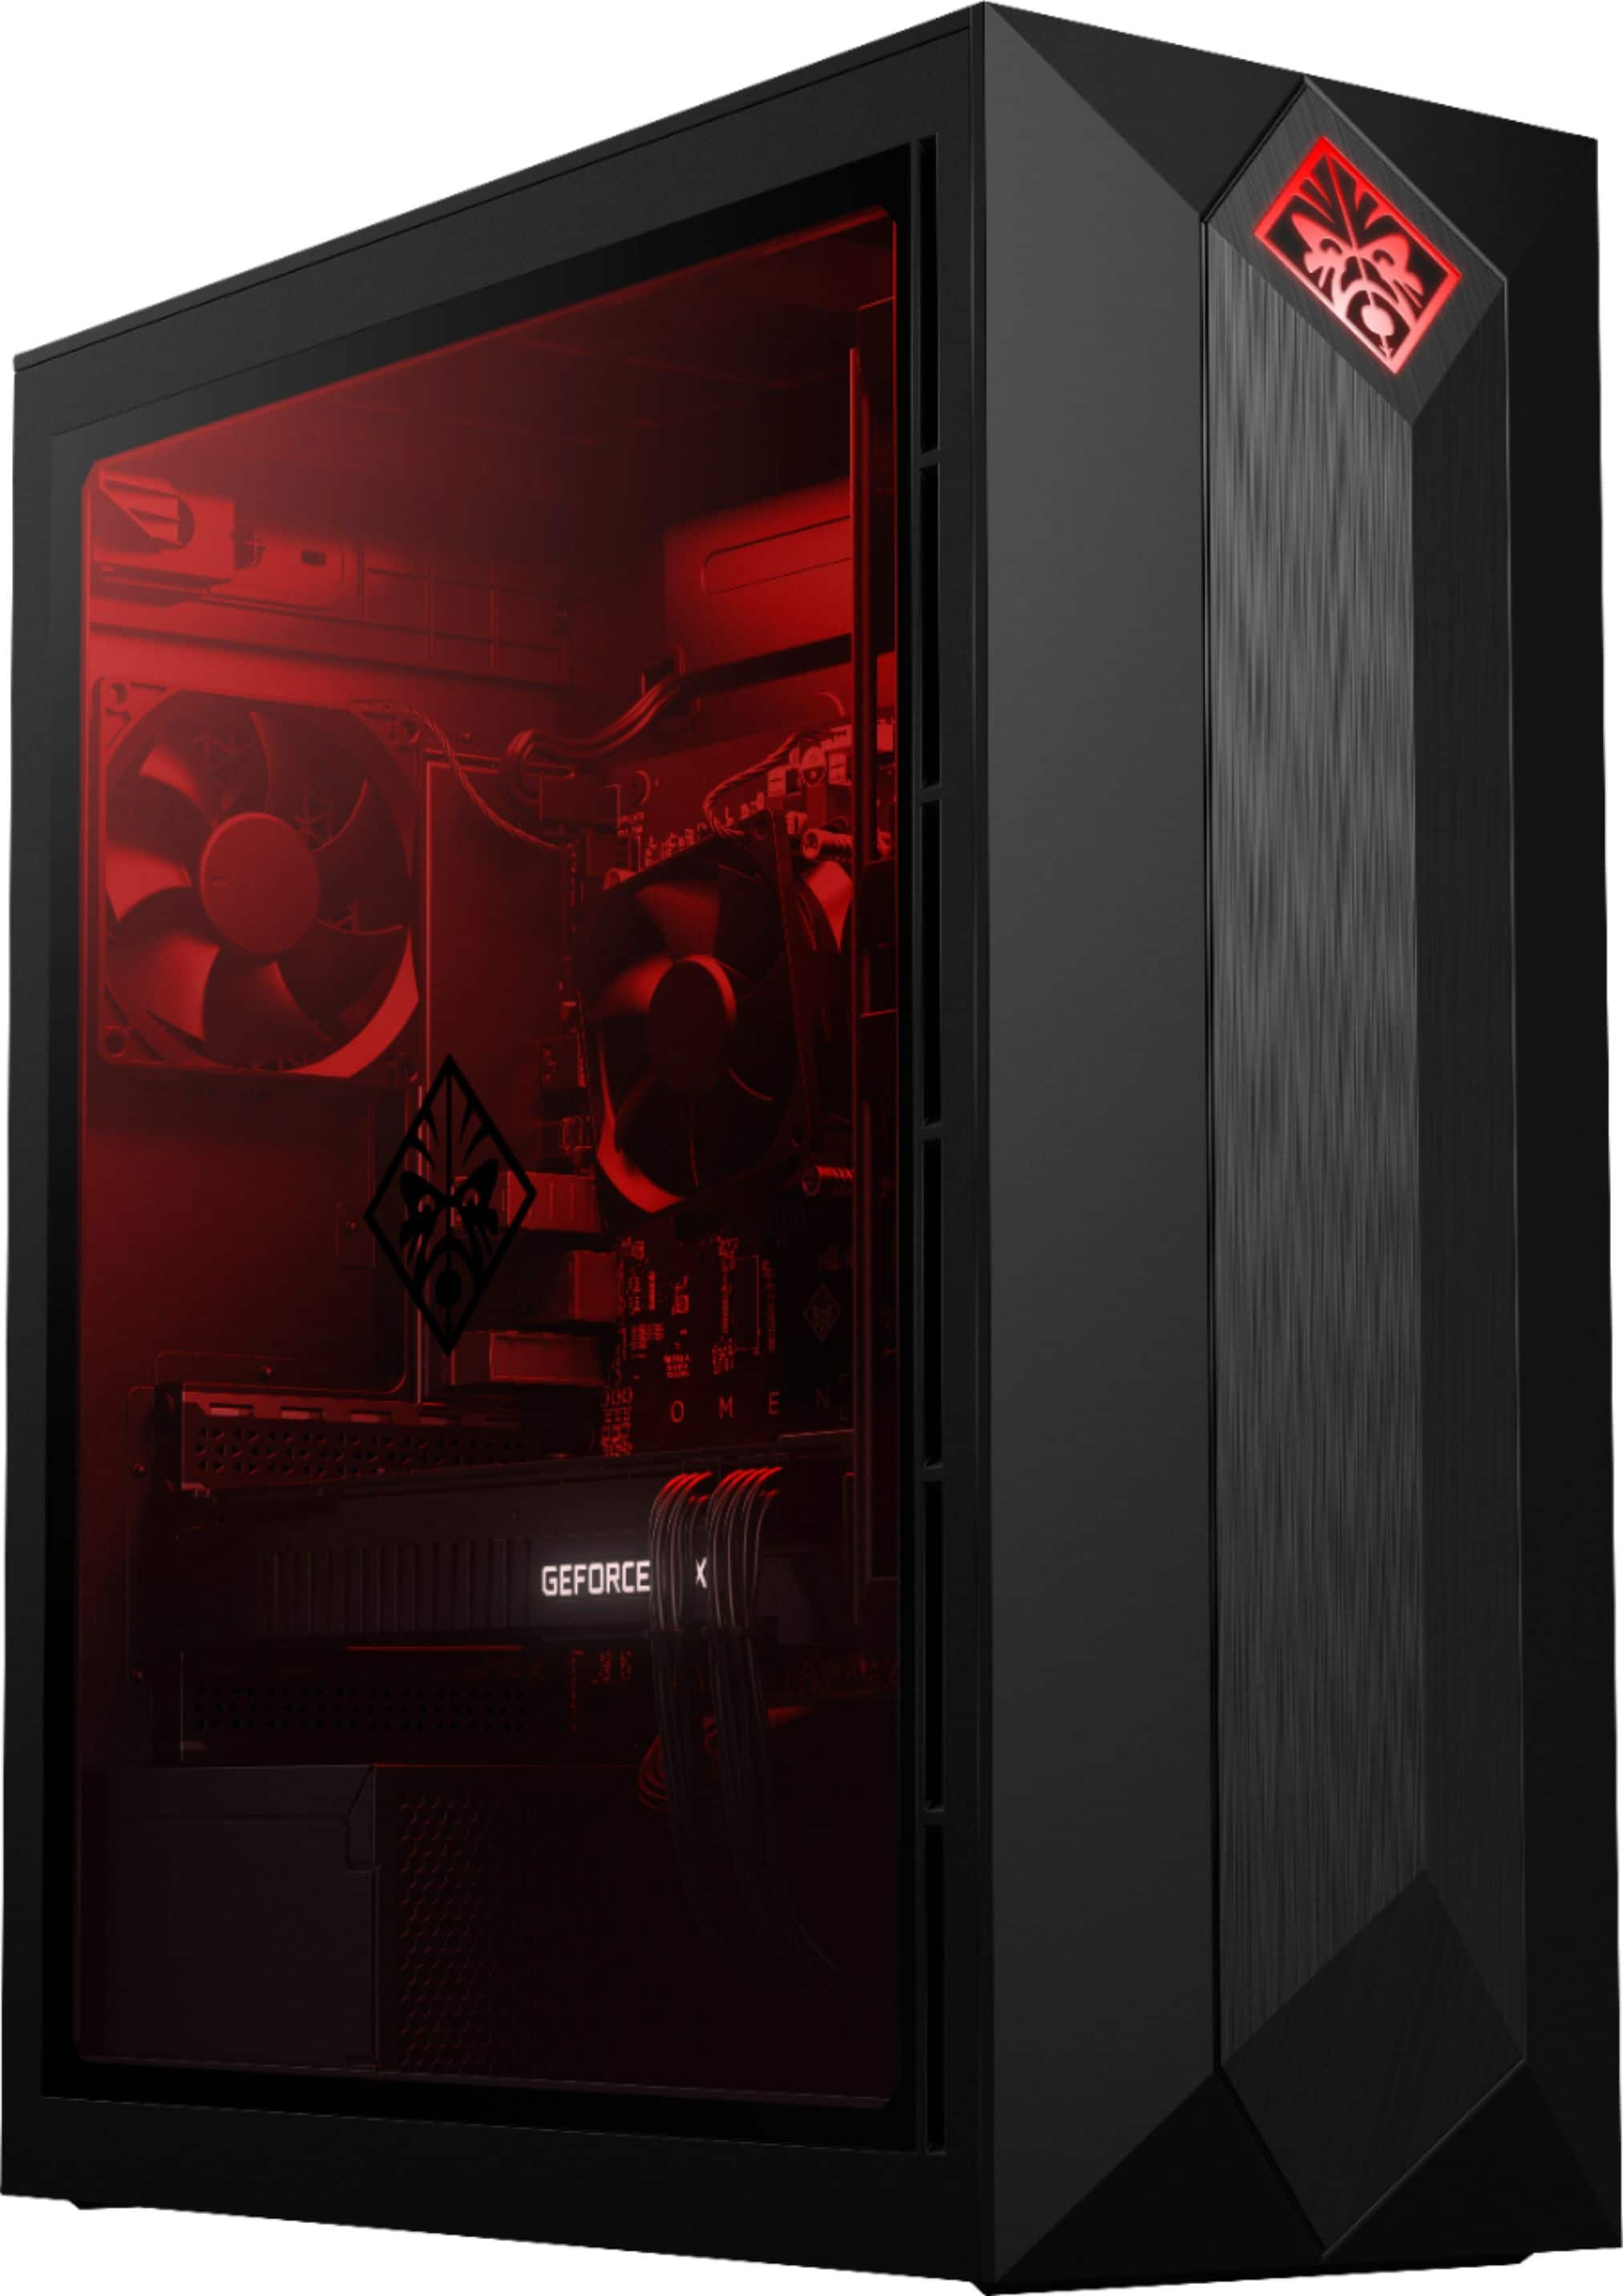
A:AnswerThe GPU has a red light on the bottom of the unit facing the power supply. You have zero control over it. That being said it's not exceptionally bright. I wouldn't even notice it if I didn't know it was there.
A:AnswerThe SSD on this computer is mounted directly to the motherboard. My computer Jedi informed me that it could be easily upgraded/replaced by a larger SSD by simply loosening a couple of screws, and inserting the new SSD "chip".