Here are a few quick fixes for printers on Windows and macOS.
Printer Quick Fixes
1. Power cycle your computer and printer.
- Power off the PC, then turn it back on.
- Power off the printer, then turn it back on.
2. Clear the print queue.
Accessing printer settings through the run menu:
- On the keyboard, hold the Windows key and press R.
- Type "control panel" in the Run dialog box.
- Click Ok or Run (depending on your version of Windows) (Figure 2).
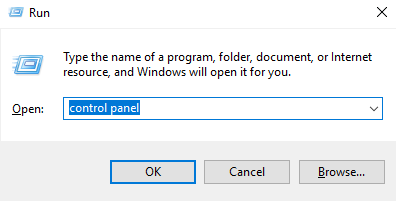
Figure 2
- If the Control Panel app opens in Category mode, click on the View by drop-down in the upper right of the window. Then choose either Large icons or Small icons (Figure 3).
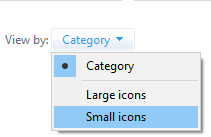
Figure 3
- Double-click on Devices and Printers (Figure 4).

Figure 4
Accessing printer settings through the task bar:
- Look for a printer icon on your screen or click on the small arrow/triangle in your task bar to see hidden icons (Figure 5).

Figure 5
- Right-click on the printer icon and select Open Devices and Printers (Figure 6).

Figure 6
Clearing the print queue:
- Right-click on the printer icon, then click See what’s printing (Figure 7).

Figure 7
- Right-click on each document and choose Cancel to delete each job. Repeat this process for all jobs in the queue (Figure 8).
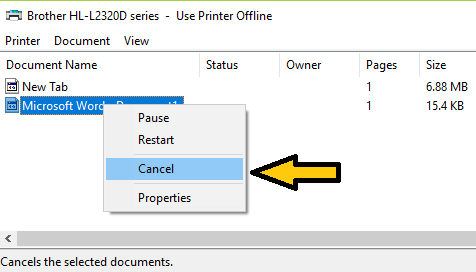
Figure 8
3. Ensure the printer is not offline:
Accessing your printer settings through the run menu:
- On your keyboard, hold the Windows key, and press R.
- Type "control panel" in the run dialog box.
- Click Ok or Run (depending on your version of Windows) (Figure 9).

Figure 9
- If the Control Panel app opens in Category mode, click on the View by drop-down in the upper right of the window. Then choose either Large icons or Small icons (Figure 10).

Figure 10
- Double-click on Devices and Printers (Figure 11).

Figure 11
Accessing the printer settings through the task bar:
- Look for a printer icon on your screen or click on the small arrow/triangle in your task bar to see hidden icons (Figure 12).

Figure 12
- Right-click on the icon and select Open Devices and Printers (Figure 13).
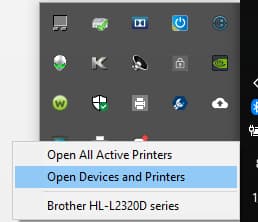
Figure 13
Make sure the printer is online:
Right-click on the printer and click See what’s printing (Figure 14).
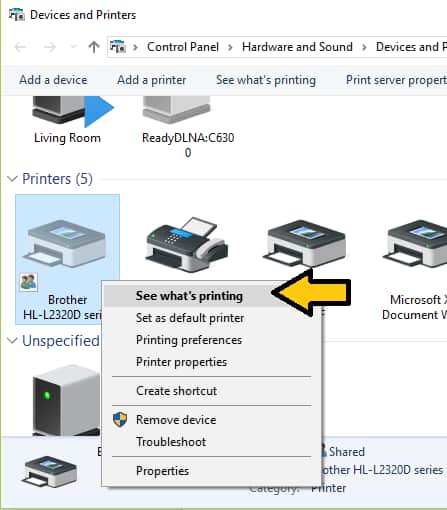
Figure 14
- Choose Printer on the top left of the menu bar (Figure 15).
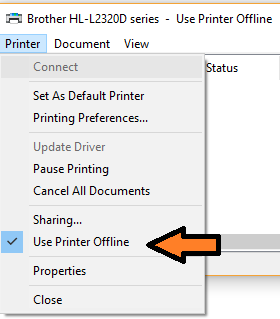
Figure 15
- Make sure that Use Printer Offline is not checked (Figure 16).

Figure 16
4. Ensure the correct printer is set as default.
Accessing your printer settings through the run menu:
- On your keyboard, hold the Windows key and press R
- Type "control panel" in the Run dialog box.
- Click Ok or Run (depending on your version of Windows) (Figure 17).

Figure 17
- If the Control Panel app opens in Category mode, click on the View by drop-down in the upper right of the window. Then choose either Large icons or Small icons (Figure 18).

Figure 18
- Double-click on Devices and Printers (Figure 19).

Figure 19
Accessing your printer setting through the task bar:
- Look for a printer icon on your screen or click on the small arrow/triangle in your task bar to see hidden icons (Figure 20).
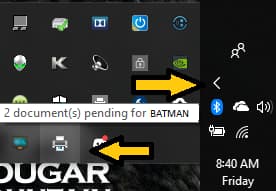
Figure 20
- Right-click on the icon and select Open Devices and Printers (Figure 21).
Figure 21
Setting the default printer in Windows:
- Right-click on your printer.
- From the resulting men, select Set as default printer (Figure 22).
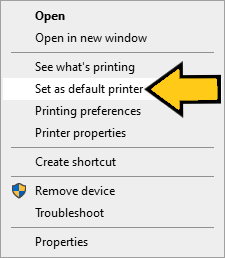
Figure 22
Setting the default printer in Chrome:
- Click on the "⋮" (three vertical dots) in the upper right-hand corne of your screen.
- Select Print.
- Verify that the destination is set to your printer.
- If it is not, click on Change... and select your printer. (Figure 23).
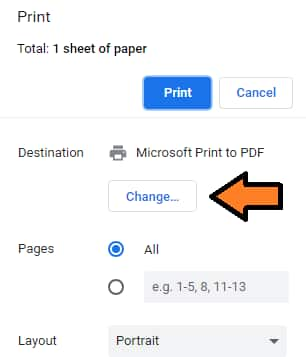
Figure 23
Setting the default printer in Word:
- Click on the File tab at the top left.
- Select Print.
- Under the word Printer, make sure that your printer is selected.
- If it is not, use the drop-down to select the correct printer (Figure 24).
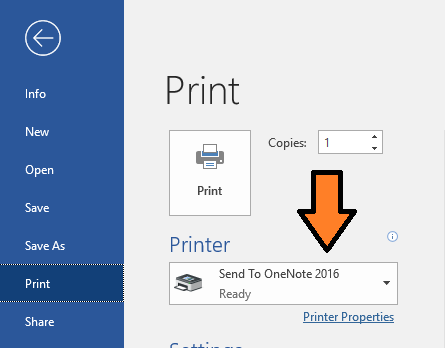
Figure 24
5. If you are unable to resolve the issue, Please call support or schedule an appointment.
1. Power-cycle the computer and printer.
- Power off the mac, then turn it back on. If unable to do so, continue to the next step,Reset the printing system.
- Power off your printer, then turn it back on.
2. Reset the printing system.
NOTE: This step will require the printer to be removed and re-added.- Click the Apple menu (the Apple icon in top left corner of screen).
- Select System Preferences.
- Select Printers & Scanners (Figure 25).
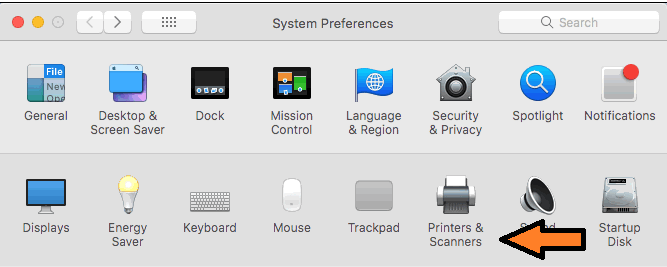
Figure 25
- Right-click (or hold the Control key and click) and select Reset printing system (Figure 26).
NOTE: This will remove the printer.
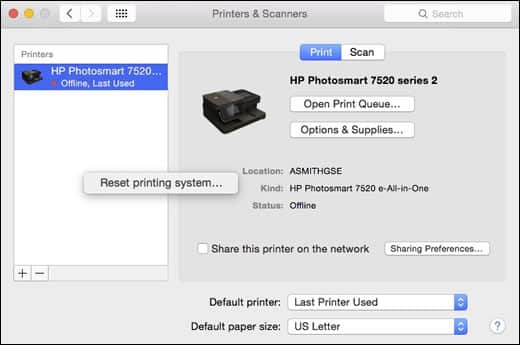
Figure 26
- Click on the + symbol to re-add the printer.
- If unable to add, or printer can't be found, please call support or schedule an appointment.
Keywords: Services Chat, Computing Services, Quick Fix