“spliter what can i get to back-up my iMac and hp tower without physically moving the hard drive back and forth?”
Answer This Question
1-3 of 3 Answers
You will need a network backup solution. One can be achieved relatively cheaply, as you may already have the components in your current setup at home. If not, they can be purchased for under $300 depending on the speed and performance you desire. 1. First you will need a router/switch with usb connection capability. (optionally, you can use an ethernet port on the router if your external hdd has ethernet RJ-45 ports.) 2. You will need an external HDD with USB 2.0 or ethernet connection options. 3. Make sure all of the systems you desire to back up are on the same network (wireless or ethernet cable. Doesn't matter which you use, but there is significant performance difference over WiFi vs ethernet. Ethernet being much faster. Also depends on your computers and the speed of the drives). Connect the drive to the router and use the router software to present a SMB share from the drive. Alternatively, you can skip the requirement for attaching the drive to your router/switch and attach it to your iMac or HP system and simply create a network share using that drive. (See creating network share for Mac or Windows at the Apple or Microsoft websites) 4. On your iMac, you'll want to create a new disk image to house the backups. Time Machine (assuming that's what you'll be using) will leverage this image later on in order to perform the backup service. See the screen shot below for an example of the configuration you will need. On your iMac, go to "other" in the applications window/ launchpad and then "disk utility" and then select the option to create a new image. The screen shot will help beyond that point. 5. Once the disk image is created. You will need to unmount it from the "Finder" window on the lefthand side. Then open the network share location you created earlier and copy the image from your iMac to the network share location. The copy may take some time depending on your network speed and disk size. don't be alarmed if it takes an hour or more for disk images larger than 100GB. Once the image is copied. Double click it while still in the share location. This will mount the image from that location. You can delete the one you created that is on the desktop. Now open a terminal window and enter this command "sudo tmutil setdestination /volumes/MacBookProBackup" **** NOTICE**** the command above is "sudo tmutil set destination /volumes/"the name of your disk image" I only used MacBookProBackup because that's what I used in my example screenshot. ALSO, DO NOT INCLUDE THE QUOTATION MARKS IN THE COMMAND **** END NOTICE **** You will be prompted for a password. This is the password of the user account on the computer with administrative privileges/ root user (if enabled). 6. Now open Time Machine and make sure the image is being used for backup. If not, you can manually add it in the Time Machine menu. It will be one of the disk options. The options for creating a windows backup on the HP will vary depending on the OS you are using, but the steps can be found on Microsoft's website. Hope this helps...
I would recommend:
Sorry, there was a problem. Please try again later.An NAS setup
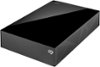
Sorry, there was a problem. Please try again later.I would recremend the Seagate 3terabye external storage for sale at best buy (find it on sale for about $100
Sorry, there was a problem. Please try again later.