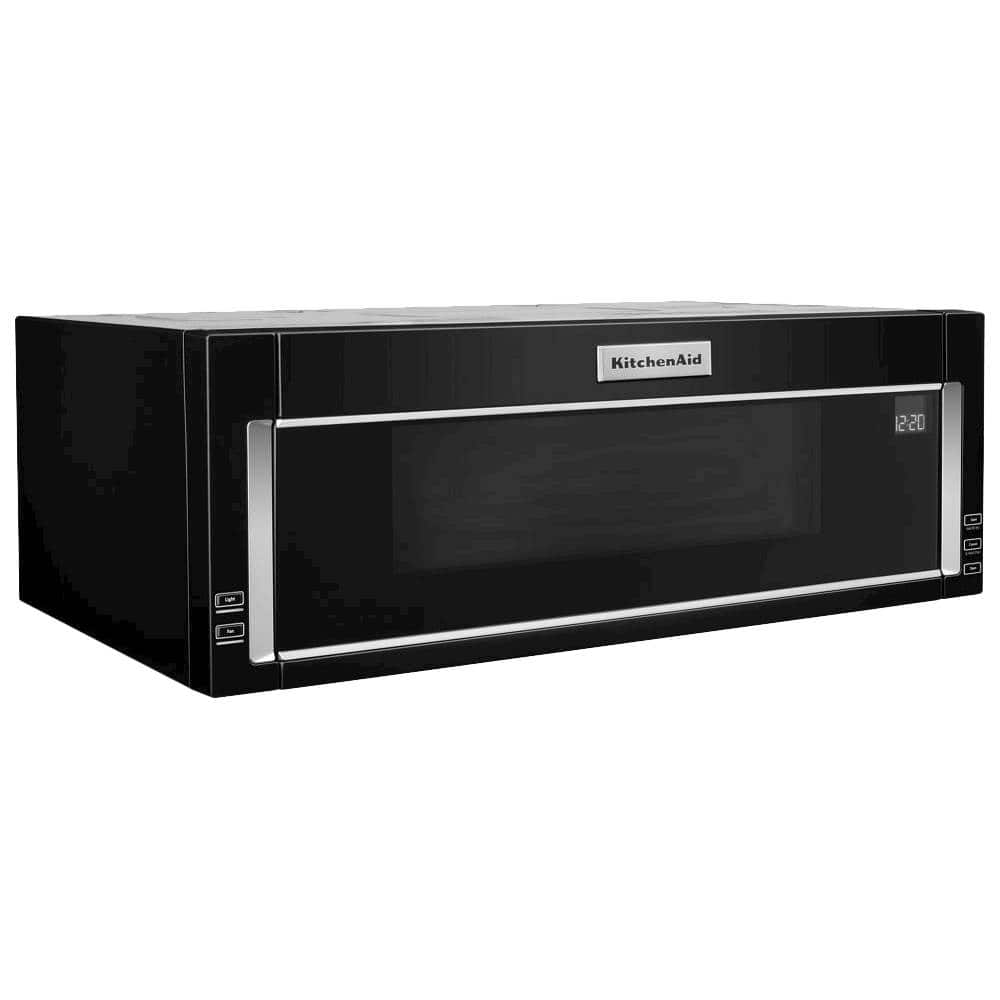
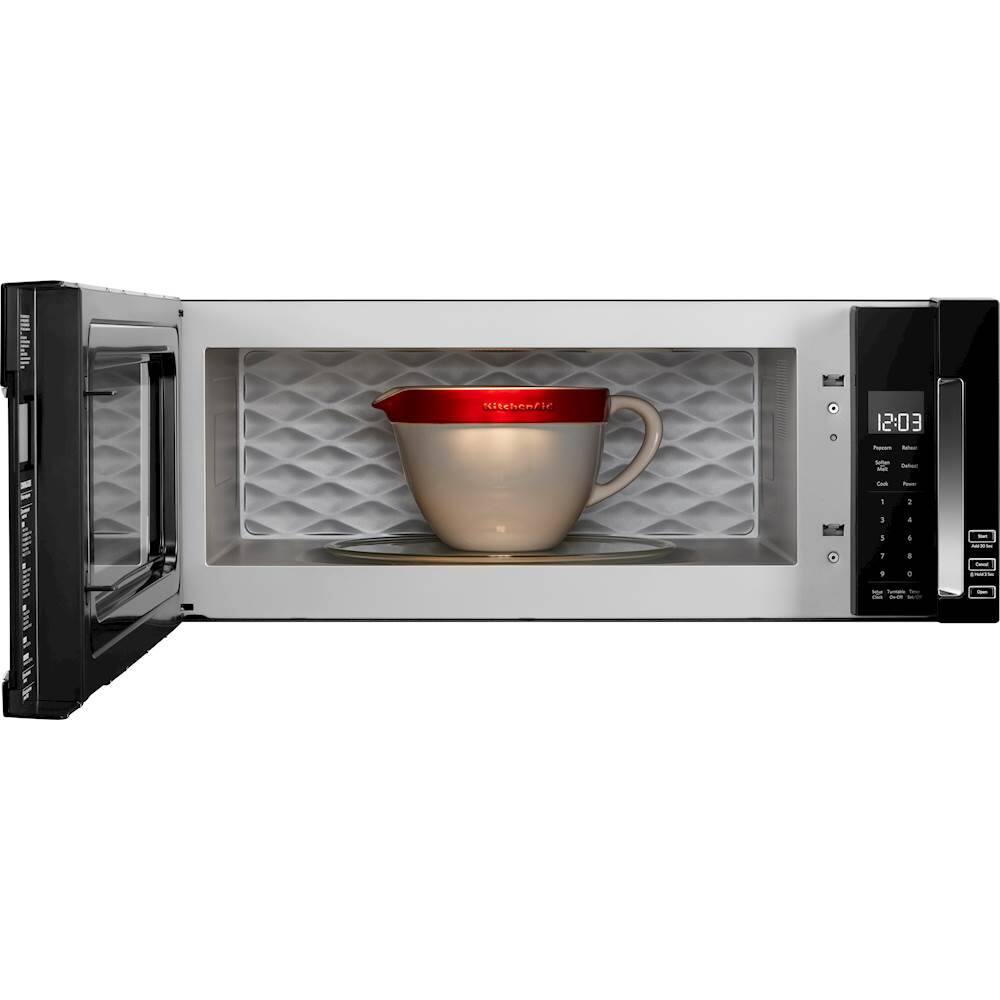
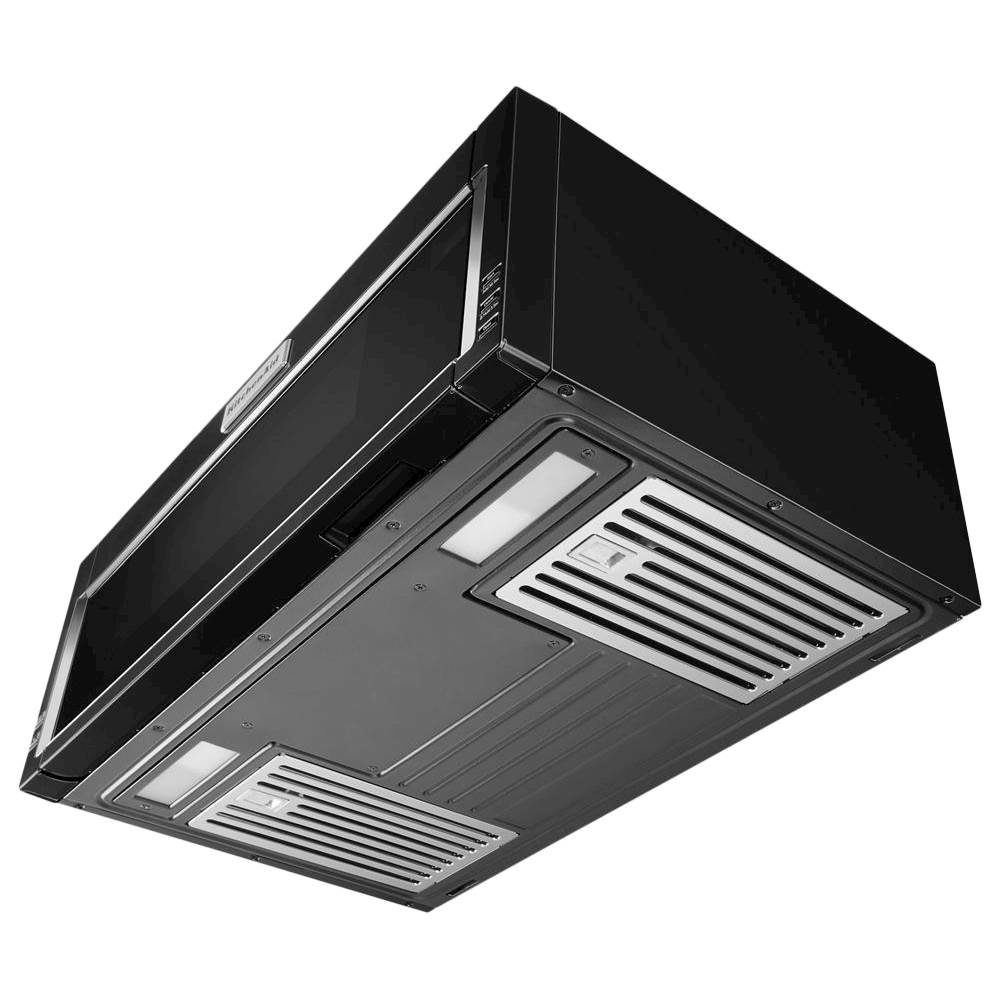
A:AnswerWould love to see decibel readings for this (and other) microwaves. I would by no means describe it as 'whisper quiet' for ventilation as the description claims. Perhaps at the lowest vent speed setting it's quieter than my previous one, but not by a lot. I'll change it over to top venting in the spring and see if that makes any difference.
A:AnswerThe hole is standard size found on many microwaves and is located in the far back center. This is one microwave Worth cutting that hole since the fan is really powerful and the grease traps are of the baffle type as found in true range hoods. The Microwave makes an excellent range hood.
A:AnswerYou could install this Unit at the end of a cabinet run, with the following in place.
There are two corner bolts that anchor and hold the hood up to the cabinet above,
there are no anchors on the side. So Anchor as instructed to the back splash wall
and the two corners to the cabinet above and you could have a side open.
A:AnswerHello LR! Unfortunately, we can only recommend this model be installed per the Installation Instructions. Thank you for your inquiry on our Whirlpool appliances.
A:AnswerI’m not sure as to why you have yellow lighting as my lights are bright white....I would contact Kitchenaid to verify that what you have is not a defect.
A:AnswerHello harv! We would recommend contacting your local Best Buy for information on Installation. Thank you for your inquiry on our KitchenAid appliances.
A:AnswerSkipper, the Microwave has a Mounting plate (Located on the upper polyfoam). Hopefully, this information is beneficial to you. Thank you for your inquiry regarding our KitchenAid appliances!
A:AnswerGreat question George! You can purchase additional installation accessories. We currently have W11185746 15" Bump Out Kit and the 8171339 Microwave Side Panel Kit. We hope this information helps.
A:AnswerI would assume that they would. There is no venting going out. They just install an electrical plug up in the cabinet above. And the mounting are just metal clips on the top and back that it sits on.
A:AnswerYou should read page 4 of the installation manual. Look for the section entitled "Roof Venting Installation." There is no rotating of the blow motor. You will need to remove a damper plate to allow air to move from the top of the microwave. Good luck.
A:AnswerHopefully they've improved the finish but I plan to avoid much cleaning with solvents or liquids: I don't trust the gaps around the buttons to shed water/solvent away from the control PC board underneath.
I'm guessing most of the problem is our own skin: our natural oils plus residue from whatever we're touching as we prepare foods in the kitchen kind of become their own paint thinner, and gradually wear off the finishes of our most-touched painted surfaces. With this in mind I mostly ask the family to use clean hands, and suggest pushing the buttons a bit off-center so as not to grind the paint right off.
A:AnswerIf your kitchen's pre-installed ducting ends at a 3x10" rectangular opening above or behind, the included damper attachment is the only sheet metal you need. In practice, as an installer you'll want to have duct adapter pieces, some short sheet-metal screws, and high-temperature foil tape handy or close by. Ducting and appliances tend to be "close but not exact" when the installer gets down to mating 'em up.